Publicité
Liens rapides
97134
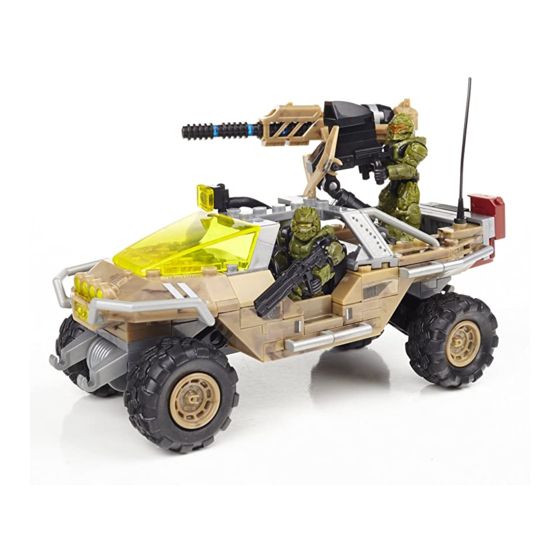
UNSC Night Ops Gausshog • Gausshog de operaciones nocturnas de CENU • Quad Gausshog pour opérations nocturnes de l'UNSC
1
Fahrzeug mit Geschütz Gauss für nächtliche Operationen RVN • RVN Gausshog-nachtvoertuig • Veicolo con cannone Gauss per Operazioni Notturne di UNSC • CENU Night Ops Gausshog
Publicité

Sommaire des Matières pour Mega Bloks HALO 97134
- Page 1 97134 UNSC Night Ops Gausshog • Gausshog de operaciones nocturnas de CENU • Quad Gausshog pour opérations nocturnes de l’UNSC Fahrzeug mit Geschütz Gauss für nächtliche Operationen RVN • RVN Gausshog-nachtvoertuig • Veicolo con cannone Gauss per Operazioni Notturne di UNSC • CENU Night Ops Gausshog...
- Page 2 UNSC Night OpS gaUSShOg The UNSC Gausshog is the light anti-armor variant of the Warthog LRV. Equipped with a 360° rotating Gauss Cannon, real working suspension and specially engineered floodlights, the Spartan Pathfinder and his Spartan gunner open fire on a Knight Lancer armed with a Suppressor. Now in desert camo with light features and in-game sounds! gaUSShOg de OperaCiONeS NOCtUrNaS de CeNU El Gausshog de CENU es la ligera variante de la anti-armadura Warthog LRV.
- Page 4 AM17003F AX9713409F AM18287F AM17010F AM18260AKD AM19380AKD AM17003HJ AM18223ANW MA09033ANW AM18287AKD MA07223AKD MA03772F AM07228ANW AM17019AKD MA09593AKD AM18256AKD AM18223AKD AM07223X AM72534AKD AM18272F MA09838AKD AM07223ZD AM18573YG AM74288AKD AM16978ANW AM18230ANW AM72574ANW MA03328AKD MA03019ANW AM17148AKD AM18220F MA09023BYE MA03328F AM16636ANW MA022501AKD MA03019F MA03328ANW MA09292AKD AS9713415 MA09106F AM19999AKD AM72573F MA07590ANW...
- Page 5 AS9713405 AM72660F AS9713403 L971341 AS9713404 AM72302MM AM72301MM AM19181F AM18222F AM18668F AM02237ANW AM18252AKD AS9713406 AS9713407 AS9713409 AS9713408 MA1172F AS9713402 AM18251F AM74213ANW Please read these instructions carefully before first use and keep them for future reference. Il est recommandé de lire attentivement ce feuillet avant la première utilisation et de le conserver pour référence future. Leer estas instrucciones cuidadosamente antes de la primera utilización y guardarlas para referencia futura.
- Page 6 Place temporary pieces. Colocar las piezas provisionales. Installer les pièces temporaires. Provisorische Teile einsetzen. Instaleer de tijdelijke onderdelen. Piazzare i pezzi temporanei. Colocar peças temporárias.
- Page 16 Remove temporary pieces. Retirar las piezas provisionales. Enlever les pièces temporaires. Provisorische Teile entfernen. Verwijder de tijdelijke onderdelen. Rimuovere i pezzi temporanei. Retirar peças temporárias.
- Page 21 BATTERY INSTALLATION BATTERIEN EINSETZEN INSTALAÇÃO DE PILHAS • Use a phillips (star-bit) screwdriver to unscrew the door of the battery • Einen Kreuzschlitz-Schraubendreher benutzen, um die Abdeckung des • Usar uma chave de parafusos Philips (ponta em forma de estrela) para compartment.
- Page 22 WARNING ! • Do not leave this toy close to a source of heat or in direct sunlight. ΠΡΟΕΙΔΟΠΟΙΗΣΗ ! • Do not operate this toy outdoors. • • Operate this toy in a dry area. • • Avoid sand and water. If moisture gets inside the electronic compartment, remove the batteries •...
- Page 23 WARNING ! TO AVOID BATTERY LEAKAGE: ATENÇÃO ! PARA EVITAR O ESCORRIMENTO DAS BATERIAS: ADVARSEL ! SLIK UNNGÅR DU BATTERILEKKASJE: 1. See the diagram to know how to remove and insert batteries. 1. Consulte o diagrama sobre a inserção das baterias. 1.
- Page 24 © 2013, Mega brands inc. ® and ™ denote trademarks of Mega brands inc. printed in china ad971341...


