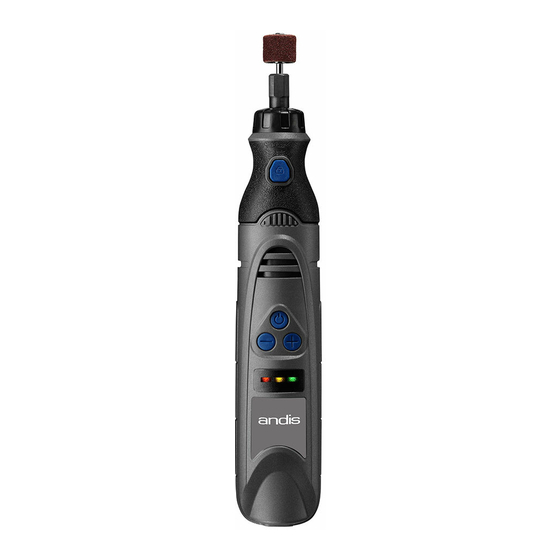
Sommaire des Matières pour Andis DNG-1
- Page 1 Item pictured may differ from actual product El artículo ilustrado puede diferir del producto real Il est possible que l’article sur la photo soit différent du produit réel DNG-1 Use & Care Instructions...
- Page 2 E N G L I S H Please read the following instructions before using your new Andis nail grinder. Give it the care that a fine, precision built instrument deserves and it will give you years of service. IMPORTANT SAFETY INSTRUCTIONS...
- Page 3 4. Never operate nail grinder if it has a damaged cord or plug, if it is not working properly, if it has been dropped or damaged, or dropped into water. Return to an Andis authorized service station for examination or repair.
- Page 4 This unit is equipped with a universal AC/DC power adapter/battery charger (Figure A). CHARGING NAIL GRINDER The battery charger is intended for use with Andis DNG-1 nail grinder. Remove the nail grinder and charger from the carton. Plug the charger into a 120V AC outlet, or according to your local power standards (Figure A).
- Page 5 COLLET COLLET RELEASE BUTTON REMOVE SANDING DRUM POWER BUTTON SPEED ADJUSTMENT BUTTONS CHARGING STATUS INDICATOR LIGHTS PLUG ADAPTER CORD IN HERE INSERT SANDING DRUM 1/4" SANDING BAND 1/4" FINISHING SANDING STONE DRUM 1/2" SANDING BAND 1/2" SANDING WRENCH DRUM NAIL GRINDER INDICATOR LIGHT STATUS REPLACE SANDING BAND Nail Grinder in Use Indicator Light Status...
- Page 6 GRINDING NAILS Your Andis nail grinder comes with variable speed operation. Use the lower settings for most nail grinding needs. Use the higher settings for large dogs. 1. Turn on nail grinder; it will start at middle speed. To change speeds, click the (–) or (+) speed buttons.
- Page 7 • Check cords and nail grinder for damage periodically. Caution: Never handle your Andis nail grinder while you are operating a water faucet, and never hold your nail grinder under a water faucet or in water. There is danger of electrical shock and damage to the appliance.
- Page 8 E S P A Ñ O L Lea las siguientes instrucciones antes de usar su nueva limadora de uñas de Andis. Trate este aparato de precisión con el cuidado que se merece, y le brindará un excelente funcionamiento durante años.
- Page 9 Devuelva el aparato a un centro de servicio autorizado de Andis para su revisión o reparación. 5. Mantenga el cable lejos de superficies calientes o filosas.
- Page 10 CA/CC (Figura A). CARGA DE LA LIMADORA DE UÑAS El cargador de batería está diseñado para usarse con la limadora de uñas DNG-1 de Andis. Saque la limadora de uñas y el cargador de la caja. Enchufe el cargador en un tomacorriente de 120V CA, o el que corresponda según las normas eléctricas de su localidad (Figura A).
- Page 11 TUERCA DEL COLLARÍN BOTÓN DE LIBERACIÓN DEL COLLARÍN DESMONTE EL TAMBOR DE LIMADO BOTÓN DE ENCENDIDO/ BOTONES DE APAGADO AJUSTE DE LA VELOCIDAD INDICADORES LUMINOSOS DE ESTADO DE CARGA ENCHUFE AQUÍ EL CABLE DEL ADAPTADOR INSERTE EL TAMBOR DE LIMADO BANDA DE LIMADO DE ¼”...
- Page 12 2. Compruebe que el enchufe del cable del adaptador esté firmemente enchufado en la parte inferior de la limadora de uñas. Si aun así no logra cargarla, devuelva la limadora de uñas a Andis o a un centro de servicio autorizado de Andis para su verificación y reparación o reemplazo.
- Page 13 Existe el peligro de una descarga eléctrica y de causar daños al aparato. Andis Company no será responsable en el caso de lesión debido a este descuido.
- Page 14 F R A N Ç A I S Lire le mode d’emploi en entier avant d’utiliser la ponceuse à ongles Andis. Si cet appareil est traité comme un instrument de précision, il devrait donner des années de bons services. CONSIGNES DE SÉCURITÉ IMPORTANTES Pendant l’utilisation d’un appareil électrique, il faut toujours...
- Page 15 La retourner à un centre de réparation agréé par Andis pour examen et réparation. 5. Garder le cordon à l’écart de surfaces chaudes ou coupantes.
- Page 16 (Figure A). RECHARGE DE LA PONCEUSE À ONGLES L’utilisation du chargeur de batterie est destiné à la ponceuse à ongles Andis DNG-1. Enlever la ponceuse à ongles et le chargeur de la boîte. Brancher le chargeur sur une prise 120 V~ (ou une autre prise, en fonction des normes locales) (Figure A). Confirmer la tension disponible à...
- Page 17 ÉCROU DU COLLIER BOUTON DE LIBÉRATION DU COLLIER RETIRER LE TAMBOUR DE PONÇAGE BOUTON MARCHE/ARRÊT BOUTONS DE RÉGLAGE DE VITESSE VOYANTS D’ÉTAT DE RECHARGE BRANCHER LE CORDON ADAPTATEUR ICI INSÉRER LE TAMBOUR DE PONÇAGE BANDE DE PONÇAGE 6 MM TAMBOUR DE PIERRE DE PONÇAGE FINITION...
- Page 18 2. S’assurer que la fiche du cordon adaptateur est bien branchée sous la ponceuse à ongles. Si elle ne se recharge toujours pas, l’envoyer à Andis ou à un centre de service agréé par Andis pour examen et réparation ou remplacement.
- Page 19 PONÇAGE DES ONGLES La ponceuse à ongles Andis est à vitesse variable. Utiliser une vitesse basse pour la plupart des besoins de ponçage des ongles. Utiliser une vitesse supérieure pour les gros chiens.
- Page 20 This Andis product is warranted against defective material or workmanship for one year from the date of purchase. All implied warranties arising and by virtue of State law shall also be limited to one year. Any Andis product determined to be defective in material or workmanship during the warranty period will be repaired or replaced without cost to the consumer for parts and labor.
