Table des Matières
Publicité
Liens rapides
Publicité
Table des Matières

Manuels Connexes pour ACLAS PP7MX

Sommaire des Matières pour ACLAS PP7MX
- Page 1 PP7MX PRINTER USER’S MANUAL IMPRIMANTE PP7MX MANUEL D'UTILISATION...
- Page 3 Safety Precautions Pré cautions de sé curité Before using the present appliance, please keep the Avant d'utiliser le pré sent appareil, veuillez respecter following safety regulations in order to prevent any les consignes de sé curité suivantes afin d'é viter tout hazard or material damage.
-
Page 4: Table Des Matières
For driver, user manual, software and other information, please visit the website: https://www.aclas.tw/products/pp7x/ to download or consult. Pour le pilote, le manuel d'utilisation, le logiciel et d'autres informations, veuillez visiter le site Web: https://www.aclas.tw/products/pp7x/ pour té lé charger ou consulter. -
Page 5: Introduction/Introduction
Introduction/Introduction Specifications/Spé cifications Optional type PP7M31HX Type facultatif Speed 250mm/s La vitesse Power Supply Source de courant Print Method thermal print Mé thode d'impression impression thermique Resolution 203dpi Ré solution Paper type Thermal paper Type de papier Papier thermique Paper width Paper 79.5±... -
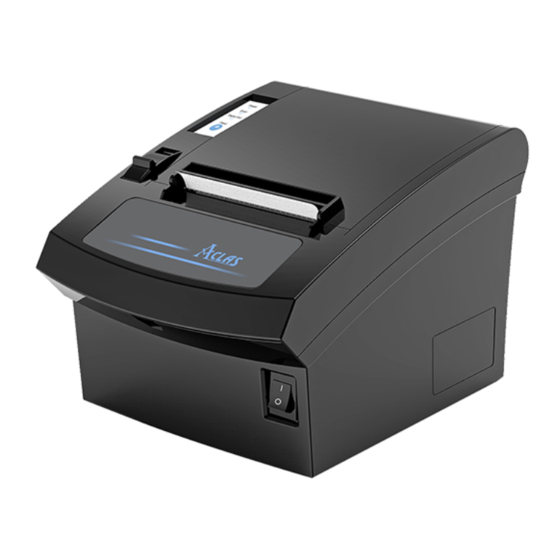
Page 6: Appearance/Apparence
OJI, PD-160R or Aclas paper.) Duré e de vie de la tê te d'impression 150 km (il est recommandé d'utiliser du papier thermique de haute qualité , tel que le papier OJI, PD-160R ou Aclas.) Paper-cutter life 1,000,000 times... -
Page 7: Accessories/Accessoires
Aclas paper. papier thermique de haute qualité , tel que le papier OJI, PD-160R ou Aclas. (1) Assurez-vous que l'imprimante ne reç oit (1) Make sure that the printer is not receiving data;... - Page 8 (3) Insé rez le rouleau de papier dans (3) Insert the paper roll to the printer as picture 2. l'imprimante comme sur l'image 2. Picture 2 Image 2 (4) (4) Be sure to note the correct direction thats Assurez-vous de noter la bonne direction the paper comes off the roll shown as picture dans laquelle le papier sort du rouleau comme illustré...
-
Page 9: Setting The Printer/Configuration De L'imprimante
(6) (6) After closing the upper cover,tear off the Aprè s avoir fermé le capot supé rieur, paper as picture 5. dé chirez le papier comme sur l'image 5. Picture 5 Image 5 Setting the Printer/Configuration de l'imprimante 3.1 Using the Printer/Utilisation de l'imprimante Power indicator light Voyant d'alimentation... -
Page 10: Connecting The Power Supply/Branchement De L'alimentation
3.3 Connecting the Power Supply/Branchement de l'alimentation ※ CAUTIONS ※ MISES EN GARDE When connect the power supply to the Lorsque vous connectez l'alimentation à printer, please refer to picture 7. When l'imprimante, veuillez vous ré fé rer à l'image disconnecting, the order is reverse. -
Page 11: Self Test/Auto-Test
SELF TEST/AUTO-TEST Press key ‘Feed’ and hold it, and then power on Appuyez sur la touche « Alimentation » et the machine at the same time, it will print a maintenez-la enfoncé e, puis allumez la machine piece of Test Page. The information of this Test en mê... -
Page 12: Troubleshooting/Dépannage
Attention: Attention: Ne touchez pas la tê te d'impression Do not touch the thermal printer head. The paper cutter will become blunt after thermique. Le coupe-papier deviendra é moussé aprè s a period of time. Please ask the maintenance man to replace the paper un certain temps. - Page 13 4) The printed character is unclear. (4) Le caractè re imprimé n'est pas clair. a. Make sure the printer head is clean enough. Assurez-vous que la tê te d'impression est b. Make sure the used paper meets the required suffisamment propre. specification.
-
Page 14: Printer Driver Installation/Installation Du Pilote D'imprimante
Installation/Installation du pilote d'imprimante Connect the printer to PC, and double click “Setup.exe” Connectez l'imprimante au PC et double-cliquez sur in the file “Aclas Printer” to install the printer driver. "Setup.exe" dans le fichier "Aclas Printer" pour installer le pilote d'imprimante. - Page 15 Choose “Hardware” Choisissez « Maté riel » Click “OK”. Cliquez sur OK". Click “Install” Cliquez sur "Installer"...
- Page 16 Type 2: If the printer connects with Ethernet Type 2 : Si l'imprimante se connecte avec un port, use the method. port Ethernet, utilisez la mé thode. Choose “TCP” Choisissez « TCP » Click “OK” Cliquez sur OK" Input the IP which is in the same network segment of the printer. Saisissez l'IP qui se trouve dans le mê...
- Page 17 Type 3: If the printer connects with USB port, Type 3 : Si l'imprimante se connecte avec un use the method. port USB, utilisez la mé thode. Choose “USB” Choisissez "USB" Click “OK” Cliquez sur OK" Click “Install” Cliquez sur "Installer" Note: Noter: After installing the printer driver, you can use the...
- Page 18 7.2. How to Know the Connect Port/Comment connaî tre le port de connexion Connect the printer to the computer, follow steps below Connectez l'imprimante à l'ordinateur, suivez les é tapes to know which port is connected. ci-dessous pour savoir quel port est connecté . Right click “This PC”...
- Page 19 Serial printer connect port: Port de connexion d'imprimante sé rie: Here you can see the connecting port of serial printer. Ici vous pouvez voir le port de connexion de l'imprimante sé rie. USB printer connect port: Port de connexion d'imprimante USB: Here you can see the connecting port of USB printer.
- Page 20 « Proprié té s de l'imprimante » . Click “Devices and Printers” in start menu. Cliquez sur "Pé riphé riques et imprimantes" dans le menu Dé marrer. Right click “Aclas Printer”, choose “Printer properties”. Faites un clic droit sur "Aclas Printer", choisissez "Proprié té s de l'imprimante".
- Page 21 If your PC is installed with WIN10 system, please Si votre PC est installé avec le systè me WIN10, follow the below steps to enter “Printer properties” veuillez suivre les é tapes ci-dessous pour entrer interface. dans l'interface « Proprié té s de l'imprimante » . Right click “This PC”...
- Page 22 Click “View devices and printers”. Cliquez sur « Afficher les pé riphé riques et les imprimantes » . Right click “Aclas Printer”, choose “Printer properties”. Faites un clic droit sur "Aclas Printer", choisissez "Proprié té s de l'imprimante".
- Page 23 Step 2: Choose connecting port Étape 2 : Choisissez le port de connexion Choose the connecting port that you have known Choisissez le port de connexion que vous avez connu from Chapter 7.2. For example, the connecting port au chapitre 7.2. Par exemple, le port de connexion de of the printer known from Chapter 7.2 is COM2, so l'imprimante connu du chapitre 7.2 est COM2, vous devez donc choisir COM2 dans l'interface suivante.
- Page 24 Choose “Hardware”. Choisissez « Maté riel » . Click “OK”. Cliquez sur OK". Step 4: Finish port configuration Étape 4: Terminer la configuration du port Choose the item “General”. Choisissez l'é lé ment « Gé né ral » . Click it to print test page, and then click “Close”. Cliquez dessus pour imprimer la page de test, puis cliquez sur «...
- Page 25 Sample of Test Page/ Exemple de page de test Note: there is the information about computer name, Remarque: il y a les informations sur le nom de printer name and port name etc. on the print test page. l'ordinateur, le nom de l'imprimante et le nom du port, The printer can be used.
-
Page 26: Contact Us/Contactez-Nous
Vous pouvez nous contacter comme suit : Website: www.aclas.tw Website: www.aclas.tw Email: osa@aclas.com Email: osa@aclas.com Facebook: @Pinnacle Aclas Facebook: @Pinnacle Aclas Twitter: @ArmPos Twitter: @ArmPos We will response within one business day. Nous vous ré pondrons dans un dé lai d'un jour Thank you so much for your time and ouvrable. - Page 28 DPP7M01FRV0-A-01...