Table des Matières
Publicité
Les langues disponibles
Les langues disponibles
Liens rapides
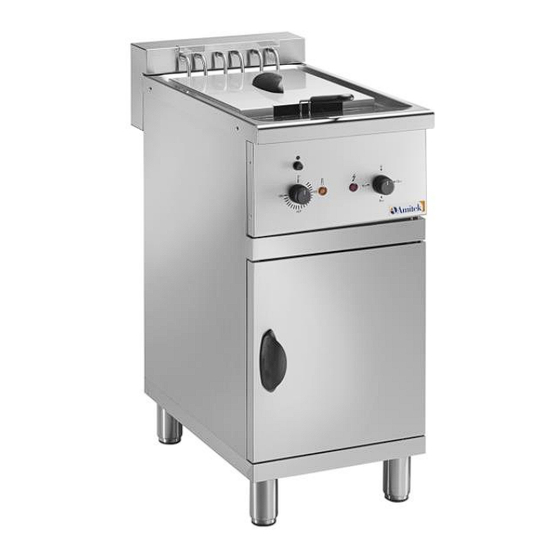
FC12 – FC120
FC18
FC12M – FC120M
FC16M – FC25M – FC250M
Manuale d'installazione uso e manutenzione friggitrice elettrica
Installation, operating and service instructions for electric fryer
Manuel d'installation, utilisation et entretien des friteuse électrique
Handbuch zur Installation, Bedienung und Wartung der elektrische Fritteuse
AMITEK SRL - Via A. Gagliani, 7 – 47814 Bellaria Igea Marina (RN) Italy
MADE IN ITALY
Publicité
Table des Matières

Sommaire des Matières pour Amitek FC12
- Page 1 Installation, operating and service instructions for electric fryer Manuel d’installation, utilisation et entretien des friteuse électrique Handbuch zur Installation, Bedienung und Wartung der elektrische Fritteuse AMITEK SRL - Via A. Gagliani, 7 – 47814 Bellaria Igea Marina (RN) Italy MADE IN ITALY...
-
Page 2: Avvertenze Generali
AVVERTENZE GENERALI Leggere attentamente le avvertenze contenute nel presente libretto. Conservate questo libretto per ogni ulteriore consultazione dei vari operatori. Prima di collegare l’apparecchiatura accertarsi che i dati riportati sulla targhetta tecnica (fig.1) siano corrispondenti a quelli della rete di distribuzione elettrica. Prima di effettuare qualsiasi operazione isolare l’apparecchiatura dalla rete di distribuzione elettrica. -
Page 3: Irregolarita' Di Funzionamento
SPEGNIMENTO 1. Portare il termostato (E fig.3) sulla posizione “0”. 2. Portare l’interruttore (D fig.3) nella posizione “0” e controllare che le due spie siano spente. 3. ATTENZIONE: se il cavo di alimentazione rimane connesso alla rete di alimentazione elettrica, l’apparecchio è... -
Page 4: Turning Off
GENERAL INSTRUCTION Read carefully the instructions given in this booklet. Keep this booklet so that the operators can refer to it as necessary. Before connecting the appliance make sure that the data shown on the technical plate (fig. 1), corresponds with that of the mains power supply. Before carrying out any operation, isolate the appliance from the mains power supply. -
Page 5: Maintenance And Cleaning
2. Put the switch (D fig.3) into position “0” and check that the two lights are out. 3. NOTE: if the power supply cable remains connected to the mains, the appliance is still live. MAINTENANCE AND CLEANING 1. After frying remove the bits floating in the oil. 2. - Page 6 PRECAUTION D’EMPLOI Lire attentivement les instructions contenues dans ce manuel. Avant de brancher l'appareil, contrôler que les données reportées sur la plaquette technique (fig.1) correspondent à celles du réseau de distribution électrique. Avant de commencer n'importe quelle opération, débrancher l'appareil du réseau électrique.L'installation doit être effectuée par du personnel spécialisé...
-
Page 7: Extinction
EXTINCTION 1. Placer le thermostat (A fig.2) en position “0”. 2. Placer l’interupteur (D fig.3) en position “0” et controler que tous les témoins soient éteints. 3. ATTENTION: si le câble d’alimentation électrique reste connecté au reseau d’alimentation electrique, l’appareil reste sous tension. ENTRETIEN ET NETTOYAGE 1. - Page 8 GEBRAUCHS- UND BEDIENUNGSANLEITUNG Wir bitten Sie, diese Bedienungsanleitung sorgfältig zu lesen und gut auf zubewahren, damit Sie bei evtl. Rückfragen jederzeit darin nachschlagen können. Bevor Sie das Gerät anschließen, vergewissern Sie sich, dass die auf dem Typenschild aufgeführten technischen Angaben mit Spannung und Frequenz Ihres Stromnetzes übereinstimmen (Abb.1).
-
Page 9: Betriebsstörungen
AUSSCHALTEN 1. Den Thermostat (E Abb.3) auf “0” stellen. 2. Den Schalter (D Abb.3) auf “0” stellen und kontrollieren, dass beide Kontrollleuchten ausgeschaltet sind. 3. ACHTUNG: Wenn das Netzkabel angeschlossen wird dem stromversorgungsnetz, ist das Gerät weiterhin stromversorgt. INSTANDHALTUNG 1. Nach dem backen sind auf dem Öl schwimmende Rückstände zu entfernen. 2. - Page 10 ALLEGATI – ANNEXES – PIECES JOINTES – ANLAGEN FIGURE – PICTURE – ILLUSTRATION – BILDER Fig.1 – Abb.1 Fig.2 – Abb.2 Fig.3 – Abb.3 Fig.4 – Abb.4...
- Page 11 DATI TECNICI – THECNICAL DATA – INFORMATIONS TECHNIQUES – TECNISCHE DATEN CAPACITA’ DIMENSIONI PESO MODELLO POTENZA ALIMENTAZIONE DIMENSIONI OLIO CESTO NETTO DIMENSIONS MODEL POWER POWER SUPPLY DIMENSIONS CAPACITY BASKET WEIGHT FC12 9000 400x700x320h 18,40 FC120 9000+9000 12+12 800x700x320h 36,00 230x280x120h FC12M 9000 400x700x850h 27,50 FC120M 9000+9000 12+12 800x700x850h 54,20...
- Page 12 FC12 – FC120 – FC12M – FC120M – FC18...
- Page 13 FC25M – FC250M...
- Page 14 ESPLOSI - EXPLODED DRAWINGS – ÉCLATÉE – EXPLOSIONZEICHNUNGEN FC12 – FC120...
- Page 15 FC12M – FC120M...
- Page 16 DICHIARAZIONE DI CONFORMITA' "CE" - DECLARATION OF CONFORMITY "CE" DÉCLARATION DE CONFORMITÉ "CE" - KONFORMITÄTSERKLÄRUNG "CE" Il sottoscritto, legale rappresentante della società, dichiaro che l'apparecchiatura sotto specificata: The undersigned, legal representative of the company, declares that the below machine: Le soussigné, représentant legal de la société, declare que la machine ci-dessous est: Der Unterzeichnete, gesetzliche Vertreter der Firma erklärt, dass das unten angegebene Gerät: Codice / Code / Numerò...