Publicité
731010121
Owner's Manual
& Assembly Guide
Montagehandbuch
Manual de ensamblaje
Guide d'assemblage
CAUTION
Sharp Edges
Vorsicht Scharfe Kanten
Precaución: extremos
y esquinas losas
ATTENTION Arêtes vives
Register • Enregistrer • Regístrate
/
ShelterLogic.com
product-registration
Kit contains extra parts * Bausatz enthält zusätzliche Teile * El juego contiene piezas de sobra * Le nécessaire comprend des pièces supplémentaires
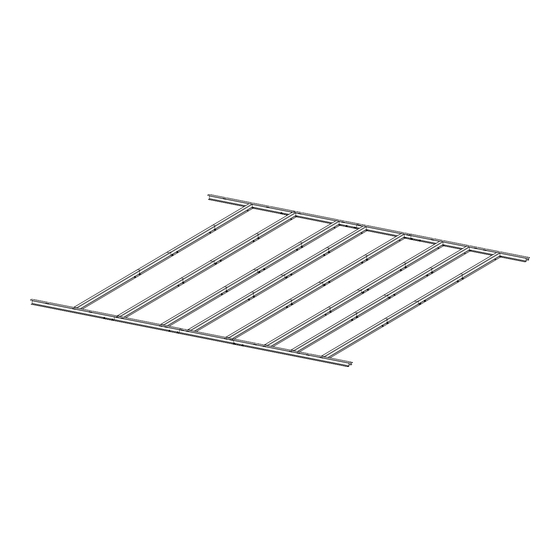
Floor Frame Kit
Floor Frame Kit
Bodenrahmen-Bausatz * Kit de cadre pour plancher
* Estructura para piso de almacén
FKE03
01JO
Publicité
Table des Matières

Sommaire des Matières pour Arrow FKE03
- Page 1 Floor Frame Kit Floor Frame Kit CAUTION Bodenrahmen-Bausatz * Kit de cadre pour plancher * Estructura para piso de almacén Sharp Edges Vorsicht Scharfe Kanten FKE03 Precaución: extremos y esquinas losas ATTENTION Arêtes vives Register • Enregistrer • Regístrate ShelterLogic.com product-registration...
-
Page 2: Parts List
Detailed Assembly Instructions by Shed Type 02JO Detaillierte Montageanleitung nach Schuppentyp / Instrucciones de montaje detalladas por tipo de cobertizo / Instructions de montage détaillées par type d’abri 10X8 Building * Gebäude * Edifi cio * Bâtiment..........................5 10X10 Building * Gebäude * Edifi cio * Bâtiment..........................9 PARTS LIST LISTE DES PIÈCES ARTÍCULOS DE FERRETERÍA TEILELISTE... - Page 3 EN,FR,SP,GE-02IX Assemble your building before starting this kit. *Montieren dem Bauen vor dem Zusammenbau dieses Bausatzes. * Monte el depósito antes de comenzar a utilizar este kit. *Assembler edifi c avant de monter ce kit. Before You Begin / Site Preparation Before You Begin / Site Preparation 1.
-
Page 4: Avant De Commencer/Préparation Du Terrain
EN,FR,SP,GE-03IX Antes de empezar/Preparación del sitio Antes de empezar/Preparación del sitio 1. Antes de empezar la construcción, verifi que los códigos de construcción locales relativos a cimentación, local ización y otros requisitos. Escudriñe y entienda este manual del propietario. 2. Siga todas las instrucciones y dimensiones con cuidado. 3. - Page 5 10X8 Gebäude 05JO 10X8 Edifi cio 10X8 BUILDING 10X8 Bâtiment 65923 65103 11642 11643 11644 65103 11642 65103 11644 65103 65923 11644 65923 11643 65923 Finished Length Longueur fi nie Longitud terminada Länge nach Montage 118 1/4” 300,4 cm 11643 11644 11644 11642...
- Page 6 10X8 Gebäude 06JO 10X8 Edifi cio 10X8 BUILDING 10X8 Bâtiment 65923 65103 11645 11646 65103 11646 65103 11646 65923 11645 65923 Finished Length Longueur fi nie Longitud terminada Länge nach Montage 89 3/8” 227,0 cm 11645 11646 11646...
-
Page 7: Important
10X8 Gebäude 07JO 10X8 Edifi cio 10X8 BUILDING 10X8 Bâtiment Insert bent tabs into slot in frame. Gebogene Laschen in die Schlitze des Rah- IMPORTANT : mens einfügen. Make sure overlaps are positioned on same side of building frame. Inserte las lengüetas WICHTIG: Stellen Sie sicher, daß... - Page 8 10X8 Gebäude 08JO 10X8 Edifi cio 10X8 BUILDING 10X8 Bâtiment 65004 11648 11649 Front Vorne NOTE: Remove existing ramp (11363) HINWEIS: Vorhandene Rampe entfernen (11363) NOTA: retire la rampa existente (11363) REMARQUE : Supprimer la rampe existante (11363) 65004 11648 11649 Front Vorne...
- Page 9 10X10 Gebäude 09JO 10X10 Edifi cio 10X10 BUILDING 10X10 Bâtiment 65923 65103 11642 11643 11644 65103 11642 65103 11644 65103 65923 11644 65923 11643 65923 Finished Length Longueur fi nie Longitud terminada Länge nach Montage 118 1/4” 300,4 cm 11643 11644 11644 11642...
- Page 10 10X10 Gebäude 10JO 10X10 Edifi cio 10X10 BUILDING 10X10 Bâtiment 65923 65103 11645 11646 65103 11646 65103 11646 65923 65103 11646 65923 11645 65923 Finished Length Longueur fi nie Longitud terminada Länge nach Montage 113 3/8” 288,0 cm 11645 11646 11646 11646...
- Page 11 10X10 Gebäude 11JO 10X10 Edifi cio 10X10 BUILDING 10X10 Bâtiment Insert bent tabs into slot in frame. Gebogene Laschen in IMPORTANT : die Schlitze des Rah- Make sure overlaps are positioned on same side of building frame. mens einfügen. Inserte las lengüetas WICHTIG: Stellen Sie sicher, daß...
- Page 12 10X10 Gebäude 12JO 10X10 Edifi cio 10X10 BUILDING 10X10 Bâtiment 65004 11648 11649 Front Vorne NOTE: Remove existing ramp (11363) HINWEIS: Vorhandene Rampe entfernen (11363) NOTA: retire la rampa existente (11363) REMARQUE : Supprimer la rampe existante (11363) 65004 11648 11649 Front Vorne...
- Page 13 * Quatre (4) Platte zu 1220 mm x 2440 mm pour 3,0 m x 3,0 m Arrow fl oor frame kits provide the galvanized metal framework to add a fl oor to your shed. The frame will raise the fl oor above ground level to help with drainage under your shed. METAL FRAMING ONLY – Attach plywood to complete your shed fl...
- Page 14 14JO Installing Plywood * Einbau des Sperrholzes * Instalación de la madera multilaminar * Installation du contre-plaqué 1. Cut Plywood to dimensions shown. * Schneiden Sie das Sperrholz auf die gezeigten Maße zu. * Corte la madera multilaminar según las dimensiones que se muestran. * Couper les panneaux de contre-plaqué...
- Page 15 10X8 Gebäude 15JO 10X8 Edifi cio 10X8 BUILDING 10X8 Bâtiment NOTE: Verify building dimensions prior to cutting plywood. Install your plywood at the rear of the building working to the front. HINWEIS: Überprüfen Sie die Abmessungen des Gebäudes vor dem Zuschneiden von Sperrholz. Installieren Sie Ihr Sperrholz von der Rückseite des Gebäudes und arbeiten sich nach vorne.
- Page 16 10X10 Gebäude 16JO 10X10 Edifi cio 10X10 BUILDING 10X10 Bâtiment NOTE: Verify building dimensions prior to cutting plywood. Install your plywood at the rear of the building working to the front. HINWEIS: Überprüfen Sie die Abmessungen des Gebäudes vor dem Zuschneiden von Sperrholz. Installieren Sie Ihr Sperrholz von der Rückseite des Gebäudes und arbeiten sich nach vorne.
