Publicité
Publicité
Table des Matières

Sommaire des Matières pour BioLite SolarHome 620
- Page 1 Battery 11 Hours Light SolarHome 620 SHA1001.R6.IM...
- Page 2 IN THE BOX TEST YOUR SETUP BEFORE ATTACHING SCREWS IN THE BOX Run cords to Hanging Lights and Control Box to ensure proper length. See diagram and quick tips below for help. Place Solar Panel high on roof for direct sunlight. Mount Control Box 1.5 meters off the ground in a central location in your home.
-
Page 3: Solar Panel Installation
SOLAR PANEL INSTALLATION Use a screw or wire to properly install Solar Panel on the roof. To keep panel clean, place Solar Panel high on roof and at an angle. Run cord from Solar Panel to location of where Control Box will be inside your home. Avoid shadows caused by trees or buildings –... -
Page 4: Control Box Installation
CONTROL BOX INSTALLATION The Control Box features its own light. Turn light ON to illuminate area and help with easy installation. Place 3 screws or nails into wall according to Control Box attachment points. Place Control Box over screws and slide down to secure position. Do not tighten screws completely into the wall – this will allow easy removal of Control Box for future setup and use. - Page 5 HANGING LIGHT INSTALLATION The SolarHome 620 includes 3 hanging lights: 2 Hanging Lights and 1 Security Light with Motion Sensor. Each light (A) Install Hanging Lights high and in center of room. Use Hook to secure light around beams or poles or use cord clip to includes a Light Switch (B), Extension Port (C), Hook (D), and Connector (E) secure cord to ceiling to prevent damage.
- Page 6 SECURITY LIGHT WITH MOTION SENSOR INSTALLATION CONNECTING YOUR SYSTEM The Security Light with Motion Sensor can be set to automatically turn on. Use Hook to angle in the direction Remove Control Box from wall by lifting up and away from wall screws. Connect 2 Hanging Lights and Solar Panel cords to the ports in the back of the Control Box as shown.
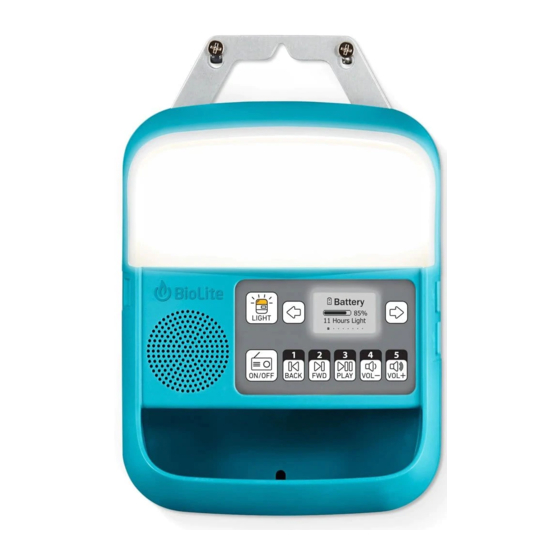
- Page 7 CONTROL BOX CONTROLS & SCREEN Congratulations! You have completed the setup for your new SolarHome 620. The following pages will guide you on operating your system. 1. Radio Back 2. Radio Forward 3. Play/Pause Battery 4. Volume Down Inline image 4 11 Hours Light 5.
- Page 8 CHARGING IN & POWER USAGE CONTROLLING YOUR LIGHTS Your system’s power supply is directly affected by the strength of the sun which will vary by weather, season, and time The three lights and Control Box have three brightness settings: Low, Medium, and High. Use diagram below to access of day.
-
Page 9: Setting Time And Date
1. To set time, hold down the RIGHT ARROW until the through hour, minute, day and date positions. hour position is highlighted. This screen applies only if you have a pay-as-you-go plan for the purchase of your SolarHome 620. Payments SEEING YOUR PAYMENT STATUS... -
Page 10: Tech Specs
BATERÍA: 6.5V - 3300 mAh (20 Wh), LiFePO4. PESO: Caja de prépayés (Pay-As-You-Go) 3.1: El SolarHome 620 incluye 3 luces de techo: 2 luces de techo y 1 luz de control: 550 g (1.21 libras); luces colgantes (cada una): 300 g (0.66 libras);... - Page 11 Ein/Aus. 7. Bildschirm zeigt den ausgewählten Sender an väggskruvar 3.1: Il SolarHome 620 include 3 luci pendenti: 2 Luci pendndenti e 1 Luce di marken på en central plats i ditt hem. 3. Bestäm vilka 2 lampor som ska sie stabil angebracht ist, um eine Beschädigung des Gerätes zu Datum/tijd/status.
- Page 12 挂钩调整角度,使灯朝向想要发现其中过路人的运动的 1. Radio/Edellinen. 2. Radio/Seuraava. 3. Toista / keskeytä. 4. オを作動させるために、ソーラーパネルからの電力が 3.1: SolarHome 620에는 교수형 조명 3개, 교수형 조명 2개, 동작 패널 18ft (5.5m), 조명 21ft (6.5m). 상자 안: 컨트롤 박스 1개, 位置。4.2:用 [2 个] 螺钉或钉子将安保灯的灯开关固定 HØY i 4,5 timer Äänenvoimakkuuden pienennys.
- Page 13 BioLiteEnergy.com/Instructions For tips, troubleshooting, tutorial videos, FAQs and more Manual completo de instrucciones, tutoriales en video, preguntas frecuentes y más // Manuels d'instruction complets, tutoriels vidéos, questions courantes, et bien plus // Volledige handleidingen, instructievideo's, veelgestelde vragen en nog veel meer // Vollständige Bedienungsanleitung, Tutorial-Videos, häufige Fragen und mehr // 전체...