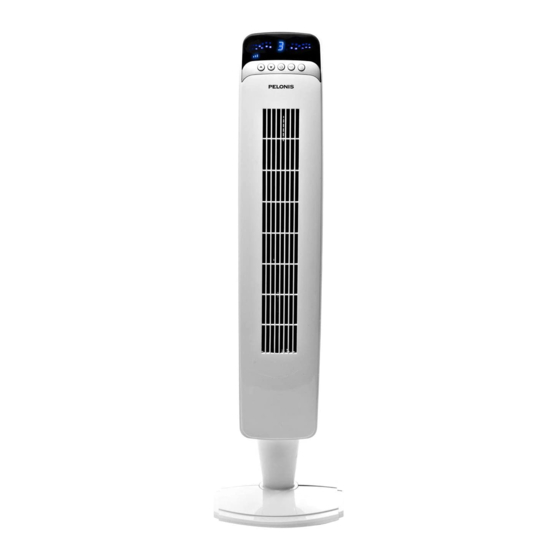
Sommaire des Matières pour Pelonis FZ10-10JRH
- Page 1 OWNER’S MANUAL OSCILLATING TOWER FAN MODEL: FZ10-10JRH READ AND SAVE THESE INSTRUCTIONS...
-
Page 2: Rules For Safe Operation
READ AND SAVE THESE INSTRUCTIONS CAUTION Read Instructions for Safe Operation and Operating Instructions carefully. WARNING 1. To reduce the risk of fire or electric shock, do not use this fan with any solid-state speed control device. 2. Do not leave the fan running unattended. 3. -
Page 3: Part Names
PART NAMES 1. Body 2. Front/Rear support 3. Front/Rear base 4. Screw 5. Power cord PARTS ASSEMBLY Fig. 1 A. Pedestal Assembly • Line up the left and right pedestal assembly and firmly snap together (Fig. 1). B. Base Assembly Pedestal Assembly •... - Page 4 E. Securing the Cord to the Base Fig. 6 With the fan still on its side, locate the cord holding bracket on the bottom of the base. Gently pull any slack out of the power cord, and carefully work the cord into the bracket slots and out through the exit hole in the base.
-
Page 5: Remote Controller Operation
II. REMOTE CONTROLLER - ON /OFF KEY For switching on the fan. The fan will start at low speed. Press this button again to turn fan off. - TIMER KEY Press this button repeatedly to set the fan to automatically shut off after a selected number of hours in the sequence of "1-2-3-4-5-6-7-8."... -
Page 6: Maintenance Instructions
MAINTENANCE INSTRUCTIONS The fan requires little maintenance. Do not try to fix it by yourself. Refer it to qualified service personnel if service is needed. 1. Before cleaning and assembling, do not plug into the socket. 2. To ensure adequate air circulation to the motor, keep vents at the rear of the motor housing free from dust and fluff. -
Page 7: Service And Support
SERVICE AND SUPPORT This article includes a limited warranty of one (1) year against defects in workmanship and material (s). Excluding wear or breakage caused by abuse or improper use. In the case of a malfunction or breakdown, simply bring or send the product, freight prepaid, along with your PROOF OF PURCHASE to Midea America. -
Page 8: Ventilateur Colonne Oscillant Modèle : Fz10-10Jrh
GUIDE D’UTILISATION VENTILATEUR COLONNE OSCILLANT MODÈLE : FZ10-10JRH VEUILLEZ LIRE ET CONSERVER CES INSTRUCTIONS... -
Page 9: Consignes D'utilisation Pour Un Fonctionnement Sécuritaire
VEUILLEZ LIRE ET CONSERVER CES INSTRUCTIONS ATTENTION Veuillez lire attentivement les directives pour une utilisation sécuritaire et les consignes d’utilisation pour garantir un fonctionnement sécuritaire du ventilateur. AVERTISSEMENT 1. Afin de réduire les risques d'incendie et de choc électrique, ne pas utiliser ce ventilateur avec un régulateur de vitesse à... -
Page 10: Liste Des Pièces
LISTE DES PIÈCES 1. Colonne 2. Piédestal frontal/postérieur 3. Socle frontal/postérieur 4. Vis 5. Cordon d’alimentation ASSEMBLAGE A. Assemblage du piédestal • Alignez les côtés gauche et droit du piédestal et appuyez-les Fig. 1 fermement ensemble (Fig. 1). B. Assemblage du socle •... - Page 11 E. Fixation du cordon d'alimentation au socle Fig. 6 • Avec le ventilateur toujours sur son côté, repérez le support de maintien du cordon en dessous du socle. • Tirez doucement tout jeu sur le cordon d'alimentation, posez le cordon d'alimentation dans le support de maintien et fixez solidement le support de maintien sur le cordon d'alimentation Fig.
-
Page 12: Fonctionnement De La Télécommande
II. TÉLÉCOMMANDE « » - TOUCHE MARCHE/ARRÊT Pour la mise en marche du ventilateur. Le ventilateur démarre à basse vitesse. Appuyez à nouveau sur cette touche pour arrêter le ventilateur. « » - TOUCHE MINUTERIE Appuyez plusieurs fois sur cette touche pour que le ventilateur s'arrête automatiquement après un certain nombre d'heures dans la séquence de «... -
Page 13: Consignes D'entretien
CONSIGNES D'ENTRETIEN Le ventilateur nécessite très peu d'entretien. N'essayez pas de le réparer vous-même. Confiez-le à du personnel qualifié si une réparation s'avère nécessaire. 1. Avant le nettoyage et l'assemblage, débranchez le cordon d'alimentation de la prise. 2. Pour assurer une circulation d'air adéquate au moteur, veillez à ce que les évents situés à... - Page 14 SERVICE ET SOUTIEN Cet article est couvert part une garantie limitée d'un (1) an contre les défauts de fabrication et de matériau(x). Exclusion : usure ou bris causés par un usage abusif ou inapproprié. En cas de mauvais fonctionnement ou de panne, apportez ou envoyez simplement le produit, port prépayé, accompagné...
