Publicité
Les langues disponibles
Les langues disponibles
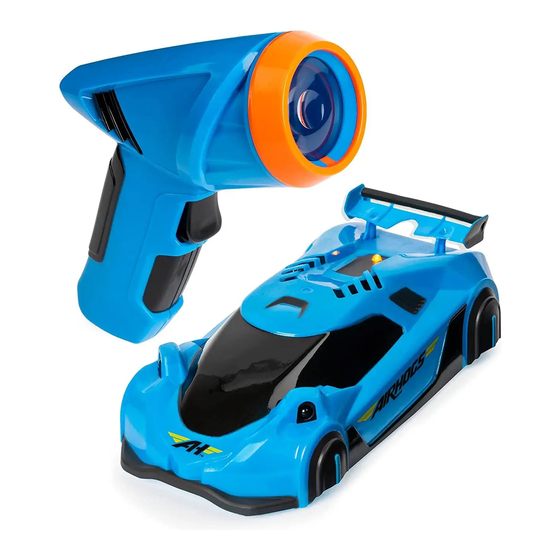
Zero Gravity Laser
INSTRUCTION GUIDE
BATTERY INDICATOR LED
IR SENSOR
For in-depth video
instructions go to
STEP 1
HOW TO
INSTALL
1. Open the battery door with a
BATTERIES
screwdriver. If used batteries are
present, remove these batteries from
the unit by pulling up on one end of
each battery. DO NOT remove or
install batteries using sharp or metal
tools.
STEP 2
HOW TO
CHARGE
1. Move the power switch on the
The charge port
vehicle to the OFF (O) position.
is located on the
back of the vehicle.
APPROXIMATE DRIVE TIME: 5 - 10 Minutes.
APPROXIMATE FULL CHARGE TIME:
45 Minutes.
NOTE: LIGHTS ON VEHICLE WILL FLASH WHEN BATTERY IS LOW. STOP PLAY AND RECHARGE. WHEN BATTERY IS
STEP 3
HOW TO
PLAY
To drive on walls or upside down, you
must have switch positioned to the
WALL position. Listen for the fan to turn
on before placing on the wall or ceiling.
Avoid driving over people's head.
IMPORTANT: USE ON SMOOTH, CLEAN FLAT SURFACES ONLY. ANY CRACKS, BUMPS, OR OPENINGS WILL
CAUSE ZERO GRAVITY™ LASER TO LOSE SUCTION AND FALL OFF OF THE WALL/CEILING. DIRT OR
CAUTION:
a
HAIR ENTANGLEMENT —
Tie back and cover hair and secure
loose clothing prior to play.
®
™
POWER SWITCH
: WALL/CEILING
MODE
AIRHOGS.COM/ZEROGRAVITYLASER
1
1
THINGS TO REMEMBER:
BEFORE YOU RECHARGE THE BATTERY, WAIT 10-15 MINUTES TO LET THE BATTERY COOL DOWN.
EMPTY THE VEHICLE WILL TURN OFF AND WILL FALL OFF OF WALLS OR CEILINGS.
1
NOTE:
DEBRIS CAN GET INSIDE THE FAN AND CAUSE DAMAGE.
INDOOR
USE ONLY
ZERO GRAVITY™ LASER
CHARGE PORT
UNDERSKIRT
: GROUND
O: OFF
MODE
DO NOT REMOVE
2. Install new batteries as shown in
the polarity diagram (+/-) inside the
battery compartment.
2. Plug the USB end of the charge
cable into a computer. Plug the other
end into the charge port on the back
of the vehicle.
To drive on the ground, you must have the
switch positioned to the GROUND
position. The fan will not turn ON, but the
light on top of vehicle will turn on and will
drive properly on the ground.
(The ground mode uses less battery charge.)
NORTH AMERICA • AMÉRIQUE DU NORD
1-800-622-8339, customercare@spinmaster.com
UK – 0800 206 1191, serviceuk@spinmaster.com
IRELAND – 1800 992 249
FRANCE – 0800 909 150, servicefr@spinmaster.com
AUSTRALIA – 1800 316 982, customercare@spinmaster.com
WWW.SPINMASTER.COM
1
CONTENTS
1 Controller
1 USB charging
cable
LED 'LASER' EMITTER
CONTROL TRIGGER
2
3. Replace battery door securely.
Check your local laws and regulations
for correct recycling and/or battery
disposal.
NOTE: 'LASER' ON CONTROLLER WILL
FLASH WHEN BATTERY IS LOW.
2
3
3. Vehicle charging when USB charging
LED is BLINKING.
4. Vehicle charged when USB charging
LED is SOLID ON.
2
45˚
The fabric air skirts can be adjusted
outward at a 45° angle to ensure proper
wall suction.
DO NOT REMOVE UNDERSKIRT
3
( LR03 )
AAA
x
1.5 V
Not included
1 Instruction
guide
BATTERY
COMPARTMENT
3
4
3
45˚
8+
YRS
Publicité
Table des Matières

Sommaire des Matières pour Airhogs ZERO GRAVITY LASER
- Page 1 CONTENTS ® Zero Gravity Laser ™ INSTRUCTION GUIDE ZERO GRAVITY™ LASER 1 Controller 1 USB charging 1 Instruction cable guide BATTERY INDICATOR LED LED ‘LASER’ EMITTER IR SENSOR CONTROL TRIGGER POWER SWITCH CHARGE PORT UNDERSKIRT : WALL/CEILING : GROUND O: OFF...
- Page 2 TM & © Spin Master Ltd. All rights reserved. Retain this information, addresses and phone numbers for future reference. Children should be supervised during play. Keep away from obstacles and electrical hazards. Spin Master Ltd. reserves the right to discontinue the a WARNING: CHOKING HAZARD – Small parts. Not for children under 3 years. www.airhogs.com website at any time. T44366_0052_20119378_GBL_IS_R5 T44366_0054_20119573_GBL_IS_R5...
-
Page 3: Utilisation
CONTENU ® Zero Gravity Laser ™ MODE D'EMPLOI ZERO GRAVITY™ LASER 1 radiocommande 1 câble de charge USB 1 mode d’emploi LED INDICATRICE DE BATTERIE ÉMETTEUR « LASER » LED CAPTEUR INFRAROUGE GÂCHETTE DE COMMANDE INTERRUPTEUR D'ALIMENTATION PORT DE CHARGE... -
Page 4: Problèmes Et Solutions
Les enfants doivent être surveillés lorsqu’ils jouent. Maintenir à l'écart de tout obstacle ou risque électrique. Spin Master Ltd. se réserve le droit de supprimer le site Internet www.airhogs.com à tout moment. a ATTENTION ! DANGER D'ÉTOUFFEMENT – Contient de petits éléments. -
Page 5: Guía De Instrucciones
CONTENIDO ® Zero Gravity Laser ™ GUÍA DE INSTRUCCIONES 1 guía de ZERO GRAVITY™ LASER 1 control 1 cable de carga USB instrucciones INDICADOR LED DE LA BATERÍA EMISOR "LÁSER" LED SENSOR INFRARROJO CONTROLADOR INTERRUPTOR DE ENCENDIDO PUERTO DE CARGA NO RETIRAR EL FALDÓN... -
Page 6: Resolución De Problemas
REGLAS DE SEGURIDAD PARA EL ZERO GRAVITY™ LASER < 2 m 1. Sitúate a una distancia de 2 metros de la pared. 2. No conduzcas en las esquinas o los bordes de la pared. 3. Apunta el rayo láser dentro de un radio de 33 cm 4. - Page 7 AIRHOGS.COM PROBLEMA, visita nuestra página website: AIRHOGS.COM web: AIRHOGS.COM f REMARQUE : De fortes interférences électromagnétiques e NOTE: If normal function of the product is disturbed or E NOTA: Si el funcionamiento habitual del producto se ve alterado...
- Page 8 f INFORMATIONS DE SÉCURITÉ CONCERNANT LES PILES : E INFORMACIÓN DE SEGURIDAD SOBRE LAS PILAS: e BATTERY SAFETY INFORMATION: Les piles sont de petits objets. Le remplacement des piles doit être Las pilas son objetos pequeños. Las pilas deben ser sustituidas por Batteries are small objects.