Table des Matières
Publicité
Les langues disponibles
Les langues disponibles
Liens rapides
REGISTER YOUR PRODUCT!
www
Thank you for choosing this ARNOVA product. We hope that you will enjoy using it and that it will give you satisfaction for many
years to come. Once you unpack your ARNOVA product, we recommend that you take a few minutes to register it
http://arnovatech.com/register
(
). This will allow you to get access to ARNOVA technical support (
?
NEED HELP?
On our Website: See the Frequently Asked Questions
section on
http://arnovatech.com/faq
Contact our Technical Support Team: Visit
arnovatech.com/support
Please register your product before contacting
Technical Support (see Register your Product ).
As we are often updating and improving our products, your device's software may have
a slightly different appearance or modified functionality than presented in this Quick Start Guide.
Ä
On the web at http://arnovatech.com/register
http://
for e-mail support.
http://arnovatech.com/support
SOFTWARE UPDATE
The ARNOVA operating system (the system that runs
your device) is periodically updated to bring new features,
improvements and bug fixes.
Ä
On the web at www.arnovatech.com
> support&account > Downloads = firmware
).
1
Publicité
Table des Matières

Manuels Connexes pour Arnova 7c G2


Sommaire des Matières pour Arnova 7c G2
- Page 1 On the web at http://arnovatech.com/register Thank you for choosing this ARNOVA product. We hope that you will enjoy using it and that it will give you satisfaction for many years to come. Once you unpack your ARNOVA product, we recommend that you take a few minutes to register it http://arnovatech.com/register...
-
Page 2: Description Of The Device
- To switch off, when you press and hold on the Power button, a window appears with a list of options. Touch “Power Off” > “Ok” to fully shut down your ARNOVA. -To put your device in standby, press the Power button once. - Page 3 Before using your ARNOVA for the first time, completely charge the battery! Charging the Battery Connect the supplied power cable to the ARNOVA Power connector and to a wall outlet. The ARNOVA device will start charging. IMPORTANT: The device should not be charged via a USB port.
- Page 4 CONNECTING TO A WIFI NETWORK For this procedure to work, you need to be in a WiFi zone that will allow you to connect to it. Every time the ARNOVA is in range of a network that you have already configured once, it will attempt to make a connection.
-
Page 5: Connecting To A 3G Network
Your Arnova 7c G2 is equipped with a SIM card slot. Any standard SIM card can be inserted. There is no provider restriction. Note that the Arnova 7c G2 will only have signal if you are in an area covered by your 3G provider’s 3G or EDGE network. - Page 6 Applications tab, on the right side of the screen, turns into a recycle bin) and release your finger. Adding more applications with APPSLIB : With the ARNOVA connected to the Internet, tap on the AppsLib icon . This online library of free and purchasable applications has thousands of fun games and useful applications to download and use.
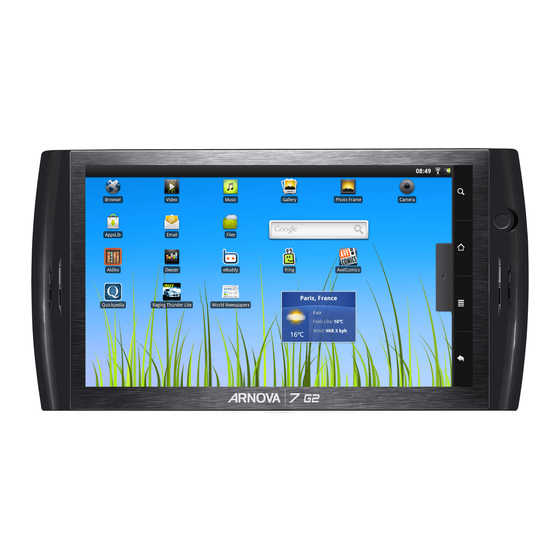
- Page 7 THE ARNOVA INTERFACE Your ARNOVA device is equipped with a capacitive touchscreen. Use your finger pulp to navigate. Home Screen These are the default Android™ shortcuts ( Browser EMail , etc.). Tap on an icon to open the correspond- Application button ing application.
- Page 8 IMPORTANT: A Micro-SD card should be inserted in the device. It works as your device storage. If there is no Micro-SD card, you can’t transfer files to your device. Connect the supplied USB cable to the ARNOVA and to a running computer via USB 2.0 or higher. Turn on USB storage The ARNOVA will ask you if you want to connect it.
-
Page 9: Enregistrez Votre Produit
Sur Internet : http://arnovatech.com/register Merci d’avoir choisi ce produit ARNOVA. Nous espérons que vous aurez plaisir à l’utiliser et qu’il vous donnera satisfaction pendant de nombreuses années. Après avoir déballé votre produit ARNOVA, nous vous conseillons de prendre quelques minutes pour l’enregistrer http://arnovatech.com/register... -
Page 10: Description De L'appareil
- Pour éteindre l’appareil, lorsque vous maintenez le bouton enfoncé, une fenêtre apparaît avec une liste d’options. Appuyez sur « Eteindre » > « Ok » pour éteindre votre ARNOVA complètement. - Pour mettre en veille votre appareil, appuyez sur le bouton une fois. -
Page 11: Première Utilisation
Avant d’utiliser votre ARNOVA pour la première fois, chargez complètement sa batterie ! Charger la batterie Branchez le câble d’alimentation fourni sur le connecteur d’alimentation de l’ARNOVA et sur une prise secteur. Votre ARNOVA s’allume et commence à se charger. - Page 12 Se conec- . Votre ARNOVA essaie alors de se connecter à ce point d’accès WiFi d’après les paramètres réseau saisis précédemment. * Pour vous connecter à un réseau WiFi ouvert, il n’est pas nécessaire de saisir les informations réseau. Pour un réseau protégé, vous devrez soit entrer une clé...
-
Page 13: Se Connecter À Un Réseau 3G
SE CONNECTER À UN RÉSEAU 3G Votre Arnova 7c G2 est équipé d’un emplacement pour carte Micro-SD. Votre appareil est désimlocké et il n’y a aucune restriction liée aux opérateurs téléphoniques. Notez que vous devez vous situer dans une zone couverte par la 3G. -
Page 14: Personnalisation De L'appareil
Applications , sur la droite, se transforme en corbeille lorsque vous maintenez un élément appuyé) et relâchez votre doigt. Ajouter d’autres d’applications avec APPSLIB : Connectez votre ARNOVA à Internet, puis appuyez sur l’icône AppsLib . Ce portail de téléchargement vous propose des milliers d’applications gratuites et payantes, telles que des jeux amusants ou des outils pratiques. -
Page 15: L'interface De L'arnova
L’INTERFACE DE L’ARNOVA Votre ARNOVA est équipé d’un écran tactile capacitif. Utiliser la pulpe de votre doigt pour naviguer. Ecran d’accueil Voici les raccourcis Android™ Navigateur Web par défaut ( E-mail , etc.). Appuyez sur une icône pour ouvrir l’application Bouton applications correspondante. -
Page 16: Transfert De Fichiers Mul Timédia
IMPORTANT: Une carte Micro-SD doit être insérée dans l’appareil. Il constitue la mémoire de l’appareil. Sans carte Micro-SD, aucun fichier ne peut être transféré dans l’appareil. Connectez le câble USB fourni à votre ARNOVA et à un ordinateur allumé via USB 2.0 ou plus. L’ARNOVA vous propose de le connecter. Sélectionnez Activer la mémoire de stockage USB... -
Page 17: Aktualisieren Der Software
ÄIm Internet unter http://arnovatech.com/register Vielen Dank, dass Sie sich für dieses Produkt von ARNOVA entschieden haben. Wir hoffen, Sie werden viel Freude daran haben und dass es Ihnen für viele Jahre zuverlässige Dienste leisten wird. Nachdem Sie Ihr ARNOVA-Produkt ausgepackt haben, empfehlen wir Ihnen, sich ein paar Minuten Zeit zu nehmen, und es zu registrieren ( http://arnovatech.com/register... - Page 18 - Um auszuschalten, wenn Sie den Power-Schalter drücken und festhalten, erscheint ein Fenster mit einer Liste von Optionen. Tippen Sie auf “Ausschalten” > “Ausschalten”, um Ihren ARNOVA völlig auszuschalten. - Wenn Sie den Power-Schalter einmal drücken, wird Ihr Gerät in den Standby-Modus gebracht.
- Page 19 STARTEN ▲ Vor der erstmaligen Verwendung des ARNOVA sollte der Akku vollständig aufgeladen werden! Aufladen des Akkus Verbinden Sie das mitgelieferte Stromkabel mit dem ARNOVA-Stromanschluss und mit einer Steckdose. Daraufhin startet den Ladevorgang. WICHTIG: Das Gerät sollte nicht über einen USB-Anschluss aufgeladen werden.
- Page 20 WIFI-NETZWERKVERBINDUNG Dazu müssen Sie sich in Reichweite eines WiFi befinden. Der ARNOVA wir dann jedesmal eine Verbindung mit einem der bereits konfigurierten Netzwerke herstellen. Um ein neues WiFi Netzwerk einzurichten, tippen Sie auf dem Desktop auf das Menü Icon Einstellungen und wählen anschließend...
-
Page 21: Einsetzen Der Sim-Karte
VERBINDEN MIT EINEM 3G-NETZWERK Ihr Gerät verfügt über einen Einschub für eine SIM-Karte. Ihr Gerät ist ohne SIM-Lock. Sie können uneingeschränkt jeden Anbie- ter nutzen. Beachten Sie, dass das Gerät nur dann ein Signal empfängt, wenn Sie sich in einem Bereich aufhalten, der von einem 3G- oder EDGE-Netzwerk Ihres Anbieters abgedeckt wird Einsetzen der SIM-Karte HINWEIS: Wenn Ihr Gerät nicht auf Ihre... - Page 22 Mülleimer (dieser erscheint auf der rechten Seite des Displays) anstatt des -Tab. Applikationen hinzufügen - APPSLIB: Wenn Sie Ihren ARNOVA mit dem Internet verbunden haben, tippen Sie auf das AppsLib Ikon . Diese Onlinebibliothek bietet Ihnen tausende zum Teil kostenlose Apps wie Unterhaltung, Spiele und weitere nützliche Anwendungen zum herunterladen und verwenden.
- Page 23 DIE ARNOVA SCHNITTSTELLE Ihr ARNOVA-Gerät ist mit einem Kapazitiven Touchscreen ausgerüstet. Benutzen die Fingerbeere. Hauptfenster Dies sind Desktop-Verküpfungen Web-Browser von Android™ ( E-Mail , usw.). Tippen Sie auf ein Icon, um die entsprechende An- wendung zu öffnen. Sie können Applikationen Taste...
- Page 24 WICHTIG: In das Gerät muss eine MicroSD-Karte eingelegt sein. Diese stellt den Datenspeicher zur Verfügung. Wenn keine MicroSD- Karte eingelegt ist, können Sie in dem Gerät keine Dateien speichern. Verbinden Sie Ihren ARNOVA mit dem Computer über USB 2.0 oder mehr, mit Hilfe des mitgeliefertem USB-Kabels. USB-Speicher aktivieren, dann tippen Sie auf OK Sie werden gefragt, ob Sie verbinden möchten.
-
Page 25: Registre Su Producto
¡REGISTRE SU PRODUCTO! ÄEn Internet en http://arnovatech.com/register Gracias por haber elegido este producto ARNOVA. Esperamos que sea de su total agrado y lo pueda disfrutar durante muchos años. http://arnovatech.com/ Una vez desempaquetado su producto ARNOVA, dedique unos pocos minutos de su tiempo para registrarlo ( register http://arnovatech.com/support... -
Page 26: Descripción Del Arnova
- Al pulsar y mantener pulsado el botón de alimentación, aparece una ventana con una lista de opciones. Dé un toque en “Apagar” > “OK” para apagar el ARNOVA por completo. Para poner el dispositivo en espera, pulse una vez el botón de alimentación (Power). -
Page 27: Antes De Empezar
Antes de utilizar su ARNOVA por primera vez, cargue completamente la batería. Cargado de la batería Conecte el cable de alimentación suministrado al conector de alimentación del ARNOVA y a una toma eléctrica de pared. El ARNOVA empezará a cargarse. - Page 28 . Así, el ARNOVA intentará establecer una conexión al punto de acceso WiFi con los parámetros de red introducidos. * Con respecto a los puntos de acceso WiFi gratuitos, no es necesario introducir ninguna información especial. En las redes protegidas, necesitará o bien una clave...
- Page 29 CONECTARSE A UNA RED 3G Su dispositivo dispone de una ranura para tarjeta SIM. Al ser libre, se puede utilizar con cualquier proveedor. Tenga en cuenta que sólo tendrá señal cuando se encuentre en un área con cobertura por parte de su proveedor de servicios 3G o red EDGE.
- Page 30 Aplicaciones del lado derecho de la pantalla se convierte en una papelera de reciclaje) y suelte el dedo. Agregar más aplicaciones - APPSLIB: Conecte el ARNOVA Internet, a continuación, pulse el icono de AppsLib. Esta biblioteca en línea de aplicaciones gratis y adquiribles, tiene miles de juegos y aplicaciones útiles para descargar y utilizar.
- Page 31 LA INTERFAZ DEL ARNOVA El dispositivo ARNOVA está equipado con una pantalla táctil capacitiva. Utilizar la pulpa de los dedos. Pantalla principal Estos son los accesos directos Android™ predeterminados Navegador web EMail , etc.). Dé un toque en un icono para abrir la Aplicaciones botón...
- Page 32 IMPORTANTE: En el dispositivo tiene que insertarse una tarjeta Micro-SD que funciona como dispositivo de almacenamiento. En ausen- cia de tarjeta Micro-SD no podrá transferir archivos al dispositivo. Conecte el cable USB suministrado al ARNOVA y a un ordenador encendido a través de USB 2.0 o superior...
-
Page 33: Registrazione Del Prodotto
Grazie per aver scelto questo prodotto ARNOVA. ARNOVA vi augura di poter sfruttare al massimo le possibilità offerte dal prodotto per molti anni. Dopo aver aperto il vostro prodotto ARNOVA, vi suggeriamo di registrarlo; ci vorranno solo pochi minuti http://arnovatech.com/register... - Page 34 Slot per scheda SIM Altoparlanti Spinotto cuffie Porta micro USB: per collegare ARNOVA al vostro PC, utilizzare il cavo USB. E ‘possibile trasferire file via USB 2.0 o superiore. Connettore di alimentazione: per collegare il cavo di alimentazione fornito. Bottone di re-inizalizzazione(reset) Il vostro prodotto non reagisce più.
- Page 35 Prima di utilizzare il dispositivo ARNOVA per la prima volta, caricare completamente la batteria. Caricamento della batteria Collegare il cavo di alimentazione fornito al connettore di alimentazione del dispositivo ARNOVA e a una presa a muro. Il dispositivo ARNOVA viene avviata la ricarica.
- Page 36 CONNESSIONE A UNA RETE WIRELESS Per procedere è necessario trovarsi in una zona WIFI che permetta la connessione. Ogni qualvolta ARNOVA si trova in un raggio di rete che avete già configurato una volta, cercherà una connessione. Per configurare una nuova rete WIFI, andare allo schermo principale, sfiorare sul Menu l’icona...
-
Page 37: Connessione A Una Rete 3G
CONNESSIONE A UNA RETE 3G Il dispositivo è munito di un alloggiamento per scheda SIM. La SIM del dispositivo non è bloccata. Il provider non applica alcuna limitazione. Notare che il dispositivo avrà il segnale solo se ci si trova in una zona coperta dalla rete 3G o EDGE del provider. Inserire la carta SIM NOTA: Se il dispositivo non si connette alla rete del provider 3G:... - Page 38 , sulla parte destra dello schermo, si trasforma in un cestino) quindi rilasciare il dito. Aggiungere altre applicazioni - APPSLIB: connettete il vostro ARNOVA a Internet, poi premete cull’icona AppsLib . Questo portale vi propone di scaricare, gratuitamente e a pagamento, diverse migliaia di applicazioni, come quelle relative a giochi divertenti o a servizi più...
- Page 39 INTERFACCIA Il dispositivo ARNOVA è dotato di uno capacitivo schermo a sfioramento. Utilizzando la polpa delle dita. Schermata Home [Pagina iniziale] Queste sono le scorciatoie Web Browser EMail Android™ ( ecc.) - sfiorare un’icona per aprire l’applicazione corrispon- Applicazioni pulsante dente.
- Page 40 IMPORTANTE: nel dispositivo va inserita una scheda Micro-SD. Essa funziona come dispositivo di archiviazione. Se non è inserita nes- suna scheda Micro-SD, non sarà possibile trasferire i file nel dispositivo. Collegare il cavo USB in dotazione ad il ARNOVA e ad un computer funzionante via USB 2.0 o superiore. Attiva archivio USB Vi verrà...
-
Page 41: Hulp Nodig
Op het internet op http://arnovatech.com/register Ä Dank u voor het kiezen van dit ARNOVA-product. Wij hopen dat u er nog jarenlang plezier aan zult mogen beleven. Wij raden u aan om uw ARNOVA-product te registreren zodra u het uit de verpakking hebt gehaald ( http://arnovatech.com/register... -
Page 42: Beschrijving Arnova
- Wanneer u de Power-knop ingedrukt blijft houden, dan verschijnt er een venster met een lijst met opties. Druk op “Uitschakelen” > “OK” om uw ARNOVA volledig uit te schakelen. - Om uw toestel in stand-by te zetten, drukt u eenmaal op de Power-knop. - Page 43 Laad de batterij volledig op alvorens de ARNOVA voor de eerste maal te gebruiken. De batterijen laden Sluit het meegeleverde netsnoer aan op de stroomaansluiting van de ARNOVA en op een stopcontact. Uw ARNOVA zal starten met laden. BELANGRIJK: Het apparaat mag niet worden opgeladen via een USB-poort.
- Page 44 WIFI-NETWERKVERBINDING Hiervoor dient u zich in een WiFi-zone te bevinden, zodat u verbinding kunt maken. Telkens dat uw ARNOVA zich in een zone bevindt met een netwerk dat u al geconfigureerd hebt, zal het proberen om hier verbinding mee te maken.
- Page 45 VERBINDING MAKEN MET EEN 3G-NETWERK Uw apparaat is voorzien van een sleuf voor een simkaart. Uw apparaat is simlockvrij. U bent niet gebonden aan één bepaalde provider. Houdt er rekening mee dat u alleen bereik hebt wanneer u zich in een gebied bevindt dat wordt gedekt door het 3G- of EDGE-netwerk van uw 3G-provider.
- Page 46 Applicaties , aan de rechterkant van het scherm, in een prullenbak) en laat u het item tot slot los. Het toevoegen van meer toepassingen - APPSLIB: Met de ARNOVA verbonden met het internet, druk op het pictogram AppsLib . Deze online bibliotheek van gratis en betaalde toepassingen heeft duizenden leuke spelletjes en nuttige toepassingen om te downloaden en te gebruiken.
- Page 47 DE ARNOVA-INTERFACE Uw ARNOVA-apparaat is uitgerust met een capacitieve aanraakscherm. Gebruik de vinger pulp. Startscherm Dit zijn de standaard Android™- Web Browser snelkoppelingen ( EMail , enz.). Druk op een pic- togram om de betreffende applicatie te openen. U kunt de...
- Page 48 USB 2.0 of hoger met een computer die aan staat . De ARNOVA Zult u vragen of u wilt aansluiten. Tik op Zet USB-opslag aan te sluiten en druk op OK om te bevestigen.Binnen enkele seconden verschijnt de micro-SD-kaart als een pictogram op uw computer.
-
Page 49: Precisa De Ajuda
Ä Obrigado por escolher este produto ARNOVA. Esperamos que você goste de usá-lo e que ele venha a lhe fornecer satisfação por mui- tos anos futuros. Uma vez que você desembala o seu produto ARNOVA, recomendamos que você leve alguns minutos para registrá-lo (http://arnovatech.com/register). -
Page 50: Descrição Do Aparelho
Slot do cartão SIM: Qualquer cartão SIM padrão pode ser inserido. Alto-falante Fone de ouvido Porta Micro-USB: para conectar seu ARNOVA ao seu computador via USB 2.0 ou superior, usando o cabo USB incluído (para transferir arquivos) Conector de força: para conectar o cabo de força fornecido. - Page 51 Antes de usar seu ARNOVA pela primeira vez, carregue completamente a bateria! Carregando a bateria Conecte o cabo de força fornecido com o conector de Força ARNOVA e na tomada de parede. O aparelho ARNOVA iniciará o carregamento. IMPORTANTE: O aparelho não deve ser cobrado através de uma porta USB.
- Page 52 Para este procedimento de trabalho, você precisa estar em uma área de WiFi que permitirá que você se conecte a ela. To- das as vezes que ARNOVA estiver no alcance de uma rede que você já configurou uma vez, ela tentará fazer uma conexão.
- Page 53 CONECTANDO A UMA REDE 3G Seu Arnova 7c G2 é equipado com um slot de cartão SIM. Qualquer cartão SIM padrão pode ser inserido. Não há nenhuma restrição fornecida. Observe que o Arnova 7c G2 somente terá sinal se você estiver em uma área coberta pelos provedores 3G ou rede EDGE.
- Page 54 - Para remover um item na tela Inicial, segure o seu dedo sobre ele, arraste-o até a lixeira (enquanto você segura um item, a guia Aplicações, no lado direito da tela, gire até a lixeira) e solte o seu dedo. Adicionando mais aplicações com APPSLIB: Com o ARNOVA conectado à Internet, toque no ícone AppsLib . Esta biblioteca online de aplicações gratuitas e pagáveis possui milhares de jogos engraçados e aplicações úteis para fazer download e usar.
- Page 55 A INTERFACE ARNOVA Seu aparelho ARNOVA é equipado com um touchscreen de capacitação. Use a polpa do seu dedo para navegar. Tela inicial Estes são os atalhos padrão Android™ (Navegador Web, EMail, etc.). Toque em um ícone para abrir a aplicação correspon- dente.
- Page 56 Conecte o seu cabo USB fornecido ao ARNOVA e para executar no computador via USB 2.0 ou superiore O ARNOVA irá perguntar se você quer ligar. Toque em Ativar armazenamento USB para conectá-lo e pressione OK para confirmar. Você pode transferir seus arquivos de mídia para o cartão Micro-SD ou por copiar/colá-los nas respectivas pastas usando O Windows®...
-
Page 57: National Restrictions
National restrictions This device is intended for home and office use in all EU countries (and other countries following the EU directive 1999/5/EC) without any limitation except for the countries mentioned below: Country Restriction Reason/remark Bulgaria None General authorization required for outdoor use and public service France Outdoor use limited to...