
Manuels Connexes pour ZALMAN Z9 NEO


Sommaire des Matières pour ZALMAN Z9 NEO
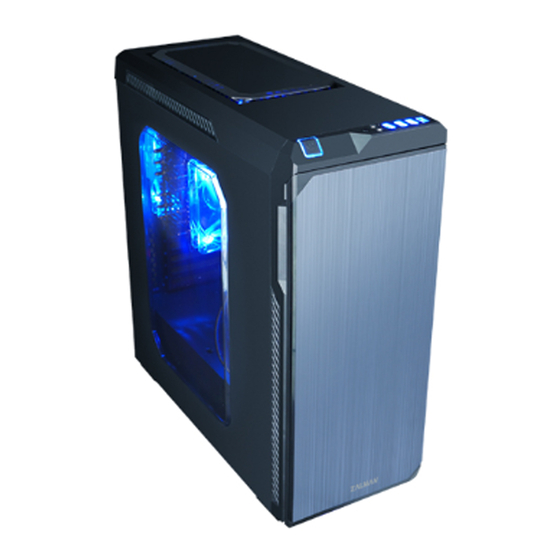
- Page 1 A TX MID TOWER COMPUTER CASE Z9 NEO ※ To ensure safe and easy installation, please read the following precaution. Product design and specifications may be revised to impove quality and performance. Ver.170112...
- Page 3 Avoid inserting objects or hands into the system while it is in operation to prevent product damage and injuries. Zalman Tech Co., Ltd. is not responsible for any improper use. Product design and specifications may be revised to improve quality and performance.
-
Page 4: Motherboard Installation
. Installation Side Panel Removal Motherboard Installation M-ATX M-ITX There are 6 Stand-offs preinstalled. Please refer to the diagrams below for additional Stand Off positions (based on motherboard type). VGA Card Installation Unfasten the Hand Screw holding the PCI Cover and disassemble the cover. Remove the PCI Slot Cover. - Page 5 ODD Installation Bolt B 3.5”, 2.5” HDD Installation Install the Drive on HDD tray 3.5" HDD 2.5" SSD/HDD then remove the HDD Tray as Install the tray on the drive. shown in the figure. Install the Drive on HDD tray ※ When transporting an assembled system, Please secure the HDD whte Bolt as shown above...
-
Page 6: Cable Connection
Cable Connection I/O Port Power Button Power LED Reset Power HDD LED HD Audio USB 2.0 USB 3.0 2.5 "HDD, SSD Installation 2.5" HDD and SSDs can be installed on the side of case as shown in the diagram below. * The images can differ from the actual How to Install the Cooler As shown in the picture, install the cooler on the top of the case using bolts... - Page 7 HQ series AIO CPU coolers 7 Year Warranty ■ EBT series Power Supply Units Zalman USA has the right to change availability of limited warranty at its own discretion and any changes will not be retroactive. The limited warranty does not cover… ■...
- Page 9 . 주의사항 설치 전 설명서를 숙독하십시오. 설치 전 제품과 구성품을 반드시 확인 후 이상이 있을 경우 구입처에 교환/환불 조치 받으십시오. 제품 설치 시 사고 예방을 위해 장갑을 착용하고 취급하십시오. 시스템 장착 시 치명적 손상이 발생할 수 있으므로 무리한 힘을 가하지 마십시오. 케이블을...
- Page 10 . 설치방법 사이드 커버 분리 마더보드 설치 M-ATX M-ITX 기본 6개의 Stand-Off가 장착되어 있으며, 메인보드 장착 볼트 위치를 참조하여 마더보드 타입에 따 라 Stand-Off를 추가로 끼우고 마더보드를 케이스에 장착합니다. 그래픽 카드 설치 PCI 커버를 고정하는 볼트를 풀고 커버를 분리한 후 PCI 커버를 제거합니다. 그래픽...
- Page 11 ODD 설치 Bolt B 3.5” & 2.5” HDD 설치 HDD 트레이에 드라이브 설치 3.5" HDD 2.5" SSD/HDD HDD Tray를 그림과 같이 분리합니다. 트레이에 드라이브를 장착합니다. HDD 트레이에 HDD 장착 ※ 조립후시스템을 이동할 때는 해당위치에 나사로 HDD를 고정해 주시기바랍니다 케이블 연결 I/O Port 전원...
- Page 12 2.5” HDD & SSD 추가 장착 다음 그림과 같이 케이스 측면에 SSD를 장착하여 사용할 수 있습니다. * 본 이미지는 실제와 다를 수 있습니다. 쿨러, 팬 장착방법 그림과 같이 케이스 상단 장착 홀에 맞추어 볼트를 이용하여 장착 할 수 있습니다. . 품질보증 및 A/S 안내 1.
- Page 14 Mantenha este produto longe do alcance de crianças Zalman Tech S.A.R.L. não é responsável por quaisquer problemas que possam ocorrem devido ao uso inadequado O desenho e as especificações do produto podem estar sujeitos a alterações para melhoria da...
- Page 15 . Composants, Precauciones, Precauções 18EA 12EA Bolt A Bolt B Bolt C Bolt D Bolt E Stand off Cable tie Manual Beep Speaker . Top I/O Ports, Puerto de I/O en superficie, Porta I/O de superfície Part Name Part Name Bouton d'alimentation Bouton de réinitialisation ①...
- Page 16 . Installation Side Panel Removal / Retrait du panneau latéral / Remoção da tampa lateral Motherboard Installation / Installation de la carte mère / Instalação de placa-mãe M-ATX M-ITX There are 6 Stand Offs preinstalled. Please refer to the diagrams below for additional Stand Off positions (based on motherboard type).
- Page 17 Installation des lecteurs de 5.25” / Instalación de unidades de 5.25” / Instalação da unidade de 5,25 " Séparation de couvercle avant / Remover tapa frontal / Remoção da tampa frontal PULL Installation de l’ODD / Instalar ODD / Instalação de ODD Bolt B Montage de HDD de 3.5”, 2.5”...
- Page 18 Installation de HDD Tray /Instalar HDD Tray / Instalação do módulo ※ Lorsque vous déplacez le système à l'ensemble à sa place Vis A pour écuriser le disque dur s'il vous plaît. ※ Al mover el sistema a la asamblea en su lugar Tornillos A para asegurar la unidad de disco duro, por favor.
- Page 19 2.5 "HDD, SSD rénovation / 2.5 "HDD, SSD retrofit / 2.5 "HDD, SSD retrofit 2,5 "HDD et SSD peuvent être installés sur le du boîtier, comme indiqué sur le schéma ci-dessous. No lado da caixa, como mostrado na figura a seguir pode ser utilizada com a instalação de SDD Caixa, como mostrado na figura a seguir pode ser utilizada com a instalação de SDD * Les images peuvent différer de la réelle * Las imágenes pueden diferir de la actual...