
Sommaire des Matières pour Soleus Air GL-PAC-08E4
- Page 1 Model No GL-PAC-08E4 Modèle N GL-PAC-08E4 8000 BTU Portable Air Conditioner Climatiseur portable 8 000 BTU OPERATING INSTRUCTIONS MODE D’EMPLOI...
-
Page 2: Important Instructions
Thank you for choosing a Soleus Air Powered by Gree Portable Air Conditioner. This owner’s man- ual will provide you with valuable information necessary for the proper care and maintenance of your new product. Please take a few moments to thoroughly read the instructions and familiarize yourself with all the operational aspects of your new Portable Air Conditioner. -
Page 3: Lcdi Power Cord And Plug
If a test is performed and the indicator light remains ON, current leakage has been detected. Do not use the air conditioner or attempt to reset the LCDI Plug. Contact Soleus Air Powered by Gree Customer Service for trou- bleshooting recommendations. -
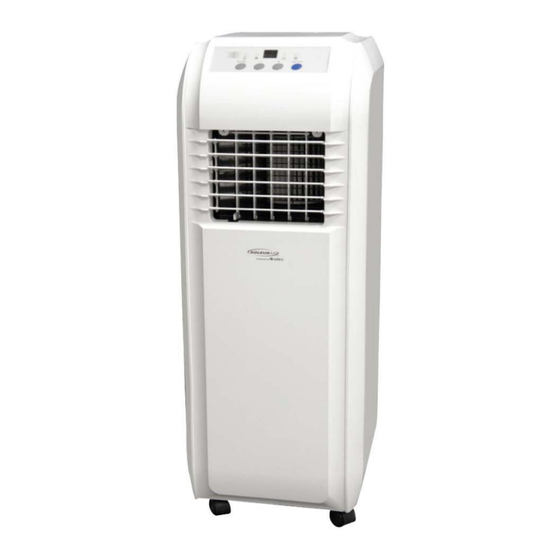
Page 4: Product Diagram
PRODUCT DIAGRAM Control Panel Louver Guides Louvers Casters Remote Control Holder Power Cord Filters Upper Air Intake Air Exhaust Vent Lower Air Intake... -
Page 5: Package Contents
• If the environment temperature is higher than the max operating temperature or lower than the minimum operating temperature, the air conditioner may not work properly. Model Number GL-PAC-08E4 Power Supply (Ph/V/Hz) 1/115/60Hz Dehumidifying Capacity (Pints/Day) Rated Cooling Capacity (BTU/h) -
Page 6: Assembly & Installation
PARTS & WINDOW KIT ASSEMBLY PARTS EXHAUST HOSE & ADAPTERS Exhaust Hose Adapter Exhaust Hose Hose Adapter ASSEMBLY & INSTALLATION INSTALLATION When the unit is operating as an air conditioner or dehumidifier, the window kit and exhaust hose must be installed. When the unit is operating in fan mode, the window kit and exhaust hose do not need to be installed . - Page 7 SINGLE HOSE WINDOW KIT INSTALLATION This installation is OK The is a poor installation 22” When installing the exhaust hose, try and keep it as flat as possible. The less angles and bends in the hose, the better the unit will perform. If bending or an angle is necessary, use single 90° angles like the pictures above.
- Page 8 CONTROL PANEL, DISPLAY, & OPERATING INSTRUCTIONS CONTROL PANEL & LED DISPLAY BUCKET FULL LIGHT COOL MODE LIGHT DRY MODE LIGHT REMOTE RECEIVER LED DISPLAY FAN MODE LIGHT TEMP SELECT BUTTON MODE BUTTON POWER BUTTON CONTROL PANEL OPERATING INSTRUCTIONS 1) Power On and Off - Press the POWER button once to manually turn the unit on. Press the POWER button once more to turn the unit off.
- Page 9 POWER BUTTON TEMP SELECT BUTTONS SWING BUTTON FAN BUTTON (Not Available on GL-PAC-08E4) SLEEP BUTTON TIMER BUTTON 1) Power On and Off - Press the ON/OFF (POWER) button once to manually turn the unit on. Press the Power button once more to turn the unit off.
- Page 10 REMOTE CONTROL OPERATING INSTRUCTIONS (Cont.) 5) Auto-on Timer: When the air conditioner is off, it can be set to automatically turn on in 30 minutes to 24 hours at the previous set mode and fan setting. To set the Auto-on Timer, press the TIMER button on the unit or remote control. Each touch of the +/- buttons on the remote will change the timer setting in 30 minute increments (.5 hours).
- Page 11 DRAINING COLLECTED WATER When the temperature or humidity is too high, the air conditioner may not be able to evaporate all of the water as quickly as needed. All moisture that is unable to be evaporated is placed in a small bank up water tank in- side the unit.
- Page 12 MAINTENANCE Note: Make sure power is off and the power cord is not plugged into an electrical outlet prior to performing any maintenance on the unit. Clean or replace filter - If the air filter is blocked with a dust, the airflow volume may reduce. It is recommended to clean the filter once every two weeks or as needed.
- Page 13 TROUBLESHOOTING PROBLEM POSSIBLE CAUSES SOLUTIONS • The Air Conditioner will not start The air conditioner is unplugged or not Make sure the air conditioner plug connected well. is pushed completely into the out- • Check the house fuse/circuit breaker box and replace the fuse The fuse is blown/circuit breaker is or reset the breaker.
- Page 14 TROUBLESHOOTING (CONT.) PROBLEM POSSIBLE CAUSES SOLUTIONS • The LED Display is showing “E5” Low Voltage Protection Unplug for 10 minutes and then turn on the unit. If “E5” is still dis- played, contact customer service. • The LED Display is showing “H8” The backup water tank is full Drain the water tank •...
- Page 15 One Year Limited Warranty Soleus International Inc. warrants the accompanying Soleus Air Powered by Gree Portable Air Conditioner to be free of defects in material and workmanship for the applications specified in its operation instruction for a period of ONE (1) year from the date of original retail purchase in the United States.
-
Page 16: Directives Importantes
Merci d'avoir choisi le climatiseur portable Gree de Soleus Air. Ce guide d’utilisation vous offre des renseignements importants pour la conservation et l’entretien de votre nouveau produit. Veuillez prendre quelques instants pour lire attentivement et vous familiariser avec les différents modes de fonctionnement de votre nouveau radiateur micathermique Soleus Air. -
Page 17: Cordon D'alimentation Idft Et Fiche
CORDON D'ALIMENTATION IDFT ET FICHE Ce climatiseur est équipé d'un cordon d'alimentation IDFT (interrupteur-détecteur de fuite à la terre) et d'une fiche conforme aux normes américaines du US National Electric Code 440,65. Ce cordon se compose de fils gainés et flexibles sans raccordement sur le côté de la charge et d'un adaptateur de fiche IDFT sur le côté ligne. -
Page 18: Illustration Du Produit
ILLUSTRATION DU PRODUIT Tableau de bord Guides des grilles d'aération Grilles d'aération Roulettes Support de télécommande Cordon d’alimentation Filtres Prise d'air supérieure Évent d'échappement Prise d'air inférieure d'air... -
Page 19: Contenu De L'emballage
• Si la température ambiante est plus élevée que la température de fonctionnement maximale ou inférieure à la température minimale de fonctionnement, le climatiseur peut ne pas fonctionner correctement. Numéro de modèle GL-PAC-08E4 Alimentation (Ph/V/Hz) 1/115/60Hz Capacité de déshumidification (litres/jour) Puissance nominale de la capacité... -
Page 20: Pièces Et Trousse D'assemblage De La Fenêtre
PIÈCES ET TROUSSE D'ASSEMBLAGE DE LA FENÊTRE PIÈCES TUYAU D'ÉCHAPPEMENT ET ADAPTATEURS Adaptateur du tuyau d'échappement Tuyau d'échappement Vis à bois (4) Tuyau Adaptateur Languette ajustable pour fenêtre (3) ASSEMBLAGE ET INSTALLATION INSTALLATION Lorsque l'unité fonctionne comme un climatiseur ou déshumidificateur, la trousse de fenêtre et le tuyau d'échappement doivent être installés. -
Page 21: Trousse D'installation Pour Un Tuyau Unique À La Fenêtre
TROUSSE D'INSTALLATION POUR UN TUYAU UNIQUE À LA FENÊTRE Installation de la trousse de ventilation POUR LES CLIMATISEURS PORTABLES AVEC TUYAU UNIQUE De s pr odui ts i nnova teur s pour un monde pl us pr opr e e t pl us c onfor ta ble La trousse de ventilation doit être installée pour que l’appareil fonctionne correctement au mode climatisation. -
Page 22: Affichage
TABLEAU DE BORD, AFFICHAGE ET MODE D'EMPLOI TABLEAU DE BORD ET AFFICHAGE DEL TÉMOIN LUMINEUX LORSQUE LE BAC EST PLEIN TÉMOIN REFROIDISSEMENT TÉMOIN SEC RÉCEPTEUR DE AFFICHAGE TÉMOIN LUMINEUX VENTILATEUR TÉLÉCOMMANDE BOUTON SÉLECTION TEMP. BOUTON ALIMENTATION MODE TABLEAU DE BORD, AFFICHAGE ET MODE D'EMPLOI 1) Mettre sous tension et hors tension - Appuyer une fois sur le bouton d'alimentation pour activer manuellement l'appareil sous tension. - Page 23 BOUTON D'ALIMENTATION BOUTON SÉLECTIONNER TEMP. BOUTON DE ROTATION BOUTON DU (Non disponible sur GL-PAC-08E4) VENTILATEUR BOUTON DE LA MINUTERIE BOUTON DE MISE EN VEILLE 1) Mettre sous tension et hors tension - Appuyer une fois sur le bouton d'alimentation pour activer manuellement l'appareil sous tension.
- Page 24 MODE D'EMPLOI DE LA TÉLÉCOMMANDE (suite) 5) Initialisation de la minuterie automatique : Lorsque la climatisation est à l'arrêt, l'appareil peut être réglé pour s'allumer automatiquement dans 30 minutes à 24 heures au mode et au réglage antérieur du ventilateur. Pour activer la minuterie automatique, appuyez sur le bouton TIMER du tableau de bord ou de la télécommande.
-
Page 25: Vidange Des Eaux Récupérées
VIDANGE DES EAUX RÉCUPÉRÉES Lorsque la température ou l'humidité est trop élevée, le climatiseur peut ne pas avoir la capacité d'évaporer toute l'eau aussi rapidement que nécessaire L'humidité qui n'est pas en mesure d'être évaporée est conservée dans un petit réservoir d'eau à l'intérieur de l'appareil. Lorsque le réservoir est rempli, une sonnerie retentit, le compresseur s'arrête et l'icône du bac plein s'allume sur le tableau de bord. -
Page 26: Entretien
ENTRETIEN Remarque : vérifiez que l'alimentation est hors tension et que le cordon d'alimentation n'est pas branché sur une prise électrique avant d'effectuer tout entretien sur l'appareil. Nettoyer ou remplacer le filtre - Si le filtre à air est obstrué par de la poussière, le volume d'air peut être réduit. -
Page 27: Dépannage
DÉPANNAGE SOLUTIONS PROBLÈME CAUSES POSSIBLES • Assurez-vous que la fiche du climatiseur est Le climatiseur ne démarre pas Le climatiseur n'est pas branché ou n'est pas entièrement insérée dans prise bien raccordé électrique. • Vérifier la boîte de fusibles ou de disjoncteurs et remplacer le fusible ou Le fusible est grillé... -
Page 28: Dépannage (Suite)
DÉPANNAGE (SUITE) SOLUTIONS PROBLÈME CAUSES POSSIBLES • Débrancher l'appareil pendant 10 minutes, L'afficheur DEL affiche « E5 » Protection contre la sous- puis rallumer. Si « E5 » est toujours tension allumé, communiquer avec le service à la clientèle. L'afficheur DEL affiche « H8 » Le réservoir d'eau est plein •... -
Page 29: Garantie
GARANTIE Garantie limitée d’une année Soleus International inc. garantit le climatiseur portable Gree contre tout défaut de fabrication, de pièces et de main- d’œuvre, si le climatiseur est utilisé conformément aux directives spécifiées dans ce guide d’utilisation, pour une période d’UNE (1) année à compter de la date de votre achat aux États-Unis. Si l’appareil présente un défaut de fabrication dans des conditions d’utilisation normale, Soleus International inc.