
Manuels Connexes pour ETRONIX PULSE EX3GPRO

Sommaire des Matières pour ETRONIX PULSE EX3GPRO
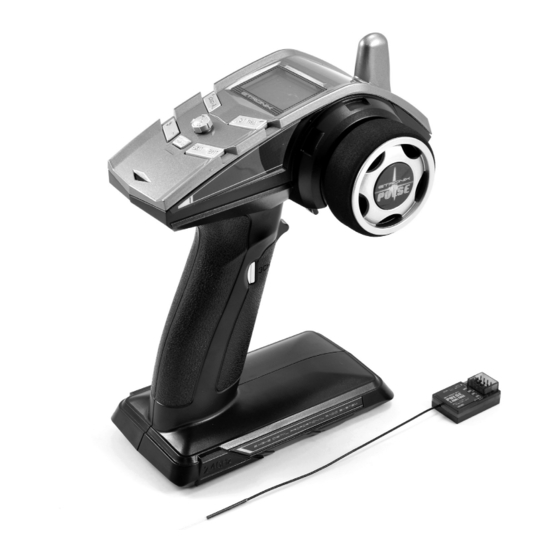
- Page 1 PULSE EX3GPRO FHSS 2.4GHZ RADIO SYSTEM INSTRUCTION MANUAL EN - PAGE 1 MANUEL D’INSTRUCTIONS FR - PAGE 12...
-
Page 2: Table Des Matières
Contents Introduction Support Safety Guidelines Transmitter Specifications Receiver Specifications Installation to Model Binding Main Screen Steering Dual Rate (ST. D/R) Menu Functions 10.1. End Point Adjustment (EPA) 10.2. Temperature* 10.3. Channel Reverse 10.4. Steering Curve 10.5. Throttle Curve 10.6. A.B.S 10.7. Model Memory 10.8. -
Page 3: Introduction
4.4v. The LED on the transmitter will flash blue and will be accompanied by a beeping sound. Please stop using your model immediately if the low voltage warning activates to prevent loss of control. 9. Etronix will not be held liable or responsible for any damages caused by the opera- tion of your radio-controlled model. -
Page 4: Transmitter Specifications
4. Transmitter Specifications • Channels: 3 • Model Type: Car/Boat/Other Surface Models • RF Range: 2.40 – 2.48GHz • Bands: 208 • RF Power Output: < 20dBm • Modulation Type: Frequency Hopping Spread Spectrum (FHSS) • Code Type: 2-FSK • Sensitivity: 1024 •... -
Page 5: Installation To Model
6. Installation To Model Electric Models Nitro Models... -
Page 6: Binding
7. Binding Transmitter/Receiver Binding 1. Turn on the transmitter while holding down the ‘3CH’ button located on the hand grip. Release the button when the LED on the transmitter starts flashing blue and you hear a beeping noise. The transmitter is now in it’s binding mode. 2. Turn on the receiver. The LED on the receiver will be flashing green slowly. Place the transmitter next to the receiver then press the ‘Bind’ button on the receiver until you see the green LED on the receiver flash rapidly then return to a slow flash. Release the button on the receiver. -
Page 7: Menu Functions
10. Menu Functions Navigating the menu: From the Main Screen press the ‘Enter’ key, then use the ‘+’ and ‘-‘ keys to select the function that you wish to use. Once selected use the ‘Enter’ key to access each sub menu, then use the ‘+’ and ‘-‘ keys to reach the setting you wish to change. Use the ‘Enter’... -
Page 8: Steering Curve
10.4 Steering Curve This is also sometimes referred to as Exponential. If the value is set to zero then the servo operation will be completely linear in proportion to the wheel movement on the transmitter. When the value is set to a negative number then the servo will be less responsive to wheel inputs around the centre of it’s travel, and more responsive at the end of it’s travel. -
Page 9: Model Memory
10.7 Model Memory The transmitter has 6 different memories to allow it to be used with multiple mod- els. Each memory has an individual bind to a receiver, so please follow the binding process when creating a new profile. If you need to purchase extra receivers to use in different models, the part number is ET1153. 10.8 Fail Safe When this is switched on the receiver will return the throttle servo or ESC to it’s pre- set position in the event that there is a loss of signal between the transmitter and... -
Page 10: Timer
10.10 Timer This can be set to either count upwards from zero or to count down to zero. When active, the timer will begin counting from the first throttle application, and an audible warning will be heard when the timer reaches the limit that has been set. The warning will sound for 10 seconds before stopping. 10.11 Battery Type This feature requires use of the optional ET1156 and ET1159 Telemetry parts for correct operation. -
Page 11: Channel Monitor
10.14 Channel Monitor This function is used to verify that the channel inputs are working correctly. You should see values of around 1500uS with the throttle trigger and steering wheel in their neutral positions, with values of around 1000uS and 2000uS with the throttle trigger and steering wheel at each end of their travel. -
Page 12: Fcc Statement
1. This device may not cause harmful interference. 2. This device must accept any interference received, including interference that may cause undesired operation. Etronix is an exclusive brand of CML Distribution Saxon House, Saxon Business Park, Hanbury Road, Bromsgrove, Worcestershire, B60 4AD England www.etronix-rc.com... - Page 13 PULSE EX3GPRO SYSTEME RADIO 2.4GHZ FHSS MANUEL D’INSTRUCTIONS Sommaire Introduction Support Mesures de sécurité Caractéristiques de la télécommande Caractéristiques du récepteur Montage du système Liaison (BIND) Ecran principal Dual Rate de la direction (ST. D/R) Fonctions dans le menu 13.1 Ajustement de la course des servos (EPA) 13.2...
-
Page 14: Introduction
1. Introduction Merci d’avoir choisi l’Etronix 3 voies en 2.4 Ghz qui intègre la technologie FHSS (Frequency-Hopping Spread Spectrum, en français : l’étalement de spectre par saut de fréquence) ; Qui est un système proportionnel digital qui est utilisé pour les RC voitures, bateaux, et autres modèles réduits. -
Page 15: Caractéristiques De La Télécommande
4. Caractéristiques de la télécommande • Nombre de voies : 3 • Type de modèles : Voiture / Bateau / Autres modèle réduit roulant • Plage des ondes : 2.40 – 2.48 GHz • Fréquence : 208 • Puissance des ondes en sortie : < 20 dBm •... -
Page 16: Montage Du Système
6. Montage du système Modèles électriques Modèles thermiques... -
Page 17: Ecran Principal
7. Liaison (BIND) Liaison de la télécommande et du récepteur 1. Allumez la télécommande tout en restant appuyé sur le bouton de la 3ème voie qui se situe au niveau du grip de la poignée. Lorsque la LED sur la télécommande com- mence à clignoter en bleu et qu’un « beep » est émis, vous pouvez lâcher le bouton. La télécommande est alors en mode de liaison. -
Page 18: Fonctions Dans Le Menu
10. Fonctions dans le menu Navigation dans le menu : Depuis l’écran principal, appuyez sur la touche « Enter », puis utilisez les touches « + » et « - » afin de sélectionner la fonction que vous souhaitez utiliser. Une fois dessus, appuyez de nouveau sur la touche « Enter » pour accéder au sous menu. Utilisez alors les touches « + » et « - » afin d’atteindre le réglage que vous souhaitez modifier. Pour modifier sa valeur, appuyez sur la touche « Enter » et utilisez les touches « + » et « - » pour choisir la valeur voulue et rappuyez sur « Enter » afin de la confirmer. À tout moment vous pouvez appuyer sur la touche « Exit » pour retourner dans le menu supérieur. Donc si vous souhaitez retourner sur le menu principal, il vous suffit d’ap- puyez sur la touche «... -
Page 19: Courbe De La Direction
10.4 Courbe de la direction Cette fonction peut aussi s’appeler exponentiel. Si sa valeur est réglée sur zéro, la course du servo de direction sera alors complétement linéaire, proportionnellement au mouvement du volant de la télécommande. Lorsque la valeur est négative, le servo est moins réactif aux mouvements du volant autour du neutre, mais il sera plus réactif aux mouvements du volant en fin de débattement. Inversement, si la valeur est posi- tive, le servo sera plus réactif aux mouvements du volant autour du neutre, mais il se... -
Page 20: Modèles En Mémoire
10.7 Modèles en mémoire La télécommande possède 6 emplacements mémoire afin que vous puissiez vous en servir avec différent modèles. Chaque profil en mémoire doit être individuellement lié (BIND) à un récepteur. Lorsque vous créez un nouveau profil, vous devez donc lier la télécommande avec le récepteur que vous allez utiliser. Si vous avez besoin d’acheter des récepteurs en plus pour les utiliser sur différent modèle, la référence du récepteur est : ET1153. 10.8 Fail Safe Cette fonction est primordiale. -
Page 21: Mixage Des Voies
10.9.3 Mixage des voies Cette fonction vous permet de brancher un deuxième servo ou ESC sur la 3ème voie du récepteur, et suivre les mouvements de la 2ème voie. Le sens de rotation de la voie 2 et de la voie 3 peuvent être réglés indépendamment grâce au sous menu d’inversion des servos. 10.10 Chronomètre Le chronomètre peut soit être régler pour chronométrer de 0 à... -
Page 22: Ajustement Des Voies / Calibration
10.13 Ajustement des voies / Calibration Avec le temps, la précision des potentiomètres utilisés dans la télécommande peut varier. La fonction de calibration permet de retrouver des valeurs correctes en prenant en compte ces écarts. Dans le menu sélectionnez « Calibration », puis appuyez sur la touche «... -
Page 23: Déclarations Fcc
2. Cet équipement doit accepter toute interférence reçue, ce qui inclut les interférenc- es qui peuvent entrainer des manipulations non voulues Etronix est une marque exclusive de CML Distribution Saxon House, Saxon Business Park, Hanbury Road, Bromsgrove, Worcestershire, B60 4AD England...