Table des Matières
Publicité
Les langues disponibles
Les langues disponibles
Liens rapides
90 AM
ISTRUZIONI PER L USO
DELL INTERRUTTORE CREPUSCOLARE
Operating instructiOns fOr phOtO-electric switch
Notice d'utilisatioN de l'iNterrupteur crépusculaire
instrucciOnes de empleO del interruptOr crepuscOlar
BedieNuNgsaNleituNg dämmeruNgsschalter
1 6 1 2 1 8 2 4
C 1
1 3 :4 8 :5 1
5 0 0
2
L U X
M E N U
2
1
1 0 0
R e s.
0
s e c
GW 96 891
Publicité
Chapitres
Table des Matières

Manuels Connexes pour Gewiss GW 96 891

Sommaire des Matières pour Gewiss GW 96 891
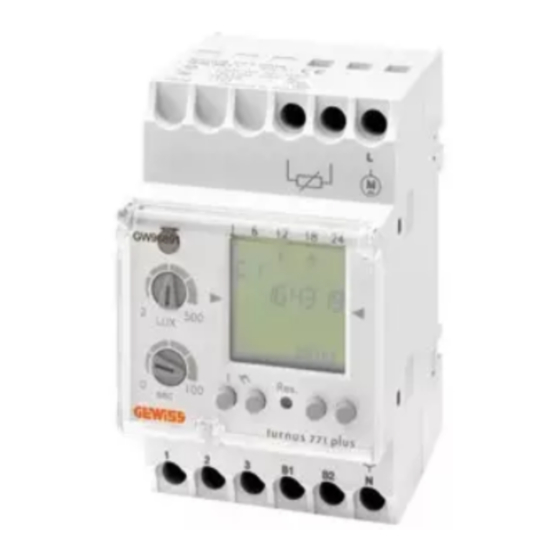
- Page 1 BedieNuNgsaNleituNg dämmeruNgsschalter 1 6 1 2 1 8 2 4 1 3 :4 8 :5 1 5 0 0 L U X M E N U 1 0 0 R e s. s e c GW 96 891...
-
Page 2: Table Des Matières
INDICE Avvertenze per la sicurezza e descrizione ..............Descrizione dell’apparecchio Uso conforme allo scopo d’impiego previsto Installazione e montaggio ..................... Montaggio su guida DIN Collegamento e montaggio del sensore di luminosità Schema di collegamento Messa in funzione Comando ed impostazione .................... Indicazione sul display e tasti di funzione Struttura del menu Prima messa in funzione –... -
Page 3: Descrizione Dell'apparecchio
AVVERTENZE E DESCRIZIONE PERICOLO DI MORTE PER SCOSSA ELETTRICA! Il collegamento e il montaggio vanno eseguiti eclusivamente da un elettricista specializzato! ● Osservare le direttive nazionali e le condizioni per la sicurezza! ● Qualsiasi intervento o modifica all’apparecchio comporta la cessazione immediata della garanzia. -
Page 4: Installazione E Montaggio
INSTALLAZIONE E MONTAGGIO PERICOLO DI MORTE PER SCOSSA ELETTRICA! Il collegamento e il montaggio vanno eseguiti eclusivamente da un elettricista specializzato! Montaggio su guida DIN Collocare l’apparecchio dall’alto in posizione leggermente inclinata sulla guida Spingerlo poi indietro finché non si incastri. Collegamento e montaggio del sensore di luminosità... -
Page 5: Schema Di Collegamento
INSTALLAZIONE E MONTAGGIO Schema di collegamento Se il sensore viene collegato ai morsetti + e –, si deve collegare anche un jumper tra i morsetti B1 e B2. Se vengono utilizzati vari apparecchi con un sensore, questo jumper deve essere collegato solo su un apparecchio. 1 canale 2 3 + –... -
Page 6: Comando Ed Impostazione
COMANDO ED IMPOSTAZIONE Indicazione sul display e tasti di funzione • La riga centrale del display che indica i valori da impostare e le voci del menu da visualizzare viene visualizzata in misura più grande. • Il segno lampeggiante significa che è richiesta un’immissione. Se non viene fatta alcuna immissione entro due minuti, l’orologio torna al funzionamento automatico •... - Page 7 COMANDO ED IMPOSTAZIONE C 3 righe del display D Indicazione del giorno della settimana E Panoramica del programma di attivazione giornaliera F Indicazione dell’ora legale/solare G Tensione di esercizio (punti permanenti) Funzionamento a riserva di carica (punti lampeggiano) H Indicazioni delle funzioni dei due tasti a destra Tasti/Interruttori I Reset J Tasti a destra...
-
Page 8: Struttura Del Menu
COMANDO ED IMPOSTAZIONE Struttura del menu MENU PROGR ORA LEG 12H 24H NUOVO AUTO CANCELLA AM PM REVIS CALIBRA LINGUA DATA ORA ENGLISH FRANCAIS Prima messa in funzione - Selezione della lingua del menu Al momento di consegna, il timer è in funzionamento automatico con preimpostazione dell’ora, della data (CET) e della lingua inglese. -
Page 9: Impostazione Della Data E Dell'ora
COMANDO ED IMPOSTAZIONE Impostazione della data e dell’ora MENU Nel menu 12H 24H si può scegliere l’indicazione DATA ORA AM/PM o di 12/24 ore. ANNO MESE GIORNO MINUTI Cambio ora legale/solare MENU Sono possibili le seguenti impostazioni: ORA LEG AUTO CALIBRA Preimpostazione di fabbrica secondo le EST INIZ MESE... -
Page 10: Generazione Del Programma
COMANDO ED IMPOSTAZIONE Generazione del programma MENU *) È disponibile solo se i giorni singoli sono PROGR NUOVO stati selezionati per il SELEZ CANALE comando ON. GIORNO CH ON ORE CH ON MINUTI CH ON GIORNO CH OFF ORE CH OFF MINUTI CH OFF SALVATO P01 P02... -
Page 11: Visualizzazione E Modifica Del Programma
COMANDO ED IMPOSTAZIONE Visualizzazione e modifica del programma MENU PROGR REVIS EDT/OK EDT/OK si può scorrere nei passi del programma. • Con • Premere OK per passare al prossimo programma. • Premere EDT per modificare il programma in questione. La procedura corrisponde alla generazione di un programma nuovo. -
Page 12: Funzionamento Manuale/Automatico
COMANDO ED IMPOSTAZIONE CANCELLARE SINGOLI PROGRAMMI • Se vengono cancellati singoli programmi, vengono cancellati tutti i passi di programma corrispondenti (ad es P01 ON e P02 OFF). • Premere OK per passare al prossimo programma. CANCELLA TUTTO DEL/OK SICURO Funzionamento manuale/automatico •... -
Page 13: Smaltimento Riciclaggio
SMALTIMENTO RICICLAGGIO Il materiale d’imballaggio va eliminato correttamente in conformità alle disposi- zioni e normative di legge. Per lo smaltimento di componenti del sistema guasti o del sistema stesso dopo la durata utile del prodotto vanno rispettate le seguenti indicazioni: •... -
Page 14: Dati Tecnici
DATI TECNICI Potere di interruzione: carico ohmico 16 A / 250 V AC carico induttivo cos 10 A / 250 V AC Carico di lampade a 2600W incandescenza/alogene Lampada fluorescente 1000W Potere max di interruzione 3700W / 750W AC1 / AC15 Temperatura ambiente: Apparecchio di regolazione / -10°C... - Page 15 E N G L I S H...
- Page 16 CONTENTS Safety instructions and product description..............17 Product description Intended use Installation and assembly ..................... 18 Assembly on DIN-rail Connecting and mounting the brightness sensor Wiring diagram Set-up Operation and adjustment ..................... 20 Display and function keys Menu structure Initial start-up – Language menu Date and time setting Daylight Saving Time New program...
-
Page 17: Safety Instructions And Product Description
SAFETY INSTRUCTIONS AND PRODUCT DESCRIPTION DANGER! RISK OF ELECTRIC SHOCK! Connection and mounting must be realized by a professional electrician! ● Please observe the national regulations and safety instructions. ● Interferences and changes to the device will invalidate the warranty and guaranty rights. -
Page 18: Installation And Assembly
INSTALLATION AND ASSEMBLY DANGER! RISK OF ELECTRIC SHOCK! Connection and mounting must be realized by a professional electrician! Assembly on DIN-rail Put the device slightly inclined on top of the rail. Then push it backwards until it engages. Connecting and mounting the brightness sensor ●... -
Page 19: Wiring Diagram
INSTALLATION AND ASSEMBLY Wiring diagram If you connect the sensor to the + and - terminals, you must connect a jumper between terminals B1 and B2. If you operate several devices on one sensor, this jumper may only be used for one device. 1 channel 2 3 + –... -
Page 20: Operation And Adjustment
OPERATION AND ADJUSTMENT Display and function keys • The central line of the display, in which the adjusted values and selected menu items are displayed, is displayed larger. • Flashing means that an entry is required If you do not enter anything within two minutes, the timer switches back to automatic operation. - Page 21 OPERATION AND ADJUSTMENT C 3-line LCD display D Day-of-week display E Overview of daily switching program F Indicates Dailight Saving Time G Operating voltage (permanently lit dots) Reserve power operation (dots flash) H Function displays of the two right-hand buttons Tasti/Interruttori I Reset J Right-hand buttons...
-
Page 22: Menu Structure
OPERATION AND ADJUSTMENT Menu structure MENU PROGRAM DAYLIGHT 12H 24H AUTO DELETE AM PM REVIEW CALIBRAT LANGUAGE DATETIME ENGLISH FRANCAIS Initial start-up – Language menu When delivered, the timer is in automatic mode with preset time, date (CET) and menu in English. Press the Menu button to make settings. -
Page 23: Date And Time Setting
OPERATION AND ADJUSTMENT Date and time setting MENU In the menu 12H 24H DATETIME you can choose between YEAR AM/PM and 12/24-hour MONTH announcement. HOURS MINUTES Daylight Saving Time MENU The following settings are possible: DAYLIGHT AUTO CALIBRAT Factory presetting of the published SU STRT MONTH calendar dates (CET). -
Page 24: New Program
OPERATION AND ADJUSTMENT New program MENU PROGRAM Available only individual days have been SELECT CHL selected for the ON DAY CHL ON H CHL ON command. MIN CHL ON DAY CHL OFF H CHL OFF MIN CHL OFF SAVED P01 P02 1. -
Page 25: View And Edit Programs
OPERATION AND ADJUSTMENT View and edit programs MENU PROGRAM REVIEW EDT/OK EDT/OK to scroll through the different program steps. • Press • Press OK to get to the next program. • Press EDT to edit a program. This procedure is similar to creating a new program. Delete program DELETE ALL PROGRAMS •... -
Page 26: Switching Mode
OPERATION AND ADJUSTMENT DELETE INDIVIDUAL PROGRAMS • For deleting individual programs, all belonging program steps are deleted (e.g. P01 ON and P02 OFF). • Press OK to get to the next program. DELETE DEL/OK CONFIRM Switching mode • Manual switch: duration ON / duration OFF / automatic mode. •... -
Page 27: Disposal Recycling
DISPOSAL RECYCLING Dispose of the packing material correctly according to legal requirements and re- gulations. Observe the following notes for disposing of defective system components or the system after its service life: • Dispose of appropriately, i.e. separating the parts to be disposed of according to material groups. -
Page 28: Technical Data
TECHNICAL DATA AC switching capacity: Ohmic load 16 A / 250 V AC Inductive load cos 10 A / 250 V AC Incandescent/halogen lamp load 2600W Fluorescent lamp 1000W Rated load AC1 / AC15 3700W / 750W Ambient temperature: Control unit / Brightness sensor -10°C... - Page 29 F R A N Ç A I S...
- Page 30 SOMMAIRE Consignes de sécurité et description ................31 Description de l'appareil Utilisation conforme à l'emploi prévu Installation et montage....................32 Montage uniquement sur rail DIN Raccordement et montage du capteur de luminosité Schéma de raccordement Mise en service Utilisation et réglage ...................... 34 Affichage et touches fonction Structure du menu Première mise en service –...
-
Page 31: Consignes De Sécurité Et Description
CONSIGNES DE SÉCURITÉ ET DESCRIPTION DANGER DE MORT PAR ELECTROCUTION! Le raccordement et le montage ne doivent être effectués que par des électriciens qualifiés! ● Respectez les prescriptions et consignes de sécurité nationales. ● Toute intervention ou modification sur l'appareil entraîne la perte de la garantie. -
Page 32: Installation Et Montage
INSTALLATION ET MONTAGE DANGER DE MORT PAR ELECTROCUTION! Le raccordement et le montage ne doivent être effectués que par des électriciens qualifiés! Montage uniquement sur rail DIN Placer l'appareil légèrement en biais par le haut sur le rail Pousser ensuite vers l'arrière jusqu'à... -
Page 33: Schéma De Raccordement
INSTALLATION ET MONTAGE Schéma de raccordement Lors du raccordement du capteur aux bornes + et –, vous devez également établir un pont entre les bornes B1 et B2. Si plusieurs appareils fonctionnent avec un capteur, ce pont ne peut être établi que sur un appareil. 1 canal 2 3 + –... -
Page 34: Utilisation Et Réglage
UTILISATION ET RÉGLAGE Affichage et touches fonction • La ligne d'écran intermédiaire indiquant les valeurs à régler et les points de menu à sélectionner est représentée en grand format. • Le clignotement signale une entrée nécessaire. Si aucune entrée n'est effectuée en l'espace de deux minutes, l'horloge retourne en mode automatique. - Page 35 UTILISATION ET RÉGLAGE Affichage à 3 lignes Affichage du jour de la semaine Vue d'ensemble programme de commutation journalier Affichage heure d'été /heure d'hiver Tension de service (points permanents) Mode réserve de marche (points clignotent) Affichages de la fonction des deux touches droites Touches/interrupteur I Reset J Touches droites...
-
Page 36: Structure Du Menu
UTILISATION ET RÉGLAGE Structure du menu MENU HEUR E H PROGRAMM 12H 24H NOUVEAU AUTO SUPPRIM AM PM REVISION CALIBRER LANGUE DATE HMP ENGLISH FRANCAIS Sélection de la langue de menu À la livraison, l'horloge de distribution est en mode automatique avec heure, date préréglées (heure européenne) et avec l'anglais comme langue de menu. -
Page 37: Régler La Date Et L'heure
UTILISATION ET RÉGLAGE Régler la date et l’heure MENU Dans le menu 12H 24H, DATE HMP vous pouvez sélectionner ANNEE entre AM/PM et l'affichage MOIS 12/24. JOUR HEURES MINUTES Passage heure d’été / d’hiver MENU Les réglages suivants sont possibles: Ç... -
Page 38: Créer Le Programme
UTILISATION ET RÉGLAGE Créer le programme MENU *) ne peut être PROGRAMM sélectionné que si, NOUVEAU pour une instruction SELECT CAN JOUR CAN ON MARCHE, des jours H CAN ON individuels sont MIN CAN ON sélectionnés. JOUR CAN OFF H CAN OFF MIN CAN OFF SAUVEGAR P01 P02... -
Page 39: Regarder Et Éditer Un Programme
UTILISATION ET RÉGLAGE Regarder et éditer un programme MENU PROGRAMM REVISION EDT/OK EDT/OK , vous pouvez faire défiler les étapes du programme. • Avec • Appuyez sur OK pour passer au prochain programme. • Appuyez sur EDT pour éditer le programme correspondant. La procédure correspond à... -
Page 40: Mode Automatique/ Manuel
UTILISATION ET RÉGLAGE SUPPRIMER LES PROGRAMMES INDIVIDUELS • Lors de la suppression des programmes individuels, toutes les étapes de programme correspondantes sont supprimées (par exemple P01 MARCHE et P02 ARRÊT). • Appuyez sur OK pour passer au prochain programme. CANCELLA TUTTO DEL/OK SICURO... -
Page 41: Elimination Des Déchets Recyclage
ELIMINATION DES DÉCHETS RECYCLAGE Le matériel d'emballage doit être éliminé correctement selon les dispositions et réglementations légales. Pour l'élimination des composants du système défectueux ou du système après la durée de vie du produit, veuillez respecter les consignes suivantes: • Eliminez correctement, c a d séparément selon les groupes de matériaux des pièces à... -
Page 42: Donnees Techniques
DONNEES TECHNIQUES Pouvoir de coupure: Charge ohmique 16 A / 250 V AC Charge inductive cos 10 A / 250 V AC Charge/lampe à incandescence/ 2600W lampe halogène Lampe fluorescente 1000W Pouvoir de coupure maximal 3700W / 750W AC1 / AC15 Température ambiante: Appareil de commande / -10°C... - Page 43 E S P A Ñ O L...
- Page 44 ÍNDICE Instrucciones de seguridad y descripción ..............45 Descripción del aparato Utilización conforme a las especificaciones Instalación y montaje..................... 46 Montaje en carril DIN Conexión y montaje del sensor de luminosidad Esquema de conexión Puesta en marcha Manejo y ajuste....................... 48 Visualizaciones en la pantalla y teclas de funciones Estructura del menú...
-
Page 45: Instrucciones De Seguridad Y Descripción
INSTRUCCIONES DE SEGURIDAD Y DESCRIPCIÓN ¡PELIGRO DE MUERTE POR ELECTROCUCIÓN! ¡La conexión y el montaje deben realizarse por un electricista profesional! ● Respetar las normativas nacionales e instrucciones de seguridad. ● Las manipulaciones y modificaciones en el aparato eximen del derecho de garantía. -
Page 46: Instalación Y Montaje
INSTALACIÓN Y MONTAJE ¡PELIGRO DE MUERTE POR ELECTROCUCIÓN! ¡La conexión y el montaje deben realizarse por un electricista profesional! Montaje en carril DIN Colocar el aparato ligeramente inclinado por encima del carril. Después empujarlo hacia atrás hasta que enganche. Conexión y montaje del sensor de luminosidad ●... -
Page 47: Esquema De Conexión
INSTALACIÓN Y MONTAJE Esquema de conexión Después de conectar el sensor a los bornes + y - debe montarse un jumper entre los bornes B1 y B2. Si se utilizan varios aparatos con un solo sensor, este jumper debe montarse sólo en un aparato. 1 canal 2 3 + –... -
Page 48: Manejo Y Ajuste
MANEJO Y AJUSTE Visualizaciones en la pantalla y teclas de funciones • La línea central de la pantalla, con los valores ajustados y los puntos de menú seleccionados, se visualiza en grande. • Una entrada es necesaria si parpadea. Si no se realiza ninguna entrada dentro de dos minutos, el reloj vuelve al modo automático. - Page 49 MANEJO Y AJUSTE 3 líneas de la pantalla Día de la semana Vista general del programa de activación diaria Horario de verano/invierno Tensión de servicio (puntos permanentes) Modo de reserva de cuerda (puntos parpadean) Funciones de los dos botones a la derecha Teclas/botones Reset Botones a la derecha...
-
Page 50: Estructura Del Menú
MANEJO Y AJUSTE Estructura del menú MENU PROGRAMA VERA INV 12H 24H NUEVO AUTO BORRAR AM PM REVISAR AJUSTAR IDIOMA FECH HOR ENGLISH FRANCAIS Selección del idioma del menú Al entregar el temporizador está ajustado el modo automático con hora (CET) y fecha preajustadas y el menú... -
Page 51: Ajustar La Hora Y La Fecha
MANEJO Y AJUSTE Ajustar la hora y la fecha MENU En el menú 12H 24H FECH HOR puede seleccionarse entre la visualización AM/PM y la visualización HORAS de 12/24 horas. MINUTOS Horario de verano / invierno Los siguientes ajustes son posibles: MENU AUTO VERA INV... -
Page 52: Crear Programa
MANEJO Y AJUSTE Crear programa MENU PROGRAMA *) Sólo está disponible NUEVO después de haber SELECC CANAL seleccionado días DIA CAN ON individuales en el HORAS CAN ON comando CON. MIN CAN ON DIA CAN OFF HORAS CAN OFF MIN CAN OFF GUARDADO P01 P02 1. -
Page 53: Visualizar Y Editar Programa
MANEJO Y AJUSTE Visualizar y editar programa MENU PROGRAMA REVISAR EDT/OK EDT/OK para hojear los pasos del programa. • Pulsar • Pulsar OK para abrir el siguiente programa. • Pulsar EDT para modificar el programa activo. El procedimiento es idéntico a la creación de un nuevo programa. Borrar programas BORRAR TODOS LOS PROGRAMAS •... -
Page 54: Modo Automático/Manual
MANEJO Y AJUSTE BORRAR PROGRAMAS INDIVIDUALES • Si se borran programas individuales, se borran también todos los pasos del programa (p. ej. ON P01 y OFF P02). • Pulsar OK para abrir el siguiente programa. BORRAR TODO DEL/OK CONFIRM Modo automático/manual •... -
Page 55: Eliminación Reciclaje
ELIMINACIÓN RECICLAJE El material de embalaje debe eliminarse adecuadamente conforme a las disposi- ciones y normativas legales. Tener en cuenta las siguientes indicaciones relativas a la eliminación de compo- nentes defectuosos o del sistema después de su vida útil: • Eliminar adecuadamente, es decir separar las piezas a eliminar según los grupos de material. -
Page 56: Datos Técnicos
DATOS TÉCNICOS Potencia de ruptura: Carga óhmica 16 A / 250 V AC Carga inductiva cos 10 A / 250 V AC Carga de lámpara incandescente/ 2600W lámpara de halógeno Lámpara fluorescente 1000W Potencia de ruptura máx 3700W / 750W AC1 / AC15 Temperatura ambiental: Regulador / sensor de... - Page 57 D E U T S C H...
- Page 58 INHALTSVERZEICHNIS Sicherheitshinweise und Beschreibung ................59 Gerätebeschreibung Bestimmungsgemäße Verwendung Installation und Montage....................60 Montage auf DIN-Schiene Anschluss und Montage des Helligkeitssensor Anschlussplan Inbetriebnahme Bedienung und Einstellung.................... 62 Display-Anzeige und Funktionstasten Menustruktur Erstinbetriebnahme – Wahl der Menusprache Datum und Uhrzeit einstellen Umschalten Sommer-/Winterzeit Programm erstellen Programm anschauen und bearbeiten...
-
Page 59: Sicherheitshinweise Und Beschreibung
SICHERHEITSHINWEISE UND BESCHREIBUNG LEBENSGEFAHR DURCH ELEKTRISCHEN SCHLAG! Anschluss und Montage ausschließlich durch Elektrofachkraft! ● Beachten Sie die nationalen Vorschriften und Sicherheitsbedingungen. ● Eingriffe und Veränderungen am Gerät fuhren zum Erlöschen der Gewährleistung und Garantie. ● Mindestdurchmesser der flexiblen Leitungen fur die Anschlussklemmen: Maximaldurchmesser: 4mm Lesen und beachten Sie diese Anleitung, um eine einwandfreie Funktion des Ge- rätes und ein sicheres Arbeiten zu gewährleisten. -
Page 60: Installation Und Montage
INSTALLATION UND MONTAGE LEBENSGEFAHR DURCH ELEKTRISCHEN SCHLAG! Anschluss und Montage ausschließlich durch Elektrofachkraft! Montage auf DIN-Schiene Gerät leicht schräg von oben auf die Schiene setzen. Anschließend nach hinten drucken, bis es einrastet. Anschluss und Montage des Helligkeitssensor ● Länge des Anschlusskabels: max 100 m ●... -
Page 61: Anschlussplan
INSTALLATION UND MONTAGE Anschlussplan Beim Anschluss des Sensors an die Klemmen + und –, mussen Sie auch zwischen den Klemmen B1 und B2 eine Brucke machen. Wenn Sie mehrere Geräte mit einem Sensor betreiben, darf diese Brucke nur an einem Gerät gemacht werden. 1 Kanal 2 3 + –... -
Page 62: Bedienung Und Einstellung
BEDIENUNG UND EINSTELLUNG Display-Anzeige und Funktionstasten • Die mittlere Zeile des Displays, welche die einzustellenden Werte und auszuwählenden Menupunkte zeigt, wird groß dargestellt. • Blinken signalisiert eine notwendige Eingabe Erfolgt innerhalb von zwei Minuten keine Eingabe, kehrt die Uhr in den Automatikbetrieb zuruck. •... - Page 63 BEDIENUNG UND EINSTELLUNG 3 Display-Zeilen Wochentaganzeige Übersicht Tagesschaltprogramm Anzeige Sommer-/Winterzeit Betriebsspannung (permanente Punkte) Gangreservebetrieb (Punkte blinken) Funktionsanzeigen der beiden rechten Tasten Tasten/Schalter I Reset J Rechte Tasten K Linke Tasten mit Handschalterfunktion im Automatikbetrieb L Einstellknopf EIN-/AUS-Schaltverzögerung M Einstellknopf Luxwert N Schaltzustandsanzeige unverzögert Funktionsanzeigen der beiden linken Tasten: im Menu nach oben blättern...
-
Page 64: Menustruktur
BEDIENUNG UND EINSTELLUNG Menustruktur MENU PROGRAMM SO WI 12H 24H AUTO LOESCHEN AM PM NEIN LESEN SPRACHE DAT/ZEIT ENGLISH FRANCAIS Erstinbetriebnahme – Wahl der Menusprache Im Auslieferungszustand befindet sich die Verteilerschaltuhr im Automatikbetrieb mit voreingestellter Uhrzeit, Datum (MEZ) und englischer Menusprache. Um Einstellungen vorzunehmen, drucken Sie die Menu-Taste. -
Page 65: Datum Und Uhrzeit Einstellen
BEDIENUNG UND EINSTELLUNG Datum und Uhrzeit einstellen MENU Im Menu 12H 24H können Sie zwischen AM/PM und DAT/ZEIT JAHR der 12/24-Stunden-Anzeige MONAT wählen. STUNDEN MINUTEN Umschalten Sommer-/Winterzeit MENU Folgende Einstellungen sind möglich: SO WI AUTO Werksseitige Voreistellung der gesetzli- SO ANF MONAT chen Vorgabe (MEZ). -
Page 66: Programm Erstellen
BEDIENUNG UND EINSTELLUNG Programm erstellen MENU *) Steht nur zur Auswahl, PROGRAMM wenn EIN-Befehl Einzeltage ausgewählt AUSWAHL KAN werden. TAG KAN EIN H KAN EIN MIN KAN EIN TAG KAN AUS H KAN AUS MIN KAN AUS SICHERN P01 P02 1. -
Page 67: Programm Anschauen Und Bearbeiten
BEDIENUNG UND EINSTELLUNG Programm anschauen und bearbeiten MENU PROGRAMM LESEN EDT/OK EDT/OK können Sie die Programmschritte durchblättern. • Mit • Drucken Sie OK um zum nächsten Programm zu kommen. • Drucken Sie EDT um das jeweilige Programm zu bearbeiten. Die Vorgehensweise entspricht dem Anlegen eines neuen Programms. -
Page 68: Automatischer/Manueller Betrieb
BEDIENUNG UND EINSTELLUNG EINZELNE PROGRAMME LÖSCHEN • Beim Löschen einzelner Programme werden alle dazugehörigen Program- mschritte gelöscht (z B P01 EIN und P02 AUS). • Drucken Sie OK um zum nächsten Programm zu kommen. LOESCHEN ALLE DEL/OK SICHER Automatischer/manueller Betrieb •... -
Page 69: Entsorgung Recycling
ENTSORGUNG RECYCLING Das Verpackungsmaterial ist nach den gesetzlichen Bestimmungen und Veror- dnungen sachgerecht zu entsorgen. Fur die Entsorgung defekter Systemkomponenten oder des Systems nach der Produktlebensdauer beachten Sie bitte folgende Hinweise: • Entsorgen Sie fachgerecht, d h getrennt nach Materialgruppen der zu entsor- genden Teile. -
Page 70: Technische Daten
TECHNISCHE DATEN Schaltleistung: ohmsche Last 16 A / 250 V AC induktive Last cos 10 A / 250 V AC Gluh-/Halogenlampenlast 2600W Leuchtstofflampe 1000W Max Schaltleistung 3700W / 750W AC1 / AC15 Umgebungstemperatur: Steuergerät / Helligkeitssensor -10°C... + 55°C / -30°C... + 70°C Schutzart: Steuergerät / Helligkeitssensor IP 20 / IP 65... - Page 71 N O T...
- Page 72 According to article 9 paragraph 2 of the European Directive 2004/108/EC and to article R2 paragraph 6 of the Decision 768/2008/EC, the responsible for placing the apparatus on the Community market is: GEWISS S.p.A Via A. Volta, 1 - 24069 Cenate Sotto (BG) Italy Tel: +39 035 946 111 Fax: +39 035 945 270 E-mail: qualitymarks@gewiss.com +39 035 946 111 sat@gewiss.com...