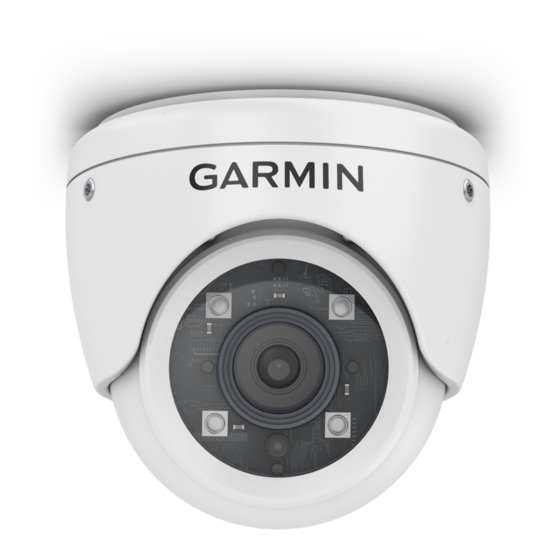
Table des Matières
Publicité
Les langues disponibles
Les langues disponibles
Liens rapides
GC
™
Garmin
®
and the Garmin logo are trademarks of Garmin Ltd. or its subsidiaries, registered in the USA and other countries. GC
used without the express permission of Garmin.
Pozidriv
is a trademark of the American Screw Company.
®
200 IP MARINE CAMERA
2
4
6
8
10
12
14
16
™
is a trademark of Garmin Ltd. or its subsidiaries. These trademarks may not be
June 2019
190-02485-90_0B
Publicité
Table des Matières

Sommaire des Matières pour Garmin GC 200
-
Page 1: Table Des Matières
Installationsinstruktioner Garmin ® and the Garmin logo are trademarks of Garmin Ltd. or its subsidiaries, registered in the USA and other countries. GC ™ is a trademark of Garmin Ltd. or its subsidiaries. These trademarks may not be used without the express permission of Garmin. -
Page 2: Installation Instructions
• You should test the camera in the selected location before To avoid permanently damaging the camera, do not connect the you permanently mount the camera. camera directly to a 24 Vdc system. You must use a Garmin Power • You can use the Garmin ®... - Page 3 74 +/- 3 degrees Infrared distance 30 m (98.4 ft.) Compass-safe distance 10 cm (4 in.) The device withstands incidental exposure to water of up to 1 m for up to 30 min. For more information, go to www.garmin.com/waterrating. Installation Instructions...
-
Page 4: Instructions D'installation
Câble Garmin Marine Network petit connecteur (inclus) Outils requis • Perceuse et foret de 2 mm ( ’’) Câble adaptateur petit à grand pour le réseau Garmin Marine Network (inclus) • Tournevis Pozidriv Source d'alimentation de 9 à 18 V c.c. (non incluse) Montage de la caméra... - Page 5 Schéma de branchement avec un module d'alimentation Garmin GC 200Caméra IP marine GC 200 Câble Garmin Marine Network petit connecteur Module d'alimentation (010-12527-00 non inclus) Interrupteur (non inclus) Source d'alimentation de 9 à 32 V c.c. (non incluse) Traceur (non inclus) Voyant LED d'état de la caméra...
-
Page 6: Istruzioni Di Installazione
• È necessario testare la videocamera nella posizione selezionata prima di installare definitivamente la videocamera. • È possibile utilizzare il modulo di alimentazione Garmin per semplificare l'installazione. Il modulo di alimentazione utilizza un unico cavo per videocamera anziché cavi separati di alimentazione ed Ethernet. - Page 7 Schema di collegamento con un modulo di alimentazione Garmin Videocamera IP per la nautica GC 200 Connettore piccolo del cavo Garmin Marine network Modulo di alimentazione (010-12527-00, non incluso) Switch in-line (non incluso) Fonte di alimentazione da 9 o 32 V cc (non inclusa)
-
Page 8: Installationsanweisungen
Sicherheitsabstand zum Kompass eingehalten werden. • Testen Sie die Kamera am ausgewählten Montageort, bevor Sie sie fest anbringen. • Sie können das Garmin Strommodul verwenden, um die Installation zu vereinfachen. Für das Strommodul ist nur ein einzelnes Kamerakabel erforderlich anstelle separater Netz- und Netzwerkkabel. - Page 9 Schaltplan für den Anschluss an ein Garmin Strommodul GC 200 Marine-IP-Kamera Garmin Marinenetzwerkkabel mit kleinem Anschluss Strommodul (010-12527-00; nicht im Lieferumfang enthalten) Leitungsschalter (nicht im Lieferumfang enthalten) Gleichstromquelle, 9 bis 32 V (nicht im Lieferumfang enthalten) Kartenplotter (nicht im Lieferumfang enthalten)
-
Page 10: Instrucciones De Instalación
24 V de CC. Utiliza un módulo de alimen- tación de Garmin para realizar la conexión a un sistema de 24 V de Retira la base del cuerpo de la cámara. - Page 11 Diagrama de conexión con un módulo de alimentación de Garmin GC 200Cámara IP náutica GC 200 Conector pequeño del cable de red Garmin Módulo de alimentación (010-12527-00, no incluido) Interruptor en línea (no incluido) Fuente de alimentación de 9 a 32 V de CC (no incluida) Plotter (no incluido) LED de estado de la cámara...
-
Page 12: Installationsvejledning
For at undgå varig skade på kameraet, skal du undlade at slutte • Du kan bruge Garmin strømmodulet til at gøre installationen kameraet direkte til et 24 V DC-system. Du skal bruge et Garmin nemmere. Strømmodulet bruger et enkelt kamerakabel i strømmodul ved tilslutning til et 24 V DC-system. - Page 13 74 +/- 3 grader Infrarød afstand 30 m (98,4 ft.) Sikkerhedsafstand for kompas 10 cm (4 tommer) Enheden tåler hændelig udsættelse for vand op til 1 meter i op til 30 minutter. Du kan finde flere oplysninger på www.garmin.com/waterrating. Installationsvejledning...
-
Page 14: Installeringsinstruksjoner
Ikke koble kameraet til et system med 24 V likestrøm for å unngå • Du kan bruke Garmin strømmodulen for å gjøre monteringen permanent skade på kameraet. Du må bruke en Garmin strøm- enklere. Strømmodulen brukes med én kamerakabel i stedet modul når du kobler til et system med 24 V likestrøm. - Page 15 Vertikal visningsvinkel 74 +/- 3 grader Infrarød avstand 30 m (98,4 fot) Trygg kompassavstand 10 cm (4 tommer) Enheten tåler utilsiktet kontakt med vann ned til 1 meter i opptil 30 minutter. Du finner mer informasjon på www.garmin.com /waterrating. Installeringsinstruksjoner...
-
Page 16: Installationsinstruktioner
• Prova kameran på den önskade platsen innan du monterar Ansluta inte kameran direkt till ett 24 V-likströmssystem för att kameran permanent. undvika att skada den permanent. Du måste använda en Garmin • Du kan använda Garmin strömmodulen för att underlätta strömmodul när du ansluter till ett 24 V-likströmssystem. - Page 17 74 +/- 3 grader Avstånd infraröd strålning 30 m (98,4 fot.) Säkerhetsavstånd till kompass 10 cm (4 tum) Enheten tål tillfällig exponering för vatten på upp till 1 m djup i upp till 30 min. Mer information hittar du på www.garmin.com /waterrating. Installationsinstruktioner...
- Page 18 © 2018 Garmin Ltd. or its subsidiaries support.garmin.com...

