Publicité
Liens rapides
Guide d'assemblage
Assembly Guide
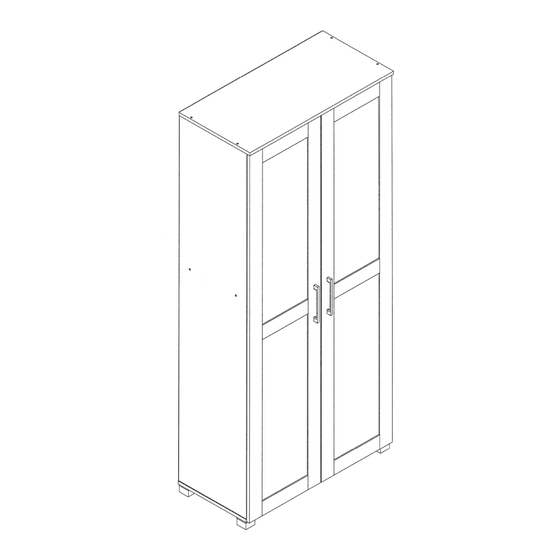
Armoire de rangement
Storage Cabinet
1012486-1012487
MISE EN GARDE : Pour effectuer l'assemblage de ce produit,
assurez-vous de porter l'équipement de protection qui convient.
WARNING : For the assembly of this product, make sure you wear adequate protective gear.
Fabriqué et emballé en Malaisie/ Made and Packaged in Malaysia
Importé par / Imported by NOVELCA Québec, Canada G2E 5W2
Publicité

Manuels Connexes pour VERTUO Armoire de rangement 1012486


Sommaire des Matières pour VERTUO Armoire de rangement 1012486
- Page 1 Guide d’assemblage Assembly Guide Armoire de rangement Storage Cabinet 1012486-1012487 MISE EN GARDE : Pour effectuer l’assemblage de ce produit, assurez-vous de porter l’équipement de protection qui convient. WARNING : For the assembly of this product, make sure you wear adequate protective gear. Fabriqué...
-
Page 2: Ne Pas Utiliser
MISE EN GARDE Le non-respect de ces instructions peut entraîner des blessures graves ou des dégâts matériels. 1. Lisez attentivement toutes les instructions avant de procéder à l’assemblage du produit. Vérifiez que toutes les pièces se trouvent dans l’emballage. 2. Retirez toutes les composantes de l’emballage et placez-les sur une surface souple, telle qu’un tapis ou une serviette. 3. -
Page 3: Liste Des Pièces
LISTE DES PIÈCES / PARTS LIST A X 8 X 14 X 12 X 12 Cache-vis Goujons / Supports de tablette Vis C/B / Dowels C/B Screws Ø6 x 25mm M4 x 45mm Shelf Supports Screw Covers E X 4 X 44 Pattes carrées Vis C/B... - Page 4 ÉTAPE 2 / STEP 2 Il vous faudra / You will need: ÉTAPE 3 / STEP 3 Il vous faudra/ You will need: FX16 Étape 1 / Step 1 Étape 2 / Step 2 Étape 3 / Step 3 Enlevez le capuchon Remove Cover...
- Page 5 ÉTAPE 4 / STEP 4 Il vous faudra / You will need: ÉTAPE 5 / STEP 5 Il vous faudra / You will need: ÉTAPE 6 / STEP 6 Il vous faudra / You will need: FX12...
- Page 6 ÉTAPE 7 / STEP 7 Il vous faudra / You will need: ÉTAPE 8 / STEP 8 Il vous faudra / You will need:...
- Page 7 ÉTAPE 9 / STEP 9 Il vous faudra / You will need: ÉTAPE 10 / STEP 10 Il vous faudra / You will need:...
- Page 8 ÉTAPE 11 / STEP 11 Il vous faudra / You will need: ÉTAPE 12 / STEP 12 *Utilisez un crayon pour Il vous faudra / You will need: marquer des parties cachées KX41 *Use pencil to mark hidden parts Crayon (non inclus)* Pencil (not included)* RETOURNEZ L’ARMOIRE TURN CABINET OVER...
- Page 9 ÉTAPE 13 / STEP 13 Insérez les tablettes Insert shelves PLACEZ L’ARMOIRE DEBOUT PLACE CABINET UPRIGHT ÉTAPE 14 / STEP 14 Pour fixer la porte Étape 1 / Step 1 To attach the door Il vous faudra / You will need: Étape 2 / Step 2 Étape 3 / Step 3...
- Page 10 ÉTAPE 15 / STEP 15 Pour ajuster la porte To adjust the door Pour déplacer la porte vers B To shift door towards B Pour déplacer la porte vers A To shift door towards A ÉTAPE 16 / STEP 16 Il vous faudra / You will need: Mur/Wall...
- Page 11 ÉTAPE 17 / STEP 17...
-
Page 12: Garantie Limitée D'un (1) An
“Product”). This limited warranty is valid only for the original purchaser of the Product and it may not be transferred. This limited warranty is not meant to exclude, restrict, limit or modify the legal warranty given by law to the purchaser of the Product. This Vertuo Table is a quality product. It was made and selected with care.