Publicité
Liens rapides
© 2012 Thermaltake Technology Co., Ltd. All Rights Reserved. 2012.08
All other registered trademarks belong to their respective companies.
Tested To Comply
With FCC Standards
FOR HOME OR OFFICE USE
www.thermaltake.com
User's Manual
Benutzerhandbuch
Mode d'emploi
Manual del usuario
Manuale dell'utente
Manual do Utilizador
Εγχειρίδιο Χρήσης
安裝說明書
用戶手冊
ユーザーズマニュアル
Руководство пользователя
kullanıcı elkitabı
(EEE Yönetmeliğine Uygundur)
คู ่ ม ื อ การใช้
Publicité

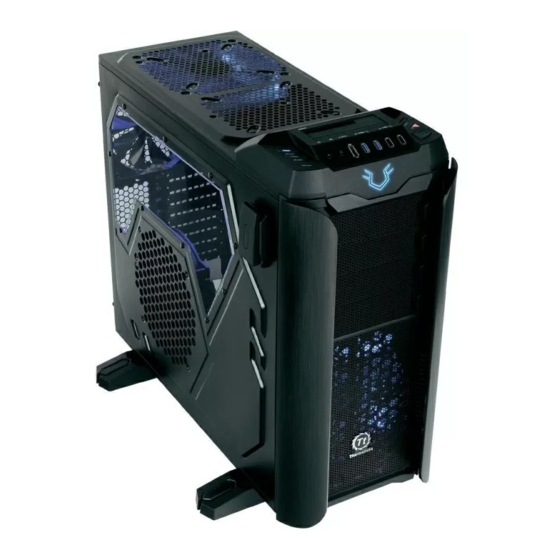
Sommaire des Matières pour Thermaltake ARMOR REVO GENE
- Page 1 Εγχειρίδιο Χρήσης 安裝說明書 用戶手冊 ユーザーズマニュアル Руководство пользователя kullanıcı elkitabı © 2012 Thermaltake Technology Co., Ltd. All Rights Reserved. 2012.08 (EEE Yönetmeliğine Uygundur) All other registered trademarks belong to their respective companies. www.thermaltake.com คู ่ ม ื อ การใช้ Tested To Comply...
-
Page 2: Table Des Matières
Specification Model ARMOR REVO GENE ARMOR REVO GENE Snow Edition Contents P / N VO800M1W2N VO800M6W2N Case Type Mid Tower Chassis Dimension 510 x 252 x 550 mm Chapter 1. Product Introduction (H*W*D) (20 x 9.9 x 21.6 inch) Specification Net Weight 7.8 kg / 17.2 lb... -
Page 3: Warning And Notice
Warning and Notice Atenção!! CPU Cooler Height Limitation VGA ( Add- on card) Length Limitation - Limite de altura para o dissipador do CPU: O limite de altura para o dissipador do CPU é 175 mm (6.9 polegadas). - Limite de comprimento para VGA (placa gráfica): O limite de comprimento para VGA (placa gráfica) é... -
Page 4: Side Panel Disassembly
Motherboard Installation Side Panel Disassembly English / 1. Lay down the chassis. 2. Install the motherboard in proper location and 繁體中文 / secure it with screws. English / 繁體中文 1. 將機殼平放。 Remove the screws on the back of the chassis, 移除機殼後方螺絲,將側窗打開... -
Page 5: Psu Installation
PSU Installation 5.25" Device Installation English / 1. Remove the 5.25” drive bay cover. 2. Slide the 5.25” device into the drive bay to lock the device. Note: Press the 5.25” tool-free mechanism to unlock the device. Deutsch / 1. Entfernen Sie die Abdeckung des 5,25 Zoll Laufwerksschachts. -
Page 6: External 3.5" Device Installation
External 3.5” Device Installation Ελληνικά/ 1. Αφαιρέστε το κάλυμμα της θέσης μονάδας 5,25”. 2. Τοποθετήστε τη συσκευή 5,25” συρταρωτά μέσα στη θήκη μονάδας για να ασφαλίσει η συσκευή. Σημείωση: Πιέστε το μηχανισμό "χωρίς εργαλείο" 5,25” για να απασφαλίσετε τη συσκευή. 繁體中文... -
Page 7: 2.5" Hdd Installation
3.5” & 2.5” HDD Installation Note: 简体中文 / 1. 将硬盘托盘取出 2.5" HDD 2. 将2.5”或3.5”硬盘放置在硬盘托盘上, 用螺丝固定硬盘 3. 将硬盘托盘放回硬盘磁架中 3.5" HDD 日本語 / 1.HDDトレイを引き出して外します。 2.2.5インチHDD、SSD もしくは 3.5インチHDDドラ イブをトレイにネジで固定します。 3. HDDトレイをHDDケージに戻します。 Русский / 1. Вытяните лоток для жестких дисков. 2. Установите 2,5- или 3,5-дюймовый жесткий диск... -
Page 8: Hdd Docking Station
HDD Docking Station Français / La station d’accueil verticale de disque dur est intégrée pour permettre le transfert ultra rapide (jusqu’à 6,0 Gbits/s) de données volumineuses vers un disque dur SATA sans devoir utiliser un boîtier de stockage externe. Pour assurer un bon fonctionnement, veuillez vérifier la justesse des paramètres suivants : - Vérifiez que tous les pilotes requis soient installés pour votre carte mère ou votre carte contrôleur SATA. - Page 9 Português/ 简体中文 / O topo da ranhura da Estação base do disco rígido está integrado para permitir uma transferência ultra rápida 内建硬盘机基座顶部插槽,无需使用外接式储存机壳,支持大型数据向 SATA 硬盘超快速传输 (可支持最高 (até 6.0Gbps) de grandes dados para um disco rígido SATA sem utilizar um disco de armazenamento externo. 6.0Gbps)。为保证正常运作,请确保如下设定正确:...
-
Page 10: Pci Card Installation
Если используется абсолютно новый жесткий диск, прежде чем он станет доступен, его необходимо PCI Card Installation инициализировать (форматировать). Для получения дополнительной информации об инициализации (форматировании) нового жесткого диска см. руководство пользователя жесткого диска или посетите указанные ниже веб-сайты: Для системы под управлением ОС Windows 7: http://www.thermaltakeusa.com/Faq.aspx?ID=1143 Для... -
Page 11: Keyboard & Mouse Security Lock Usage
Keyboard & Mouse Security Lock Usage 240mm Radiator Installation English / Ελληνικά/ Place the keyboard or mouse cables through the Περάστε τα καλώδια του πληκτρολογίου ή του “Keyboard & Mouse Security Lock” then secure it ποντικού μέσα από την “Κλειδαριά Ασφαλείας back to the back panel from inside of the chassis Πληκτρολογίου... -
Page 12: Case Led Connection
Leads Installation Guide Leads Installation Guide Guide d'installation des fils Case LED Connection / On the front of the case, you can find some LEDs and switch leads. Please consult your user Connexion des voyants du boîtier / Sur la face avant du boîtier, vous trouverez plusieurs voyants et les fils des manual of your motherboard manufacturer, then connect these leads to the panel header on the motherboard. - Page 13 Ελληνικά Guida di installazione dei contatti Οδηγός Τοποθέτησης Αγωγών Connessione del LED del case / Nella parte anteriore del case, sono presenti alcuni contatti per interruttori e LED. Σύνδεση LED Θήκης / Στην πρόσοψη της θήκης, μπορείτε να βρείτε ορισμένες λυχνίες LED και αγωγούς διακοπτών. Συμβουλευτείτε...
- Page 14 Указания по прокладке кабелей Указания по прокладке кабелей 线材安装说明 Подключение индикаторов корпуса Подключение индикаторов корпуса / В передней части корпуса расположены индикаторы и провода выключателей. 机壳LED连接方式 机壳LED连接方式 / 在机壳前方的面板后面,可以找到一些LED与开关线材(POWER Switch….),请参考主板使用说明 Перед подсоединением этих проводов к монтажной колодке панели на материнской плате изучите руководство пол 书,并将机壳上的线材正确地连接到主板上,这些线材通常都会印有标签在上面,如果没有的话,请找出机壳前方面板上线...
-
Page 15: Thermaltake Power Supply Series (Optional)
มิ ฉ ะนั ้ น อุ ป กรณ์ ข องคุ ณ อาจเสี ย หายได้ Quality From Within Every power supply units from Thermaltake should pass a very strict quality control before sent to customers, including BIT(Burn-in-test) for over 8 continuous hour in a 45℃ room to test if a unit can run normally under usual scene, and Hipot test to ensure the power supply unit can survive and protect both users and their systems when the voltage volume surges. - Page 16 Note:...


