Table des Matières
Publicité
Les langues disponibles
Les langues disponibles
Liens rapides
NOTE:
PLEASE READ ALL
INSTRUCTIONS CAREFULLY
BEFORE USING THIS
PRODUCT
NOTE:
VEUILLEZ LIRE LES
INSTRUCTIONS
ATTENTIVEMENT AVANT
D'UTILISER CE PRODUIT
TABLE OF CONTENTS /
TABLE DES MATIÈRES
SAFETY NOTICE /
PRÉCAUTIONS
IMPORTANTES
ASSEMBLY INSTRUCTION /
ASSEMBLAGE
PARTS LIST / LISTE DES
PIÈCES
WARRANTY / GARANTIE
ORDERING PARTS / PIÈCES
DE RECHANGE
Model / Modèle
NS-653
Retain This Manual for
Reference / Conserver ce
manuel comme référence
210409
ASSEMBLY & OWNER'S
MANUAL / MANUEL DU
PROPRIÉTAIRE
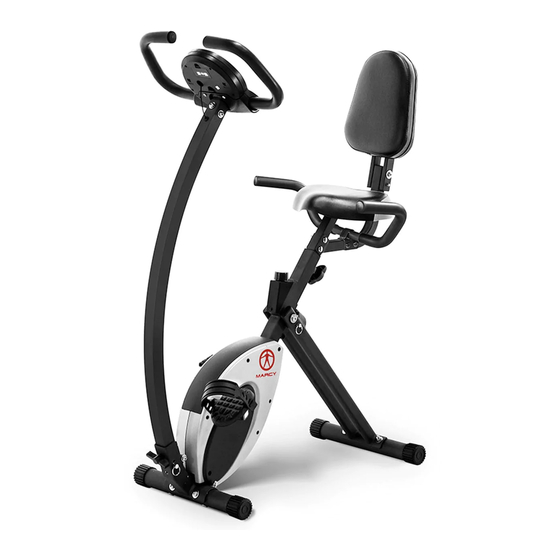
RECUMBENT BIKE
IMPORTANT: Please read this manual before commencing assembly
of this product.
ATTENTION! Veuillez lire attentivement le Manuel de l'utilisateur avant
d'assembler cet appareil
2801 S. Towne Ave, Pomona, CA 91766
support@impex-fitness.com
MARCY
FOLDABLE
NS-653
IMPEX
®
INC.
Tel: (800) 999-8899
www.marcypro.com
®
Publicité
Chapitres
Table des Matières

Sommaire des Matières pour Impex NS-653
- Page 1 PRODUCT MARCY ® NOTE: VEUILLEZ LIRE LES FOLDABLE INSTRUCTIONS ATTENTIVEMENT AVANT D’UTILISER CE PRODUIT RECUMBENT BIKE NS-653 TABLE OF CONTENTS / TABLE DES MATIÈRES SAFETY NOTICE / PRÉCAUTIONS IMPORTANTES ASSEMBLY INSTRUCTION / ASSEMBLAGE PARTS LIST / LISTE DES PIÈCES WARRANTY / GARANTIE ORDERING PARTS / PIÈCES...
-
Page 2: Table Des Matières
CARE AND MAINTENENCE, OPERATING NOTES WARRANTY ORDERING PARTS BEFORE YOU BEGIN Thank you for selecting the MARCY NS-653 by IMPEX INC. For your ® ® safety and benefit, read this manual carefully before using the machine. As a manufacturer, we are committed to provide you complete customer satisfaction. -
Page 3: Important Safety Notices
OVER THE AGE OF 35 OR PERSONS WITH PRE-EXISTING HEALTH PROBLEMS. READ ALL INSTRUCTIONS BEFORE USING ANY FITNESS EQUIPMENT. IMPEX INC. ASSUMES NO RESPONSIBILITY FOR PERSONAL INJURY OR PROPERTY DAMAGE SUSTAINED BY OR THROUGH THE USE OF THIS PRODUCT. SAVE THESE INSTRUCTIONS. - Page 4 WARNING LABEL REPLACEMENT The Warning Label shown here has been placed on the rear Stabilizer. If the label is missing or illegible, please call customer service at 1-800-999-8899 for replacement. Apply the label in location shown. ©IMPEX INC. www.marcypro.com...
-
Page 5: Pre-Assembly Check List
PRE-ASSEMBLY CHECK LIST ©IMPEX INC. www.marcypro.com... -
Page 6: Hardware Pack
Lock Pin Ø ¼” x 3 ⅜” Adjustment Knob Allen Wrench Crossing Wrench Above hardware are all you need to assemble this machine. Before you start to assemble, please check the hardware pack to make sure they are included. ©IMPEX INC. www.marcypro.com... -
Page 7: Assembly Instruction
Front Post forward, and fasten the Lock Knob (#24). Insert back Front Post Lock Pin (#29). C.) Pull and extend the Rear Support (#2). Insert the Rear Support Lock Pin (#27) into the upper hole to firmly lock Rear Support in position. DIAGRAM 1 ©IMPEX INC. www.marcypro.com... - Page 8 B.) Attach the Rear Stabilizer (#9) to the bracket on bottom of Rear Support (#2), Secure it with two M8 x 2 ½” Carriage Bolt (#10), two Ø ⅜” x Ø ⅞” Curved Washers (#18), and two Domed Nuts (#23). DIAGRAM 2 ©IMPEX INC. www.marcypro.com...
- Page 9 STEP 3 (See Diagram 3) A.) Firmly thread the Left Pedal (#30) counter clockwise onto Left Crank (#25). B.) Firmly thread the Right Pedal (#31) clockwise onto Right Crank (#26) DIAGRAM 3 ©IMPEX INC. www.marcypro.com...
- Page 10 Nylon Nuts (#22) and three Ø ⅜” x Ø ⅝” Flat Washers (#13). C.) Insert the Seat Post (#4) into the opening on Main Frame (#1). Use the Adjustment Knob (#34) to lock the Seat Pad at selected height. DIAGRAM 4 ©IMPEX INC. www.marcypro.com...
- Page 11 C.) Attach Backrest Board (#15) to Backrest Support (#6). Secure it with four M8 x 1 ¾” Allen Bolts (#12) and four Lock Washers (#21). D.) Insert the Backrest Board Lock Pin (#28) to lock the Backrest Board when in use. DIAGRAM 5 ©IMPEX INC. www.marcypro.com...
- Page 12 A.) Attach Handle Bar (#7) to Front Post (#3). Secure it with three M8 x ⅝” Allen Bolts (#14) and three Ø ⅜” x Ø ¾” Washers (#19). B.) Connect the Computer wire (#32) to Middle Sensor Wire (#33). DIAGRAM 6 ©IMPEX INC. www.marcypro.com...
- Page 13 B.) Pull out the Rear Support Lock Pin (#27). Pull the Rear Support (#2) toward the Main Frame (#1). C.) Insert the Rear Support Lock Pin (#27) to lower hole to lock the Rear Support in fold position. ©IMPEX INC. www.marcypro.com...
-
Page 14: Exploded Diagram
EXPLODED DIAGRAM ©IMPEX INC. www.marcypro.com... - Page 15 NS-653 PARTS LIST PART DESCRIPTION SPEC. QUANTITY Main Frame Rear Support Front Post Seat Post Seat Support Backrest Support Handle Bar Front Stabilizer Rear Stabilizer Carriage Bolt M8 x 2 ½” Carriage Bolt M8 x 2” Allen Bolt M8 x 1 ¾”...
-
Page 16: Computer
10. When the batteries are removed, all the functional values will reset to zero. Note: Please note all values on this computer are approximate and they are for comparison purpose only. Do not use these values for any medical or rehabilitation purpose. ©IMPEX INC. www.marcypro.com... -
Page 17: Care And Maintenance
11. Seat height can be adjusted to four different heights from 30 ½” to 32 ½” with ½” for each increment. 12. There are two roller wheels on Rear Stabilizer. Lift up the Front and transport. ©IMPEX INC. www.marcypro.com... -
Page 18: Warranty
IMPEX authorized service center or for products used for commercial or rental purposes. No other warranty beyond that specifically set forth above is authorized by IMPEX. -
Page 19: Avant De Commencer
ENTRETIEN ET ENTREPOSAGE , NOTES D’UTILISATION GARANTIE COMMANDER DES PIÈCES AVANT DE COMMENCER Merci d’avoir choisi le MARCY FOLDABLE RECUMBENT BIKE NS-653 d'IMPEX ® INC. Afin d’assurer votre sécurité et de tirer le maximum de ce produit, veuillez lire ce guide attentivement avant d’utiliser l’appareil. En tant que fabricant, nous nous engageons à... -
Page 20: Avis De Sécurité Important
POUR LES PERSONNES DE 35 ANS ET PLUS OU QUI SOUFFRENT DÉJÀ DE PROBLÈMES DE SANTÉ. LIRE TOUTES LES INSTRUCTIONS ATTENTIVEMENT AVANT D’UTILISER UN APPAREIL D’EXERCICES. IMPEX INC. NE PEUT ÊTRE TENUE RESPONSABLE D’AUCUNE BLESSURE NI D’AUCUN DOMMAGE MATÉRIEL SUBI PAR OU DÉCOULANT DE L’UTILISATION DE CE PRODUIT. -
Page 21: Emplacement Des Étiquettes De Mise En Garde
Les étiquettes de mise en garde illustrées ici ont été posées sur la base arrière et la monture supérieure. Si les étiquettes sont manquantes ou illisibles, veuillez communiquer avec le Service à la clientèle au 1-800-999-8899 pour obtenir d’autres étiquettes, puis les poser aux endroits indiqués ci-dessus. ©IMPEX INC. www.marcypro.com... -
Page 22: Liste De Vérification Avant L'assemblage
LISTE DE VÉRIFICATION AVANT L’ASSEMBLAGE ©IMPEX INC. www.marcypro.com... -
Page 23: Quincaillerie
⅜ po Bouton de réglage Clé hexagonale Clé en croix Les pièces et outils ci-dessus sont tout ce dont vous avez besoin pour assembler cet appareil. Avant de commencer l’assemblage, assurez-vous que tout le matériel est inclus. ©IMPEX INC. www.marcypro.com... -
Page 24: Instructions D'assemblage
29) dans le montant avant. C.) Tirer et écarter le support arrière (n 2). Insérer la goupille de verrouillage (n 27) dans le trou supérieur du support arrière afin de bien verrouiller le support arrière à sa position. IMAGE 1 ©IMPEX INC. www.marcypro.com... - Page 25 9) au support arrière (n 2) avec deux boulons de carrosserie M8 x 2 ½ po (n 10), deux rondelles courbées de Ø ⅜ po x Ø ⅞ po (n et deux écrous borgnes (n 23). IMAGE 2 ©IMPEX INC. www.marcypro.com...
- Page 26 Visser la pédale gauche (n 30) dans la manivelle de gauche (n 25) en tournant dans le sens antihoraire. B.) Visser la pédale droite (n 31) dans la manivelle de droite (n 26) en tournant dans le sens horaire. IMAGE 3 ©IMPEX INC. www.marcypro.com...
- Page 27 Ø ⅜ po x Ø ⅝ po (n 13). F.) Insérer le siège (n 4) dans l’ouverture du cadre principal (n 1). Utiliser le bouton de réglage (n 34) pour verrouiller le siège à la hauteur souhaitée. IMAGE 4 ©IMPEX INC. www.marcypro.com...
- Page 28 6) avec quatre boulons à tête creuse M8 x 1 ¾ po (n 12) et quatre rondelles autobloquantes (n 21). H.) Insérer la goupille de verrouillage du dossier (n 28) afin de verrouiller le dossier pendant l’utilisation. IMAGE 5 ©IMPEX INC. www.marcypro.com...
- Page 29 3) avec trois boulons à tête creuse M8 x ⅝ po (n 14) et trois rondelles Ø ⅜ po x Ø ¾ po (n 19). D.) Connecter le fil de l’ordinateur (n 32) au fil central du capteur (n 33). IMAGE 6 ©IMPEX INC. www.marcypro.com...
-
Page 30: Plier Le Vélo
E.) Retirer la goupille de verrouillage du dossier arrière (n 27). Tirer le support arrière 2) vers le cadre principal (n F.) Insérer la goupille de verrouillage du support arrière (n 27) dans le trou inférieur afin de verrouiller le support arrière en position pliée. ©IMPEX INC. www.marcypro.com... -
Page 31: Vue Éclatée
VUE ÉCLATÉE ©IMPEX INC. www.marcypro.com... -
Page 32: Liste Des Pièces
NS-653 LISTE DES PIÈCES PIÈCE DESCRIPTION SPÉCIFICATIONS QUANTITÉ Cadre principal Support arrière Montant avant Tige du siège Support du siège Support du dossier Poignées Stabilisateur avant Stabilisateur arrière Boulon de carrosserie M8 x 2 ½ po Boulon de carrosserie M8 x 2 po Boulon à... -
Page 33: Ordinateur
15 secondes avant de les réinstaller. 19. La durée de vie des piles est d’environ 3 mois lorsqu’elles sont soumises à des conditions normales d’utilisation. 20. Enlever les piles aura pour effet de réinitialiser toutes les valeurs fonctionnelles. ©IMPEX INC. www.marcypro.com... -
Page 34: Entretien Et Entreposage
16. Lire toutes les mises en garde avant d’utiliser le vélo. 17. Il est possible d’obtenir les mises en garde électroniques en communiquant avec le service à la clientèle (support@impex-fitness.com). 18. Au moment d’utiliser le vélo, veiller à ce qu’il y ait un espace libre d’au moins 20 po tout autour de l’appareil. -
Page 35: Garantie
GARANTIE LIMITÉE DE DEUX ANS IMPEX Inc. (« IMPEX® ») garantit la monture de ce produit contre les défauts de matériaux et de main- d’œuvre pendant deux (2) ans à partir de la date d’achat lorsque le produit est utilisé et entretenu dans des conditions normales.