Table des Matières
Publicité
Les langues disponibles
Les langues disponibles
Liens rapides
ULTRASONIC CLEANER
VASCA ULTRASUONI
LINDA
3 e 6 L
Istruzioni d'uso / Instructions for use
Mode d'emploi / Gebrauchsanleitung /
Istrucciones de uso
1
Istruzioni d'uso / Instructions for use / Mode d'emploi / Gebrauchsanleitung / Istrucciones de uso
LINDA Ultrasonic Cleaner / Vasca Ultrasuoni – Rev.00
Publicité
Chapitres
Table des Matières

Sommaire des Matières pour Soltec Faro LINDA 3
- Page 1 ULTRASONIC CLEANER VASCA ULTRASUONI LINDA 3 e 6 L Istruzioni d’uso / Instructions for use Mode d’emploi / Gebrauchsanleitung / Istrucciones de uso Istruzioni d’uso / Instructions for use / Mode d’emploi / Gebrauchsanleitung / Istrucciones de uso LINDA Ultrasonic Cleaner / Vasca Ultrasuoni – Rev.00...
-
Page 2: Table Des Matières
INDICE CAPITOLO 1 ............................3 Garanzia ............................3 Interventi di garanzia ........................3 Limitazione della garanzia ......................3 Sicurezza ............................3 Simboli di sicurezza ........................4 CAPITOLO 2 ............................4 Collegamento elettrico ........................4 Prima di far funzionare l’apparecchio ..................4 CAPITOLO 3 ............................ -
Page 3: Garanzia
APITOLO Garanzia Le informazioni contenute in questo documento sono soggette a possibili variazioni senza preavviso. L’apparecchio è garantito contro difetti dei materiali e di fabbricazione per un periodo di 24 mesi dalla data di acquisto secondo le clausole riportate nell’apposito certificato di garanzia. Durante il periodo di garanzia, la società... -
Page 4: Simboli Di Sicurezza
Simboli di sicurezza Simbolo del manuale di istruzioni Consultare il manuale per prevenire eventuali danni al prodotto o eventuali danni fisici all’operatore. Simbolo di alta tensione Non aprire o non manomettere l’apparecchio. Parti elettriche in tensione all’interno dell’apparecchio. APITOLO Collegamento elettrico Prima di collegare la spina dell’apparecchio alla presa di corrente, controllate che la tensione indicata sulla targhetta matricola corrisponda alla tensione del vostro luogo di lavoro. - Page 5 Assicurarsi che i piedini della lavatrice siano in posizione corretta per garantire la circolazione dell’aria. Non fare funzionare la lavatrice ad ultrasuoni se: il cavo di alimentazione o la spina sono danneggiati, non funziona correttamente, è stata danneggiata, è caduta. In tal caso potrebbero verificarsi scosse elettriche, incendi o altri incidenti.
-
Page 6: Mascherina Comandi E Descrizione Dei Simboli
Fare sempre attenzione al livello del liquido affinché non scenda sotto i 2/3 dell’altezza totale della vaschetta. Se ciò accadesse, l’elemento di riscaldamento, i trasduttori ultrasonici e il circuito elettronico potrebbero subire gravi danni. Non immergere le mani nella vaschetta durante il funzionamento. I liquidi aggressivi che potrebbero danneggiare la vaschetta vanno messi in un bicchiere apposito che viene poi posto nella vaschetta contenente acqua che trasmette le onde ultrasonore al bicchiere e quindi alla soluzione ivi contenuta. -
Page 7: Istruzioni Operative
APITOLO Istruzioni operative 1. Per accendere il riscaldamento termostatato a 60°C premere l’interruttore luminoso indicato come Heater (Fig.1 - punto 4) 2. Impostare il tempo di lavaggio ruotando in senso orario la manopola Timer/Interruttore (Fig.1 - punto 1) 3. Al termine del tempo impostato la macchina si spegnerà automaticamente. Per interrompere in qualsiasi momento il funzionamento della macchina, è... -
Page 8: Lavaggio Con Gli Ultrasuoni
APITOLO Lavaggio con gli ultrasuoni Gli ultrasuoni: che cosa sono? Gli ultrasuoni sono vibrazioni di un mezzo materiale simili alle onde acustiche, ma con frequenze che sono troppo alte per essere udite dall’orecchio umano. Il limite di frequenza dell’udito umano varia da circa 10 Khz a circa 18 Khz. -
Page 9: Manutenzione Dell'apparecchio
Tempo di lavaggio. Il tempo di lavaggio è sempre subordinato al tipo di oggetto, al tipo e alla quantità di materiale da rimuovere. Manutenzione dell’apparecchio Prima di eseguire qualsiasi intervento di manutenzione staccare sempre la spina. Per garantire sempre la sicurezza dell’apparecchio è sufficiente accertarsi regolarmente che il contenitore dell’apparecchio e il cavo di allacciamento alla rete non siano danneggiati. -
Page 10: Caratteristiche Tecniche
Caratteristiche tecniche Modello SONICA 3200 MH S3 SONICA 2200 MHD S3 LINDA 3 L LINDA 6 L Tensione di alimentazione 230/240V - 50/60Hz Assorbimento 130 W 180 W Assorbimento con riscaldamento 305 W 355 W Peso in kg. (approx.) Dimensioni esterne (in mm) 270x170x260 325x270x260 Dimensioni vaschetta (in mm) - Page 11 TABLE OF CONTENTS CHAPTER 1 ............................12 Warranty ............................12 Services under warranty ......................12 Limitations on the warranty ......................12 Safety .............................. 12 Safety symbols ..........................12 CHAPTER 2 ................. Errore. Il segnalibro non è definito.13 Electrical connection ........................13 Before operating the device......................
-
Page 12: Warranty
HAPTER Warranty The information contained in this document is subject to possible variations without prior notice. The device is guaranteed against defects regarding materials and manufacturing for a period of 24 months from the date of purchase according to the terms of the warranty certificate. During the warranty period, the manufacturer, in the event of device failure, will decide whether to repair or replace the defective product. -
Page 13: Electrical Connection
High voltage symbol Do not open or tamper with the device. Live electrical parts inside the device. HAPTER Electrical connection Before connecting the plug of the device to the power outlet, check that the voltage indicated on the nameplate corresponds to the voltage of your workplace. (See Fig. 2-1). The earthing of the device is compulsory according to law. - Page 14 wear, or other reasons, turn off the device immediately and contact the service assistance department. Do not lift and carry the device when it is full of liquid. Handles are designed solely to lift and carry the device when it is empty and when disconnected from the power outlet. WARNING This ultrasonic washing machine works only with water or ultrasonic cleaning agents recommended by the manufacturer.
-
Page 15: Command Panel And Description Of Symbols
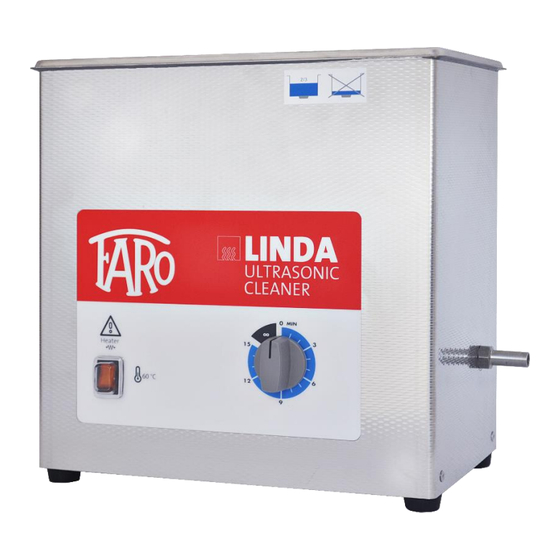
In addition, LINDA washers offer ideal solutions for emulsion, accelerating chemical reactions, solution blends, degassing liquids, decontamination and sediment dissolution. HAPTER Command panel and description of symbols Fig. 1 LINDA device command panel 5. Switch/timer knob 6. MIN symbol (washing time expressed in minutes) 7. -
Page 16: Accessories
appliance on and off according to user requirements. When the washing cycle is complete, to switch off the heating, press the Heater switch (Fig.1 - point 4). HAPTER Accessories Stainless steel cover To be used to cover the ultrasonic tray. It is also useful if you start the heating cycle of the washing liquid. -
Page 17: Useful Tips And Suggestions
Sweep System Technology The LINDA models with Sweep System technology contain the best you can get from an ultrasonic washing machine. In fact, the brand new generator incorporates a special ultrasonic oscillator with Sweep System technology. With this technology, the output frequency of the ultrasonic generator is modulated around a central frequency, so the transducers working at the frequency of 39 kHz are modulated at a frequency between 38 and 40 kHz. -
Page 18: Assistance
HAPTER Assistance If the device does not work, perform the following checks: Check that the plug is properly plugged into the socket. Check the level of liquid in the tray. WARNING Services should only be carried out by technicians trained by the manufacturer. It is dangerous for any other person to carry out repairs. -
Page 19: Correct Disposal Of The Product (Electrical And Electronic Waste)
HAPTER Correct disposal of the product (electrical and electronic waste) The symbol on the product or on the documentation indicates that the product must not be disposed of with other household waste at the end of the life cycle. To avoid any damage to the environment or health caused by inappropriate waste disposal, you are encouraged to separate this product from other types of waste and recycle it in a responsible manner to promote the sustainable reuse of material resources. - Page 20 SOMMAIRE CHAPITRE 1 ............................ 20 Garantie ............................21 Interventions de garantie ......................21 Limites de la garantie ......................... 21 Sécurité ............................21 Symboles de sécurité ........................21 CHAPITRE 2 ............................ 22 Branchement électrique......................22 Avant de faire fonctionner l'appareil ..................22 3 ............................
-
Page 21: Garantie
HAPITRE Garantie Les informations contenues dans ce document sont sujettes à de possibles variations sans notification préalable. L'appareil est garanti contre des défauts des matériaux et de fabrication pour une période de 24 mois à compter de la date d'achat suivant les clauses reportées dans le certificat de garantie. Durant la période de garantie, le fabricant, en cas de panne de l'appareil, pourra décider si réparer ou remplacer le produit qui s'est vérifié... -
Page 22: Symboles De Sécurité
Symboles de sécurité Symbole du mode d'emploi Consulter le manuel pour prévenir des dommages éventuels sur le produit ou d'éventuels dommages physiques sur l'opérateur. Symbole de haute tension Ne pas ouvrir ni fausser l'appareil. Parties électriques sous tension à l'intérieur de l'appareil. - Page 23 S'assurer que les pieds de la machine de nettoyage soit en position correcte pour garantir la circulation de l'air. Ne pas faire fonctionner la machine de nettoyage à ultrasons si : le câble d'alimentation ou la fiche sont endommagés, si elle ne fonctionne pas correctement, qu'elle est endommagée, qu'elle est tombée. Dans ce cas, des chocs électriques, incendies ou autres accidents pourraient se vérifier.
-
Page 24: Hapitre 3
Important quand vous utilisez des machines de nettoyage à ultrasons Avant d'allumer l'appareil, remplir le bac en acier avec de l'eau et/ou liquide détergent jusqu'à un niveau maximum de 3 cm du bord ; si la version de votre appareil est dotée de dispositif de décharge liquides, vérifier que le robinet soit bien fermé. -
Page 25: Hapitre 4
Fig. 2 Vue côté arrière appareils LINDA 5. Etiquette numéro de série et identification appareil Fiche entrée câble d'alimentation HAPITRE Instructions opérationnelles 9. Pour allumer le chauffage thermostaté à 60°C, presser l'interrupteur lumineux indiqué comme Heater (fig.1 - point 4) 10. -
Page 26: Hapitre 6
solutions particulièrement agressives qui ne pourraient pas entrer en contact direct avec le bac en acier. Support en acier inox porte-verres. Le support en acier inox porte-verres sert à soutenir les verres durant le lavage. Se rappeler de régler la bague de soutien du verre afin que le fond du verre soit toujours en contact avec le liquide du bac, mais qu'il n'entre pas en contact avec le fond du bac en acier. -
Page 27: Entretien De L'appareil
Quand les objets sont très sales. Utiliser des temps de lavage longs avec le chauffage du liquide de lavage compatible avec l'objet à nettoyer. Quand remplacer la solution détergente. Pour obtenir un nettoyage efficace, changer souvent la solution détergente, surtout si on l'utilise pour nettoyer des instruments chirurgicaux. Forme et dimension. -
Page 28: Caractéristiques Techniques
Caractéristiques techniques Modèle SONICA 3200 MH S3 SONICA 2200 MHD S3 LINDA 3 L LINDA 6 L Tension d'alimentation 230/240V - 50/60Hz Absorption 130 W 180 W Absorption avec chauffage 305 W 355 W Poids en kg (environ) Dimensions externes (en mm) 270x170x260 325x270x260 Dimensions bac (en mm) - Page 29 INHALT KAPITEL 1 ............................29 Garantie ............................30 Garantiegedeckte Maßnahmen ....................30 Garantieeinschränkung ......................30 Sicherheit ............................30 Sicherheitssymbole ........................30 KAPITEL 2 ............................31 Elektroanschluss .......................... 31 Vor dem Betrieb des Geräts ...................... 31 3 ............................33 APITEL Bedienfeld und Beschreibung der Symbole ................33 4 ............................
-
Page 30: Garantie
APITEL Garantie Die in diesem Dokument enthaltenen Informationen können ohne Vorankündigung verändert werden. Für Material- und Herstellungsfehler wird eine Garantie auf das Gerät von 24 Monaten ab dem Kaufdatum entsprechend den im beiliegenden Garantiezertifikat angegebenen Klauseln gewährt. Während der Garantiezeit kann der Hersteller im Fall eines Schadens am Gerät entscheiden, ob er das als defekt befundene Produkt repariert oder ausgetauscht. -
Page 31: Sicherheitssymbole
Sicherheitssymbole Symbol der Bedienungsanleitung Schlagen Sie in der Bedienungsanleitung nach, um eventuelle Schäden am Produkt oder Verletzungen an der Bedienungsperson zu vermeiden. Hochspannungssymbol Das Gerät nicht öffnen oder manipulieren. Spannungsführende elektrische Teile im Geräteinneren. APITEL Elektroanschluss Kontrollieren Sie, ob die auf dem Typenschild angegebene Spannung der Spannung an Ihrem Arbeitsplatz entspricht, bevor Sie den Gerätestecker in die Steckdose einstecken. - Page 32 Installieren Sie das Ultraschall-Reinigungsgerät nicht in der Nähe von Wärmequellen. Achten Sie außerdem sorgfältig darauf, es nicht in der Nähe von Feuchtigkeitsquellen, an nassen Arbeitsplätzen oder in der Nähe von Staubquellen zu installieren. Vergewissern Sie sich, dass die Füße des Reinigungsgeräts korrekt positioniert sind, um eine ausreichende Luftzirkulation zu garantieren.
-
Page 33: Apitel 3
Wichtig beim Betrieb des Ultraschall-Reinigungsgeräts Füllen Sie vor dem Einschalten des Geräts die Stahlwanne mit Wasser und/oder Reinigungsflüssigkeit bis zu einer maximalen Höhe von 3 cm unter der Kante. Wenn Ihre Geräteversion mit einer Vorrichtung zum Ablassen der Flüssigkeit ausgestattet ist, überprüfen Sie, ob der Hahn gut geschlossen ist. -
Page 34: Apitel 4
Symbol Reinigungstemperatur (Grad Celsius) Abb. 2 Rückansicht der LINDA-Geräte 7. Typenschild und Identifikation des Geräts Anschluss für Netzkabel APITEL Betriebsanweisungen 13. Drücken Sie zum Einschalten der mittels Thermostat auf 60 °C geregelten Heizung auf den mit Heater gekennzeichneten Leuchtschalter (Abb. 1 - Punkte 4). 14. -
Page 35: Apitel 6
Reinigen von Objekten mit besonders aggressiven Lösungen, die nicht in direkten Kontakt mit der Edelstahlwanne gelangen sollten. Edelstahlhalterung für Glasbehälter Die Edelstahlhalterung für Glasbehälter dient dazu, die Behälter während des Reinigungsvorgangs zu halten. Denken Sie daran, den Stützring des Glases immer so einzustellen, dass der Boden des Glases immer mit der Flüssigkeit der Wanne in Kontakt bleibt, gleichzeitig jedoch keinen Kontakt mit dem Boden der Edelstahlwanne hat. -
Page 36: Wartung Des Geräts
Zur Reinigung von vielen Objekten. Das Ultraschall-Reinigungsgerät sollte nie zu voll gefüllt werden. Die Objekte sollten vorzugsweise ordentlich am Boden des rechteckigen Korbs angeordnet werden, der dann in die Wanne eingesetzt wird. Danach wird der geeignete Reinigungsvorgang gestartet. Eine gleichzeitige Reinigung von zu vielen Objekten vermindert die Effektivität der Ultraschallreinigung. -
Page 37: Technische Eigenschaften
Technische Eigenschaften Modell SONICA 3200 MH S3 SONICA 2200 MHD S3 LINDA 3 L LINDA 6 L Versorgungsspannung 230/240V - 50/60Hz Leistungsaufnahme 130 W 180 W Leistungsaufnahme mit Heizung 305 W 355 W Gewicht in kg (ca.) Außenmaße (in mm) 270x170x260 325x270x260 Abmessungen der Wanne (in... - Page 38 ÍNDICE CAPÍTULO 1 ............................. 39 Garantía ............................39 Intervenciones de garantía ......................39 Limitación de la garantía ......................39 Seguridad ............................39 Símbolo de seguridad ........................40 CAPÍTULO 2 ................ Errore. Il segnalibro non è definito.40 Conexión eléctrica ......................... 40 Antes de hacer funcionar el aparato ...................
-
Page 39: Garantía
APÍTULO Garantía Las informaciones contenidas en este documento están sujetas a posibles variaciones sin previo aviso. El aparato está grarantizado contra defectos de los materiales y de fabricación por un período de 24 meses a partir de la fecha de compra según las cláusulas indicadas en el certificado de garantía. Durante el período de garantía, la sociedad fabricante, en caso de desperfecto del aparato, podrá... -
Page 40: Símbolo De Seguridad
Símbolo de seguridad Símbolo del manual de instrucciones Consulte el manual para prevenir eventual daños al producto o eventuales daños físicos al operador. Símbolo de alta tensión No abra ni adultere el aparato. Partes eléctricas en el interior del aparato. APÍTULO Conexión eléctrica Antes de conectar el enchufe del aparato a la toma de corriente, controle que la tensión indicada en... - Page 41 Asegúrese que los pies de la lavadora estén en posición correcta para garantizar la circulación del aire. No haga funcionar la lavadora de ultrasonidos si: el cable de alimentación o el enchufe están dañados, no funciona correttamente, ha sido dañada o se ha caído. En tal caso podrían suceder choques eléctricos, incendios u otros accidentes.
-
Page 42: Máscara De Mandos Y Descripción De Los Símbolos
Preste siempre atención al nivel del líquido para que no baje más de 2/3 de la altura total de la cubeta. Si esto sucede, el elemento de calentamiento, los transductores ultrasónicos y el circuito electrónico podrían sufrir graves daños. No introduzca las manos en la cubeta durante el funcionamiento. Los líquidos agresivos que podrían dañar la cubeta se ponen siempre en un vaso adecuado que transmite las ondas ultrasonoras al vaso y por consiguiente a la solución allí... -
Page 43: Instrucciones Operativas
Fig. 2 Vista lado trasero de los aparatos LINDA 9. Etiqueta de matrícula e identificación del aparato Enchufe de ingreso del cable de alimentación APÍTULO Instrucciones operativas 17. Para encender la calefacción a 60°C pulse el interruptor luminoso indicado como Heater (Fig.1 - punto 4) 18. -
Page 44: Lavado Con Ultrasonidos
Soporte de acero inox porta vasos El soporte de acero inox porta vasos sirve para sostener los vasos durante el lavado. Recuerde ajustar el anillo de sostén del vaso para que el fondo del vaso esté siempre en contacto con el líquido de la cubeta, pero al mismo tiempo que no entre en contacto con el fondo de la cubeta de acero. -
Page 45: Mantenimiento Del Aparato
Cuando los objetos están muy sucios. Utilice tiempos de lavado largos con el calentamiento del líquido de lavado compatible con el objeto a limpiar. Cuándo sustituir la solución detergente. Para obtener una limpieza eficiente cambie frecuentemente la solución detergente, sobre todo si esta se usa para limpiar instrumentos quirúrgicos. Forma y dimensión. -
Page 46: Características Técnicas
Características técnicas Modelo SONICA 3200 MH S3 SONICA 2200 MHD S3 LINDA 3 L LINDA 6 L Tensión de alimentación 230/240V - 50/60Hz Absorbimiento 130 W 180 W Absorbimiento con 305 W 355 W calentamiento Peso (aprox) 3,8 kg Dimensiones externas 270x170x260 mm 325x270x260 mm Dimensiones de la cubeta... - Page 47 SOLTEC S.r.l. Via Guglielmo Röntgen 16 20136 Milano (MI) Istruzioni d’uso / Instructions for use / Mode d’emploi / Gebrauchsanleitung / Istrucciones de uso LINDA Ultrasonic Cleaner / Vasca Ultrasuoni – Rev.00...