Publicité
Les langues disponibles
Les langues disponibles
Liens rapides
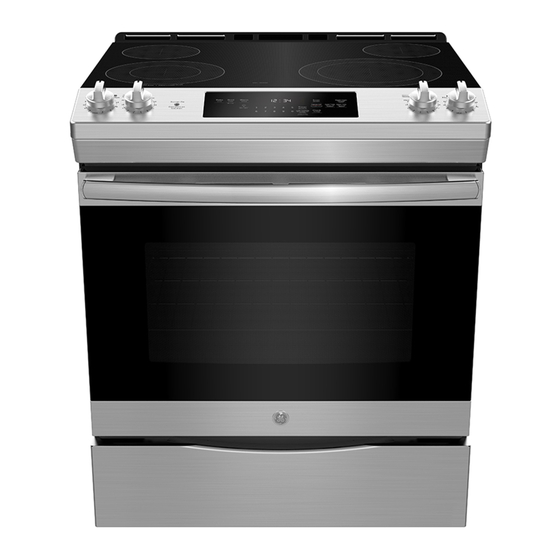
30" RADIANT SLIDE-IN CONVECTION SINGLE
OVEN RANGE
WARNING
Electrical Shock Hazard
Death or serious injury can result from failure to follow these instructions.
•
• Disconnect power before servicing this product.
• Reconnect all grounding devices after service.
• Replace all parts and panels before operating.
DISCONNECT POWER BEFORE SERVICING
IMPORTANT: Reconnect all grounding devices. All parts of this appli-
ance capable of conducting electrical current are grounded. If grounding
wires, screws, straps, clips, nuts or washers used to complete a path to
ground are removed for service, they must be returned to their original
position and properly fastened.
GROUNDING SPECIFICATIONS
Ground Path Resistance 0.10Ω Max.
Insulation Resistance
250KΩ Min.
INSTALLATION REQUIREMENTS
Power Supply: This appliance must be supplied with proper voltage and
frequency, and connected to an individual properly grounded branch circuit,
protected by a circuit breaker or time delay fuse, as noted on rating plate.
Wiring must conform to the National Electrical Codes. The rating plate is
located on lower front frame behind the storage drawer.
Overcurrent Protection Ranges
MAXIMUM KILOWATT RATING
NEC RATING
208V
236V
240V
35 Amp
–
12.4
12.4
40 Amp
12.4
15.4
16.0
50 Amp
17.4
21.4
22.00
RADIANT HEATING ELEMENT SYSTEMS
Heating Elements: The radiant heating element consists of a spiral-wound
resistance wire attached to microporous insulation with molded ceramic fiber
walls in a corrosion protected metal tray.
The Heating Elements come in various sizes:
• 6" - 240 Volt, 1200 Watts
• 6" - 240 Volt, 1500 Watts
• 6"/9" - 240 Volts, 3000 Watts
• 12"/9" - 240 Volts, 3000 Watts
TO REMOVE COOKTOP
• Turn the power off.
• Slide the unit out.
• Remove four (4) 1/4" hex head screws on the back of the unit securing the
rear trim.
• Remove two (2) 1/4" hex head screws on the gap cover on the back of the
range. (Single Oven Only)
• Remove three (3) 1/4" hex head screws on the back of the unit securing the
vent trim.
• Rotate the vent trim forward and lift to disengage tabs to remove.
• Remove four (4) 1/4" hex head screws on the back of the unit securing the
cooktop.
• Remove two (2) T-15 torx screws from the front sides of the range.
•
Remove two (2) housing harness wire.
• Lift up cooktop and remove.
CAUTION
Raising the cooktop too high can break the glass.
SH. 1 of 6
295D1749G027
29-6312
HOW TO REMOVE OR REPLACE THE DOOR
To remove the door:
Slot
1. Fully open the door.
2. Pull the hinge locks down toward the door
Hinge
frame, to the unlocked position. A tool, such
lock
as a small flat-blade screwdriver, may be
Pull hinge locks down to unlock.
required.
3. Firmly grasp both sides of the door at the
top.
4. Close door to the door removal position,
which is halfway between the broil stop
position and fully closed.
5. Lift door up and out until the hinge arm is
clear of the slot.
Removal position
To replace the door:
Bottom
Hinge arm
1. Firmly grasp both sides of the door at the top.
edge of
slot
2. With the door at the same angle as the
removal position, seat the indentation of the
hinge arm into the bottom edge of the hinge
Indentation
slot. The notch in the hinge arm must be
fully seated into the bottom of the slot.
3. Fully open the door. If the door will not fully
open, the indentation is not seated correctly
in the bottom edge of the slot.
4. Push the hinge locks up against the front
Hinge
lock
frame of the oven cavity to the locked
position.
Hinge
arm
5. Close the oven door.
Push hinge locks up to lock.
TO REMOVE THE CONTROL PANEL
The control panel contains the control, Left and Right Wing Boards
1. Disconnect the power.
2. First remove the cooktop (see remove cooktop).
3. Remove the two (2) screws behind the manifold panel that attach it to
the side panel bracket.
4. Pull the control panel straight out.
CAUTION
Place a protective covering (such as a towel) between the
control panel and the cooking surface to avoid damage to the control panel.
ELECTRONIC OVEN CONTROL
CAUTION
Components are electrically HOT on control when voltage
is connected to oven. The Electronic Oven Control system consists of the control,
key panel, oven sensor, door and lock assembly.
NOTE: temperature/Mode Selection necessary for operation of Relay contacts.
VOLTAGE MUST BE PRESENT ACROSS TERMINALS L1 TO N FOR CONTROL
TO OPERATE.
CONTROL VOLTAGE
Voltage
Terminals
J203-1 to J203-2 Wing Board
J203-3 to J203-2 Wing Board
Broil COM (Pin 1) to QTH NO (pin 2)
120 VAC all the time
L1 to N
L2 to N
L1 to BAKE
240 VAC when cooking mode is active
L1 to BROIL
and oven is not calling for heat
L1 to CONVECT
J902-1 to N
120 VAC when fan is turning CCW
J902-2 to N
120 VAC when fan is turning CCW
*J903-1 to N
120 VAC when light is on
J901 to N
120 VAC when warming drawer is on
J903-2 to N
120 VAC locking or unlocking
*Oven light not working. Make the following checks:
• Check oven light bulb.
• Light is to come on when door is opened-check voltage across light socket.
Terminals should read 120VAC. If 0 volts, check jamb switch and wiring.
• Light is to come on when control light pad is pressed. K906 should click. Check
voltage from J903-1 to N. Should read 120VAC. If 0 volts, replace control.
OVEN SENSOR AND DOOR SWITCH OHMMETER TEST
Remove power from the oven. Make a resistance measurement from the side
of the sensor and lock switch connector with the exposed terminals unplugged
from the ERC.
CIRCUIT
TERMINALS
OHMS
Oven
4 to 5
Sensor
Unlatch
1 to 2
Open
Latch
1 to 2
* If abnormal reading is observed, wiggle
leads at connector at rear of cavity bet-
ween broil elements pins. If any variation,
replace sensor.
JCSS630 RADIANT SINGLE OVEN
Printed in Mexico
Publicité

Manuels Connexes pour GE JCSS630 Serie


Sommaire des Matières pour GE JCSS630 Serie
- Page 1 OVEN SENSOR AND DOOR SWITCH OHMMETER TEST 30" RADIANT SLIDE-IN CONVECTION SINGLE TO REMOVE THE CONTROL PANEL HOW TO REMOVE OR REPLACE THE DOOR Remove power from the oven. Make a resistance measurement from the side OVEN RANGE The control panel contains the control, Left and Right Wing Boards of the sensor and lock switch connector with the exposed terminals unplugged 1.
- Page 2 ERC FAILURE CODES The oven may stop operating but not give an F code on the display inmediately. F codes are stored in nonvolatile EEPROM memory until the same fault occurs twice consecutively. F codes can be recalled by pressing together TIMER, CLOCK and 9.
- Page 3 POUR ENLEVER LE PANNEAU DE CONFIGURATION CUISINIÈRE RAYONNANTE ENCASTRABLE À COMMENT ENLEVER OU REMPLACER LA PORTE * La lumière du four ne fonctionne pas. Faites les vérifications suivantes: • Vérifiez l'ampoule du four. Le panneau de configuration contient la commande et les panneaux latéraux FOUR SIMPLE À...
- Page 4 CODES D’ÉCHECS CEC Total des Affiché Code de Description Mesures Catégorie Secondes de Conditions Réglées Conditions Cause(s) Possible(s) Défaut (Oui/Non) Le four peut arrêter de fonctionner mais ne pas donner un code F sur l’affichage Réponse immédiatement. Les codes F sont entreposés dans la mémoire rémanente Mauvais raccordement de la cuisinière dans les Éteint tous les éléments de Ceci est un défaut verrouillé.
- Page 5 WIRING DIAGRAM / SCHÉMA DE CÂBLAGE WARNING Power must be disconnected before servicing this appliance. AVERTISSEMENT L'alimentation doit être déconnectée avant de faire l'entretien de cet appareil. RADIANT SINGLE OVEN / SH. 5 of 6 295D1749G027 29-6312 CUISINIÈRE RAYONNANTE À FOUR SIMPLE...
- Page 6 SCHEMATIC DIAGRAM / SCHÉMA DE CÂBLAGE RADIANT SINGLE OVEN / SH. 6 of 6 295D1749G027 29-6312 CUISINIÈRE RAYONNANTE À FOUR SIMPLE...