Table des Matières
Publicité
Les langues disponibles
Les langues disponibles
Liens rapides
Instructions for use
Gebrauchsanweisung
Directives d'utilisation
Gebruiksaanwijzing
Instrucciones de uso
Instrucciones de uso
Libretto di istruzioni
Οδηγίες χρήσης
Bruksanvisning
Bruksanvisning
Brugsanvisninger
Käyttöohjeet
Instrukcja użytkownika
Návod k obsluze
Návod na používanie
Használati útmutató
Инструкция по эксплуатации
Инструкции за използване
Instrucţiuni de utilizare
Інструкції з використання
Publicité
Table des Matières

Manuels Connexes pour Whirlpool Eole 3


Sommaire des Matières pour Whirlpool Eole 3
- Page 1 Instructions for use Gebrauchsanweisung Directives d’utilisation Gebruiksaanwijzing Instrucciones de uso Instrucciones de uso Libretto di istruzioni Οδηγίες χρήσης Bruksanvisning Bruksanvisning Brugsanvisninger Käyttöohjeet Instrukcja użytkownika Návod k obsluze Návod na používanie Használati útmutató Инструкция по эксплуатации Инструкции за използване Instrucţiuni de utilizare Інструкції...
- Page 3 SPIW309A3WF.1 SPIW312A3WF.1 SPIW309A2WF SPIW312A2WF SPIW318A2WF SPIW309L SPIW312L SPIW318L ENGLISH Instructions for use Page 4 DEUTSCH Bedienungsanleitung Seite 20 FRANÇAIS Consignes d’utilisation Page 36 NEDERLANDS Gebruiksaanwijzing Pagina 52 ESPAÑOL Instrucciones de uso Página 68 PORTUGUÊS Instruções de utilização Página 84 ITALIANO Istruzioni per l’uso Pagina 100 ΕΛΛΗΝΙΚΑ...
-
Page 4: Safety Instructions
SAFETY INSTRUCTIONS IMPORTANT TO BE READ AND OBSERVED • Download the complete instruction manual on docs.whirlpool.eu or call the phone number shown on the warranty booklet. • Before using the appliance, read these safety instructions. Keep them nearby for future reference. -
Page 5: Electrical Warnings
SAFETY INSTRUCTIONS • When moving or relocating the air conditioner, consult experienced service technicians for disconnection and reinstallation of the unit. • The appliance shall not be installed in the laundry. ELECTRICAL WARNINGS • The power supply must be of rated voltage with special circuitry for the appliance. The diameter of the power cord must comply with requirements. -
Page 6: Declarations Of Conformity
20 dBm (e.i.r.p.). • This product includes certain open source software developed by third parties. The open source license usage statement is available at the following website: docs.whirlpool.eu. • This product contains Fluorinated Greenhouse Gases covered by the Kyoto Protocol, the refrigerant gas being in a hermetically sealed system (R32, GWP 675). - Page 7 SAFETY INSTRUCTIONS transport regulations. 2. Marking of equipment using signs shall be compliant with local regulations. 3. Disposal of equipment using flammable refrigerants shall be compliant with national regulations. 4. The storage of equipment / appliances should be in accordance with the manufacturer’s instructions.
- Page 8 SAFETY INSTRUCTIONS released refrigerant and preferably expel it externally into the atmosphere. 6-8 Checks to the refrigeration equipment Where electrical components are being changed, they shall be fit for the purpose and to the correct specification. At all times the manufacturer’s maintenance and service guidelines shall be followed.
- Page 9 SAFETY INSTRUCTIONS The use of silicon sealant may inhibit the effectiveness of some types of leak detection equipment. Intrinsically safe components do not have to be isolated prior to working on them. 8. Repair to intrinsically safe components Do not apply any permanent inductive or capacitance loads to the circuit without ensuring that this will not exceed the permissible voltage and current permitted for the equipment in use.
- Page 10 SAFETY INSTRUCTIONS - Purge again with inert gas; - Open the circuit by cutting or brazing. The refrigerant charge shall be recovered into the correct recovery cylinders.The system shall be “flushed” with OFN to render the unit safe. This process may need to be repeated several times.
- Page 11 SAFETY INSTRUCTIONS h. Do not overfill cylinders. (No more than 80 % volume liquid charge). i. Do not exceed the maximum working pressure of the cylinder, even temporarily. j. When the cylinders have been filled correctly and the process completed, make sure that the cylinders and the equipment are removed from site promptly and all isolation valves on the equipment are closed off.
-
Page 12: Product Description
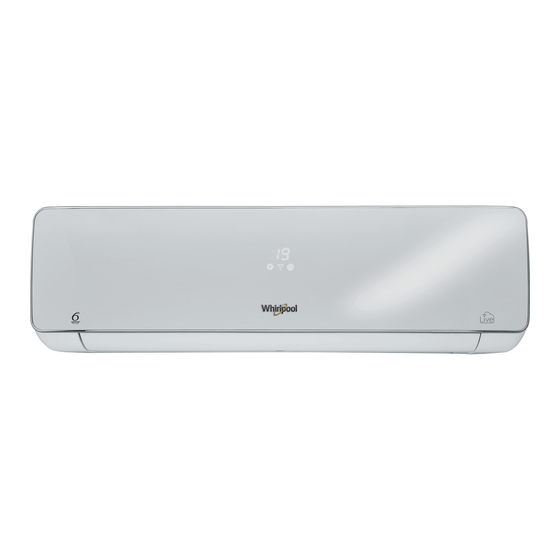
Product description Indoor unit Front Panel Air Intake Display Panel Emergency Panel Air Outlet Vertical Adjustment Louver Horizontal Adjustment Louver Air Filter Remote Controller Air Intake Outdoor unit Pipes and Power Connection Cord Drain Hose Note: Condensate water drainsat COOLING or DRY operation. Air Outlet The figures in this manual are based on the external view of a standard model. -
Page 13: User Interface
User Interface Temperature indicator (1) Displays set temperature. It shows “FC” as a reminder to clean the filter. Wi-Fi indicator (2) It blinks fast (3 Hz) when it’s connecting to router or lose connection to router. It blinks slowly (1.5 Hz) when it’s connected to router but not connected to cloud. It turns to be solid when the Wi-Fi is fully connected. -
Page 14: Remote Controller
Remote controller Insert the batteries into RC Use RC to control the appliance 1. Insert a pin and gently press down on the battery • To operate the appliance by remote control, point the cover and push in the direction of the arrow to remote control at the receiving device on the indoor remove, as shown. -
Page 15: Swing Button
Remote controller Function description of buttons (J1-3A) 1. ON/OFF BUTTON Starts or Stops the appliance by pressing this button. 2. MODE BUTTON Used to select the operation mode in sequence of Cooling, dry, fan only or heating. 3. FAN BUTTON Used to select fan speed in sequence auto, high, medium or low. -
Page 16: Emergency Operation
Maintenance Clean front panel of Indoor Unit 1. Disconnect from the power supply Turn off the appliance first before disconnecting from power supply. 2. Remove the front panel Open the front panel as shown by the arrow (Fig. A). Fig.A Pull the slots at the side of the front panel with force to take out the front panel (Fig. -
Page 17: Installation Instruction
Installation instruction Installation diagram To get detail installation information , Distance from ceiling Distance from wall please go to : docs.whirlpool.eu should be over 200mm should be over 50mm Distance from the wall Indoor unit should be over 50mm Distance from floor NOTE: The figure is only a simple... - Page 18 Note: If the problems still have, turn off the appliance and disconnect from power supply, then contact the nearest Whirlpool Authorized Service Center. Do not attempt to move, repair, disassemble, or modify the appliance by yourself. - 18 -...
-
Page 19: After-Sales Service
• The service number can also be found in the warranty booklet; • your full address; • your telephone number. Note: if you want the full manual for your appliance, please help to download it from websit throught below link: docs.whirlpool.eu using QR code. - 19 -... -
Page 20: Sicherheitshinweise
SICHERHEITSHINWEISE DIESE MÜSSEN DURCHGELESEN UND BEACHTET WERDEN • Laden Sie die komplette Bedienungsanleitung auf docs.whirlpool.eu runter oder rufen Sie die Telefonnummer auf dem Garantieheft an. • Diese Sicherheitsanweisungen vor dem Gebrauch durchlesen. Diese Anweisungen zum Nachschlagen leicht zugänglich aufbewahren. • In diesen Anweisungen sowie auf dem Gerät selbst werden wichtige Sicherheitshinweise angegeben, die durchgelesen und stets beachtet werden müssen. -
Page 21: Reinigung Und Pflege
SICHERHEITSHINWEISE • Das Gerät darf nicht in Räumen installiert werden, die zum Waschen und Trocknen von Wäsche genutzt werden. HINWEISE ZUR ELEKTRIK • Die Netzspannung muss der Nennspannung des Geräts entsprechen, und für den Geräteanschluss ist ein separater Stromkreis einzurichten. Der Querschnitt des Netzanschlusskabels muss diese Anforderungen erfüllen. -
Page 22: Konformitätserklärung
Sie auf dem Typenschild. SICHERHEITSHINWEISE FÜR WARTUNGEN/KUNDENDIENST VON GERÄTEN MIT SPEZIELLEN KÜHLMITTELN • Laden Sie das vollständige Handbuch für detaillierte Installations-, Wartungs- und Reparaturmethoden auf docs.whirlpool.eu.herunter. • Benutzen Sie ausschließlich die vom Hersteller empfohlenen Mittel zur Beschleunigung des Auftauprozesses oder zur Reinigung. - Page 23 SICHERHEITSHINWEISE 4. Die Lagerung von Ausrüstung/Geräten muss gemäß den Herstelleranweisungen erfolgen. 5. Lagerung von verpackten (nicht verkauften) Geräten Die Lagerschutzverpackung muss so beschaffen sein, dass ein mechanischer Schaden am Gerät in der Verpackung kein Leck der Kältemittelfüllung verursacht. Die maximal zulässige Anzahl von Geräten, die gelagert werden dürfen, werden von den lokalen Vorschriften bestimmt.
- Page 24 SICHERHEITSHINWEISE Wenn elektrische Komponenten getauscht werden, müssen Sie für diesen Zweck geeignet sein und die korrekte Spezifikation aufweisen. Es sind stets die Anweisungen des Herstellers zu Wartungen und Kundendienst zu befolgen. Bitte konsultieren Sie bei Fragen die technische Abteilung des Herstellers. Die folgenden Prüfungen müssen bei Installationen durchgeführt werden, die entzündliche Kältemittel nutzen: - Die Befüllungsgröße ist gemäß...
- Page 25 SICHERHEITSHINWEISE an, ohne sicherzustellen, dass dies nicht die zulässige Spannung und die zulässige Stromstärke für die in Betrieb befindliche Anlage/Ausrüstung überschreitet. Eigen-/ berührungssichere Komponenten sind die einzigen Typen, an denen mit Strom bei Anwesenheit einer entzündlichen Atmosphäre gearbeitet werden kann. Die Testapparatur muss auf den korrekten Bemessungswert eingestellt sein.
- Page 26 SICHERHEITSHINWEISE „Spülen“ wird erzielt, indem der Unterdruck im System mit OFN aufgebrochen und das System so lange befüllt wird, bis der Arbeitsdruck erreicht ist. Dann muss in die Atmosphäre entlüftet werden, und abschließend wieder der Unterdruck hergestellt werden. Dieser Vorgang muss so lange wiederholt werden, bis sich kein Kältemittel mehr im System befindet.
- Page 27 SICHERHEITSHINWEISE j. Wenn die Zylinder korrekt befüllt sind und der Vorgang abgeschlossen ist, stellen Sie sicher, dass die Zylinder und die Ausrüstung sofort aus dem Bereich entfernt werden und dass alle Trennventile der Ausrüstung geschlossen sind. k. Das wiedergewonnene Kältemittel darf nicht in ein anderes Kältemittelsystem befüllt werden, es sei denn, dieses wurde gereinigt und geprüft.
-
Page 28: Beschreibung Des Geräts
Beschreibung des Geräts Inneneinheit Frontblende Lufteintritt Display Notbedienungspanel Luftauslass Vertikale Luftleitlamelle Horizontale Luftleitlamelle Luftfilter Fernbedienung Lufteintritt Außeneinheit Leitungen und Stromkabel Ablaufschlauch Hinweis: In den Betriebsarten KÜHLEN und ENTFEUCHTEN fließt Kondenswasser aus. Luftauslass Die Abbildungen der Bedienungsanleitung zeigen ein Gerät in Standardausführung,. das sich in Größe und Design von Ihrem Gerät unterscheiden kann. - Page 29 Benutzerschnittstelle Temperaturanzeige (1) Zeigt die Solltemperatur an. Falls die Angabe „FC“ erscheint, muss der Filter gereinigt werden. Wi-Fi Anzeige (2) Sie blinkt schnell (3 Hz), wenn eine Verbindung zum Router hergestellt wird oder die Verbindung zum Router unterbrochen wird. Sie blinkt langsam (1,5 Hz), wenn sie mit dem Router, aber nicht mit der Cloud verbunden ist. Sie leuchtet beständig, wenn das Wi-Fi vollständig verbunden ist.
- Page 30 Fernbedienung Einlegen der Batterien in die Verwenden der Fernbedienung zur Fernbedienung Steuerung des Gerätes • Richten Sie die Fernbedienung zur Bedienung des 1. Drücken Sie mit einem spitzen Gegenstand in die Vertiefung Geräts auf das Empfangsteil der Inneneinheit aus, der Batteriefach-Abdeckung und schieben Sie die damit eine gute Signalqualität gewährleistet ist.
- Page 31 Fernbedienung Beschreibung der Funktionen der Tasten (J1-3A) 1. ON/OFF TASTE (Ein/Aus) Startet oder stoppt das Gerät durch Drücken dieser Taste. 2. TASTE MODE (Betriebsart) Dient zur Wahl des Betriebsmodus in Reihenfolge Cooling (Kühlen) oder Dry (Luftentfeuchtung), Fan only (Lüfterbetrieb) oder Heating (Heizen). 3.
- Page 32 Pflege Säubern der Frontabdeckung der Inneneinheit 1. Trennen des Geräts vom Stromnetz Schalten Sie das Gerät aus, bevor Sie es vom Stromnetz trennen. 2. Abnehmen der Frontabdeckung Klappen Sie die Frontabdeckung in Pfeilrichtung hoch (Abb. A). Abb. A Ziehen Sie die Frontabdeckung dann mit einem Ruck aus den seitlichen Schlitzen (Abb. B). 3.
- Page 33 Installationsanweisung Aufstellungszeichnung Für weitere Informationen gehen Sie auf : Abstand zur Decke sollte Abstand zur Wand sollte docs.whirlpool.eu runtergeladen werden über 200 mm sein über 50 mm sein Abstand zur Wand sollte Inneneinheit über 50 mm sein HINWEIS: Die obige Abbildung ist nur eine Abstand zum Fußboden sollte...
- Page 34 Hinweis: Wenn die Störung weiterbesteht, müssen Sie das Gerät zuerst ausschalten und dann vom Stromnetz trennen. Kontaktieren Sie anschließend einen autorisierten Whirlpool Kundendienst in Ihrer Nähe. Versuchen Sie nicht, das Gerät selbst zu versetzen, zu reparieren, zu zerlegen oder umzurüsten.
- Page 35 • Die Servicenummer finden Sie auch im Garantie- Handbuch, • Ihre vollständige Anschrift, • Ihre Telefonnummer. Hinweis: Sie können das komplette Handbuch für Ihr Gerät von der Internetseite herunterladen. Dazu den folgenden Link verwenden: docs.whirlpool.eu den QR Code benutzen. - 35 -...
-
Page 36: Consignes De Sécurité
CONSIGNES DE SÉCURITÉ IMPORTANT À LIRE ET À RESPECTER • Téléchargez le manuel d'instruction complet sur docs.whirlpool.eu ou appelez au numéro de téléphone indiqué sur le livret de garantie. • Avant d’utiliser l’appareil, lire attentivement les consignes de sécurité. Conservez-les à... -
Page 37: Avertissements Électriques
CONSIGNES DE SÉCURITÉ • L'appareil ne doit pas être installé dans la buanderie. AVERTISSEMENTS ÉLECTRIQUES • L'alimentation électrique doit être de tension nominale avec un circuit spécial pour l'appareil. Le diamètre du câble électrique doit être conforme aux conditions requises. •... -
Page 38: Déclarations De Conformité
• Ce produit comprend certains logiciels libres développés par des tiers. La déclaration d'utilisation de licence libre est disponible sur le site internet suivant : docs.whirlpool.eu. • Ce produit contient des gaz à effet de serre fluorés couverts par le Protocole de Kyoto, le gaz réfrigérant étant dans un système hermétiquement scellé... - Page 39 CONSIGNES DE SÉCURITÉ 3. La mise au rebut de l'équipement utilisant des réfrigérants inflammables doit être conforme aux réglementations nationales. 4. Le stockage de l'équipement/des appareils doit être conforme aux instructions du fabricant. 5. Stockage de l'équipement emballé (non vendu). Un emballage de stockage de protection doit être réalisé...
- Page 40 CONSIGNES DE SÉCURITÉ et de préférence de l'expulser extérieurement dans l'atmosphère. 6-8 Contrôles de l'équipement de réfrigération Lorsque des composants électriques sont modifiés, ils doivent être adaptés au but prévu et à la spécification correcte. À tout moment, il convient de suivre les directives de maintenance et d'entretien du fabricant.
- Page 41 CONSIGNES DE SÉCURITÉ Ne pas appliquer de charges inductives ou de capacitance permanentes au circuit sans s'assurer que cela ne dépassera pas la tension autorisée et l'intensité permise pour l'équipement utilisé. Des composants à sécurité intrinsèque sont les seuls composants sur lesquels il est possible de travailler alors qu'ils sont sous tension en présence d'une atmosphère inflammable.
- Page 42 CONSIGNES DE SÉCURITÉ enfin une dépression jusqu'au vide. Ce processus doit être répété jusqu'à ce qu'il n'y ait plus de réfrigérant dans le système. Lorsque la charge finale est utilisée, le système doit être ventilé à la pression atmosphérique pour permettre le travail. Cette opération est absolument vitale si des opérations de brasage sur les conduits doivent avoir lieu.
- Page 43 CONSIGNES DE SÉCURITÉ 15. Étiquetage L'équipement doit être étiqueté en indiquant qu'il a été démantelé et vidé de son réfrigérant. L'étiquette doit être datée et signée. Assurez-vous qu'il existe des étiquettes sur l'équipement indiquant que l'équipement contient du réfrigérant inflammable. 16.
-
Page 44: Description De L'appareil
Description de l'appareil Unité intérieure Panneau avant Prise d'air Panneau d'affichage Panneau d'urgence Sortie d'air Volet de réglage vertical Volet de réglage horizontal Filtre à air Télécommande Prise d'air Unité extérieure Conduits et câble de branchement électrique Flexible de vidange Remarque : Évacuation de l'eau condensée lors du fonctionnement à... -
Page 45: Interface Utilisateur
Interface utilisateur Voyant de température (1) Il affiche la température prévue. Il indique « FC » pour rappeler de nettoyer le filtre. Voyant Wi-Fi (2) Il clignote rapidement (3 Hz) lorsqu'il se connecte au routeur ou en cas de perte de connexion au routeur. Il clignote lentement (1,5 Hz) lorsqu'il est connecté... -
Page 46: Télécommande
Télécommande Insérez les batteries dans la télécommande Utilisation de la télécommande pour 1. Insérez une fiche et appuyez lentement vers le bas sur le commander l'appareil couvercle des piles et poussez dans le sens de la flèche, • Pour faire fonctionner l'appareil par le biais de la comme indiqué. - Page 47 Télécommande Description fonctionnelle des touches (J1-3A) 1. TOUCHE ON/OFF (MARCHE/ARRÊT) La pression sur cette touche permet d'allumer ou d'éteindre l'appareil. 2. TOUCHE MODE Utilisée pour sélectionner le mode de fonctionnement, en séquence Refroidissement, chauffage ou ventilation. 3. TOUCHE FAN (VENTILATEUR) Il est utilisé...
-
Page 48: Entretien
Entretien Nettoyage du panneau avant de l'Unité intérieure 1. Débranchez l'appareil de l'alimentation électrique Coupez l'appareil avant de le débrancher de l'alimentation électrique. 2. Enlevez le panneau avant Fig. A Ouvrez le panneau avant comme indiqué par la flèche (Fig. A). Tirez sur les fentes sur le côté... - Page 49 La distance par rapport au mur informations d'installation, merci de 200 mm doit être supérieure à 50 mm consulter le site : docs.whirlpool.eu La distance par rapport au mur d Unité intérieure doit être supérieure à 50 mm La distance par rapport au sol REMARQUE : La figure n'est qu'une simple...
-
Page 50: Dépannage
Remarque : Si les problèmes persistent, coupez l'appareil et débranchez-le de l'alimentation électrique, puis contactez le Service après-vente agréé Whirlpool le plus proche. N'essayez pas de déplacer, réparer, démonter ou modifier l'appareil par vous-même. - 50 -... -
Page 51: Service Après-Vente
; • votre adresse complète ; • votre numéro de téléphone. Remarque : si vous voulez le manuel complet pour votre appareil, téléchargez-le sur le site internet à travers le lien ci-dessous : docs.whirlpool.eu en utilisant le code QR. - 51 -...